Treating Embedded Wood Splinters or Thorns in Wilderness First Aid
You can remove most embedded wood splinters or thorns with fine-tipped tweezers and a sterilized needle, but 30% of attempts fail due to poor lighting or dirty tools. Assess depth first-press gently to see if the tip rises. Clean the skin and tools with alcohol or boiled water. Pull the object straight out without digging. If it breaks, mark the spot. Clean the wound, apply antiseptic, and cover it. Watch for redness or swelling over the next three days. Factors like tool quality and contamination risk affect success, so technique matters more than gear-knowing what to do next improves outcomes.
Notable Insights
- Assess the splinter’s visibility and depth by checking skin exposure and gently pressing around the area.
- Use fine-tipped tweezers and a sterilized needle for precise, controlled removal of embedded wood or thorns.
- Sterilize tools with alcohol or boiling water and clean the skin to prevent infection in the field.
- Remove the object slowly along its entry path, avoiding digging or squeezing to prevent breakage or deeper embedding.
- Clean the wound with water or saline, apply antiseptic, cover with a sterile dressing, and monitor for infection signs.
Assess the Splinter or Thorn
Size, depth, and material matter when you’re dealing with a splinter or thorn. You need a clear view to judge visible exposure-how much sticks out or breaks the skin. If you see even a sliver, removal is easier. No visible exposure means it’s fully embedded, and you’ll rely on depth estimation to decide your approach. Press gently around the area; if it’s shallow, the tip might rise slightly. Deeper ones won’t shift and may require different tactics later. Hard materials like wood or thorn are less likely to break during removal than softer debris. Swelling or redness suggests longer presence or infection risk. Don’t guess-misjudging depth or exposure leads to incomplete removal or tissue damage. Assess under good light, using touch and sight. Accurate depth estimation and noting visible exposure guide your next move, ensuring you don’t push it deeper or leave fragments behind.
Grab Your Removal Tools
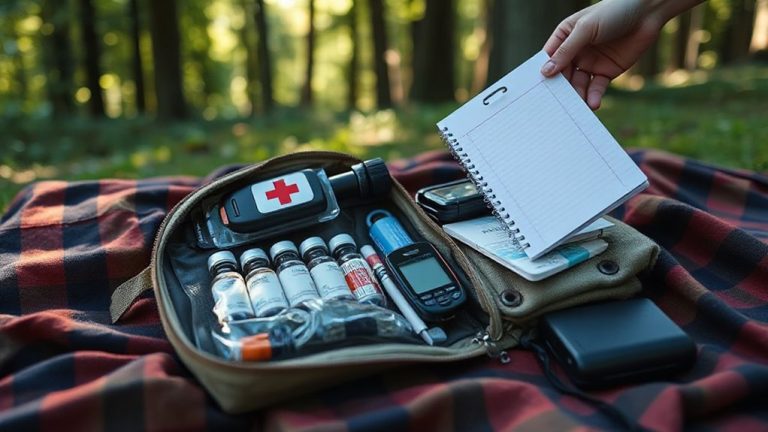
A few basic tools can handle most embedded splinters or thorns, and your best options are tweezers with fine, pointed tips and a needle for guiding the object out. You need a proper grip to control the tool without slipping, especially when pressure or precision is required. Blunt-tipped tweezers often fail with deep or tiny splinters, so fine points are more effective. If you’re using a needle, choose one with a sharp, tapered end to gently lift or reposition the object. Always follow sterile technique-use tools that are cleaned or pre-packaged to reduce infection risk. In the wild, carry these tools in a sealed, protective case to keep them uncontaminated. Metal tools last longer and are easier to clean than plastic. Improvised tools increase failure risk, so rely only on what’s designed for precision work. Including these essentials in your wilderness first aid kit ensures you’re prepared for common injuries in remote areas.
Clean Tools and Skin
Because infection risk increases when foreign objects break the skin, you’ll need to clean both your tools and the affected area before starting removal. Use an antiseptic solution like iodine or alcohol to wipe tweezers, needles, or other tools-boiling is effective if no chemicals are available. Apply the same antiseptic solution to the surrounding skin, letting it dry completely. Avoid touching the area with unclean hands. Maintaining sterile technique reduces contamination but isn’t always possible in the field. If sterile gloves aren’t available, wash hands thoroughly and minimize contact. Even small splinters can carry bacteria deep into tissue. Cleaning both tools and skin cuts infection risk markedly. While perfection isn’t realistic outdoors, close adherence to basic hygiene rules matters most. In survival settings, a minor infection can become serious fast-so don’t skip this step. A well-prepared first aid kit should include antiseptic wipes and sterile instruments for situations like this.
Remove the Splinter or Thorn
Grab steady hold of the splinter or thorn with clean tweezers, pulling straight out in line with the direction it entered-this minimizes tissue damage and reduces the chance of breaking it. If it’s deeply embedded, use a sterilized needle to gently lift the skin above it, but don’t dig. You risk pushing it deeper or leaving behind hidden fragments. Avoid squeezing or crushing the area, as improper removal can drive pieces further in or cause infection. Work slowly and keep the site well-lit. If the object breaks, remove visible parts and mark the spot to monitor. Larger or curved thorns may require medical help. Precision matters-rushing increases complications. Tweezers with fine tips perform better in removing small, shallow splinters cleanly. Always assume remnants could remain if pain persists.
Clean the Wound and Monitor
Now that you’ve removed the object, focus shifts to preventing infection and tracking for complications. Clean the area immediately with clean water and mild soap if available; otherwise, use purified water or saline solution-this is critical for infection prevention. Irrigate thoroughly to remove debris. Pat dry with a clean cloth. Apply an antiseptic if you have one, though it’s not essential in most cases. Cover the wound with a sterile wound dressing to maintain a clean environment and reduce contamination risk. Change the dressing daily or sooner if it gets wet or dirty. Monitor the site closely for redness, swelling, increased pain, or pus-early signs your body is reacting. A small amount of inflammation is normal, but worsening symptoms suggest trouble. Keep the wound elevated if swollen and avoid pressure on it. Continue assessment every 12 to 24 hours for 72 hours.
When to Seek Medical Help
How long should you wait before getting help? If you can’t remove the splinter fully or it’s deep, don’t wait-seek care now. You’re at higher tetanus risk if it’s wood or dirt-contaminated and your last shot was over five years ago. That’s a real danger, not just a scare tactic. Watch for infection signs: increasing redness, swelling, pus, or warmth around the wound. Pain that worsens after 24 hours, not improves, means trouble. Fever means the infection may be spreading. Deep thorns near joints or under nails are especially risky. You won’t handle those alone. Antibiotics won’t fix what’s still embedded. Imaging and removal need a medical setting. Delay raises complications. If you’re unsure, go. No field trick replaces proper care when infection signs appear or tetanus risk is present. Your health isn’t worth the gamble.
On a final note
You’ve got the right tools and a clean technique, so most splinters or thorns come out easily. Larger, broken, or deep ones may need professional care. Clean the area and watch for redness or swelling-signs of infection. Puncture wounds can trap bacteria, so don’t ignore them. Your best move is prevention: gloves and sturdy footwear reduce risk. Handle each case calmly, but know when to get help-it’s not a weakness, it’s smart fieldcraft.