How to Waterproof a Bug-Out Backpack Using Dry Bags and Sealed Liners
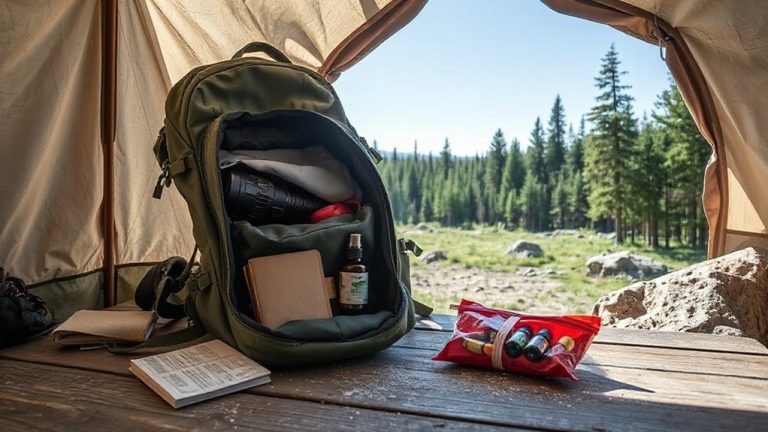
Use a sealed TPU liner inside your pack to block moisture from seeping through seams and zippers-it adds under 10 oz and handles submersion. Pair it with roll-top dry bags (420-denier PVC or TPU nylon) for critical gear like electronics and fire starters. Dry bags inside the liner give redundant protection; color-code them for fast access. Organize by priority: top for first aid, bottom for sleeping gear. Test your layout by grabbing a rain shell in under ten seconds-see how your setup holds up.
Notable Insights
- Start with waterproofing to protect critical survival gear from water damage during emergencies.
- Use welded TPU or PVC dry bags with roll-top closures for reliable, durable gear protection.
- Line your backpack with a sealed TPU-coated nylon barrier to block moisture through seams.
- Combine dry bags and liners for redundant, full-coverage waterproofing of all backpack contents.
- Pack with color-coded dry bags and smart layering for quick access and maximum organization.
Start With Waterproofing to Protect Your Survival Gear
One of the most critical steps in preparing your bug-out bag is making sure your gear stays dry-because even a small amount of water can ruin insulation, ruin food supplies, or short out electronics. You’ll need to understand waterproofing basics: it’s not just about tossing items in plastic-it’s about layering protection where it counts. Water-resistant backpacks alone aren’t enough; they may shed light rain but fail in downpours or river crossings. A dry bag or sealed liner inside your pack adds a reliable barrier. This approach supports long-term gear maintenance by preventing mold, corrosion, and fabric degradation. Treat every item as if it might get soaked-because eventually, it could. Simple moves like sealing matches in a vacuumed Ziploc or wrapping fire-starters in paraffin yield measurable protection. Waterproofing isn’t overkill-it’s standard care. Do it right the first time, and your gear will work when you need it most.
Pick Waterproof Dry Bags for Critical Gear
You’ve already sealed your gear against moisture with layered protection, so now it’s time to sort what stays dry at all costs. Start with gear categorization-separate items by priority: electronics, fire starters, first aid, and spare clothing need the highest protection. Use dry bags made from welded TPU or PVC laminated nylon; these materials resist punctures and won’t leak at seams. 20-denier fabric is too light for rough conditions-go for at least 420-denier for durability without excess weight. Roll-top closures with three or more folds create a reliable seal. Transparent bags help with quick identification. Match bag size to contents: 5L for phones and batteries, 10–20L for clothes or sleeping bags. Compartmentalizing critical items in color-coded dry bags speeds access under stress. Don’t rely on zip-locks for long-term moisture resistance-they fail under pressure or abrasion. Choose based on real-world performance, not marketing.
Line Your Bug-Out Backpack With Sealed Barriers
While the outer shell of your backpack might resist light rain, it won’t stop prolonged exposure or submersion, so adding an internal sealed barrier is essential for full protection. Use waterproof liners or built-in sealed barriers to block moisture from entering through seams or zippers. These barriers act as a final defense, keeping your gear dry even if the backpack gets soaked. A sealed liner improves cargo management by creating a single, protected cavity, reducing the chance of water creeping between compartments. For better gear separation, pair the barrier with internal dividers or dry bags, but rely on the liner to maintain overall integrity. Materials like TPU-coated nylon offer durability and true waterproofing without excessive weight. Most tested models add under 10 ounces. This setup isn’t foolproof-zippers and seams can fail-but it markedly reduces moisture risk during river crossings or heavy storms. For ultimate protection, consider choosing a pack with best waterproof hiking packs features, such as fully welded seams and roll-top closures.
Combine Dry Bags and Liners for Full Coverage
If you want total protection from water, pairing a waterproof liner with individual dry bags gives you redundant coverage that neither method achieves alone. This combo guarantees gear redundancy-if one layer fails, the other still holds. It also improves compartment separation, keeping items organized and isolated. Use the liner as your first barrier, then pack essentials in labeled dry bags.
| Layer | Purpose |
|---|---|
| Backpack Liner | Blocks external moisture |
| Dry Bag (Sleep System) | Keeps sleeping gear dry |
| Dry Bag (Electronics) | Protects sensitive devices |
| Dry Bag (Clothing) | Maintains dry changes |
| Dry Bag (First Aid) | Secures medical supplies |
This setup doesn’t add bulk and only takes minutes to load. In downpours or river crossings, you’ll see why full coverage matters. Gear stays dry, organized, and accessible-no surprises when the weather turns.
Pack Smart: Dry Layers, Easy Access
A full waterproof system means nothing if you can’t reach your gear fast when weather shifts or terrain changes. You need smart gear organization to guarantee quick retrieval under stress. Use color-coded dry bags to separate critical items-navigation tools, first aid, and fire starters-so they’re visible at a glance. Pack frequently used gear in external or top compartments with sealed liners for immediate access. Heavier, less-needed items go at the bottom in larger dry bags. Avoid overpacking; a stuffed backpack slows access and stresses seals. Test the layout by simulating emergencies: can you grab your rain shell in under ten seconds? Good organization balances dry protection with practicality. You’ll sacrifice speed if layers are too deep or poorly marked. Prioritize function-every second counts when conditions turn.
Test Your Setup Before You Need It
How confident are you that your pack will keep your gear dry when the downpour hits? Don’t guess-test it. Fill your dry bags with paper towels or clothing, seal them, then submerge in water for 30 seconds. Check for dampness. This simple trial checks both dry bag durability and seal integrity. Cheap roll-top closures often fail after few uses, so inspect the closure each time. Even minor wear on the seams or buckles can compromise protection. If using sealed liners, repeat the test with them inside your backpack. Real rain, river crossings, or sweat all challenge your system. Testing reveals weaknesses before they matter. It’s not about brand names-it’s about performance. A bag might look tough, but only testing proves it. Spend ten minutes now to avoid soaked gear later. Your survival kit’s reliability starts with a practical check you can do today.
On a final note
You’ve sealed your gear with dry bags and liners, so now test it. Submerge your packed backpack for 10 minutes; check for moisture. Use welded-seam dry bags rated IPX6 or higher-they outperform zip-top bags. Liners add backup but aren’t standalone. A double layer on critical items like fire starters or electronics costs little but boosts reliability. This setup adds minimal weight-about 8–12 oz-and fits most 30–50L packs. It’s proven in downpours and river crossings. Water resistance isn’t guaranteed, but smart layering comes close.