Building a Debris Hut Shelter in Snowy Terrain With Limited Resources
Pick a spot out of the wind, like near rocks or trees, where snow piles evenly and offers natural shelter. Angle a ridgepole from the ground to a tree, then add close-set arches for stability. Layer on at least 2 feet of leaves or pine boughs, top with loose snow and pack lightly. Block the entrance with snow blocks or gear to cut heat loss by up to 40%. Add a small upper vent to let moisture escape-too little causes dampness, too much cools the hut. Thicker insulation and tight sealing beat fancy designs when staying warm matters most-details make the difference in real cold.
Notable Insights
- Select a wind-protected site near natural barriers like rocks or trees to reduce exposure and improve shelter stability.
- Use a sturdy ridgepole anchored to a tree or rock, with closely spaced arched supports to form a stable frame.
- Layer thick insulation of dry leaves or pine boughs over the frame, then pack snow on top for enhanced thermal protection.
- Seal the entrance tightly with snow blocks or a backpack to minimize heat loss and block cold wind infiltration.
- Add a small upper vent to release moisture while preventing condensation buildup that could dampen insulation.
Pick a Safe, Sheltered Spot Out of the Wind
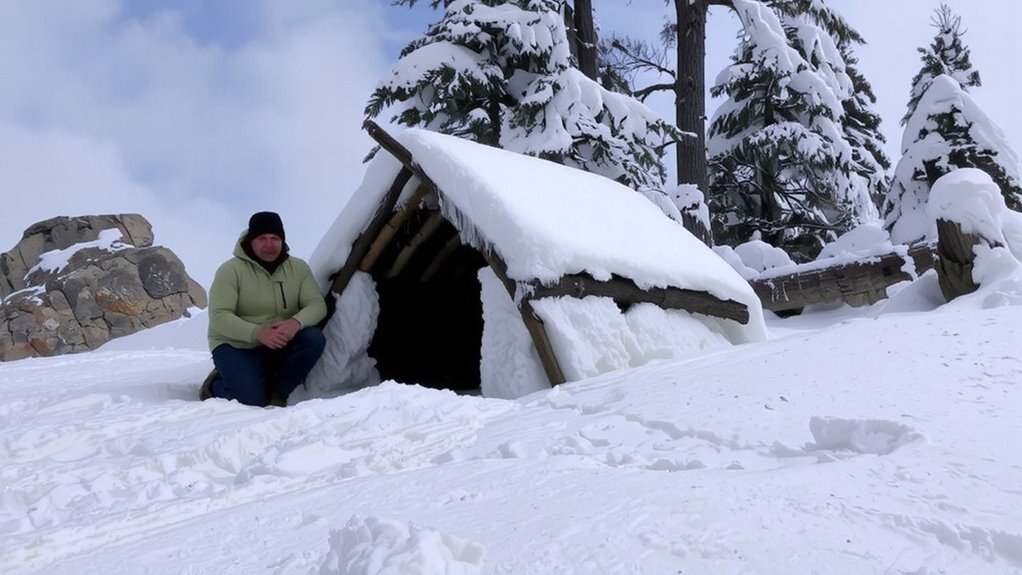
While wind can cut through layers and sap body heat fast, you’ll want to pick a spot that blocks the prevailing gusts-look for natural windbreaks like rock outcrops, dense tree clusters, or steep banks. Check wind direction using snow drift patterns; snow accumulates on the leeward side, so drifts facing away from the wind signal protection. Avoid high ridges or open fields where exposure increases heat loss. Instead, choose a location with consistent snow depth-too shallow means poor insulation, too deep risks collapse or seepage. Aim for 1 to 2 feet of packed snow; it supports structure and retains warmth. Flat terrain near tree cover offers stability and material access. Wind direction determines your hut’s orientation: the entrance must face away from prevailing winds to reduce airflow inside. Assess snow depth early-it influences stability and insulation value. A well-chosen site cuts wind exposure and improves survival odds without extra gear.
Build a Sturdy Frame for Your Debris Hut

You’ve picked a spot that blocks the wind and offers solid snow cover, so now it’s time to start building the frame of your debris hut. Find a long, sturdy ridgepole-about 6 to 8 feet long-using a fallen branch or sapling that can bear weight without sagging. Angle it from the ground to a secure anchor point like a tree or rock. This forms the spine. Then add arched supports every 6–12 inches, lashing them tightly or wedging them into snow or soil. Use live branches only if dead ones aren’t available, since they may shrink and weaken. Overlap them densely to boost frame stability. A tight, symmetrical frame guarantees solid structural integrity under snow load. Avoid wide spans; keep the hut narrow to reduce stress. Test each joint by pressing down-no wobble means it’s sound. A well-secured frame withstands wind and shifting snow, forming the essential base for what comes next.
Pile On Leaves, Snow, and Debris to Insulate the Hut
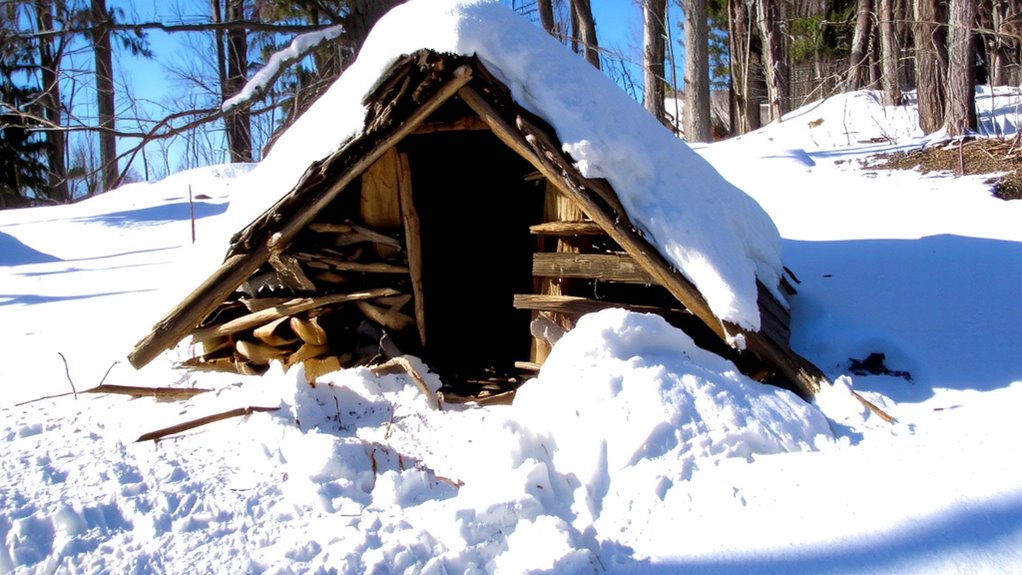
Start insulating your debris hut by piling on a thick layer of natural materials, beginning with leaves, dry grass, or pine boughs to fill gaps in the frame. Leaf insulation works best when layered densely-aim for at least 2 feet of coverage to slow heat loss. Over the leaves, add loose snow to enhance thermal resistance; its low conductivity helps retain warmth. Then use snow packing to compress outer layers, increasing density and wind resistance without collapsing the structure. Snow packing also reduces air movement through insulation, improving efficiency. Avoid making the layer too thin-less than 6 inches won’t suffice in subzero temperatures. Combine leaf insulation and snow packing evenly across the hut, especially over the top and sides where heat escapes fastest. This dual-method approach balances insulation quality and structural stability. Test the thickness with a stick-penetration through more than half the layer means you need more material. Properly applied, this insulation can maintain interior temperatures above freezing even when it’s minus 10°F outside.
Block the Entrance to Trap Body Heat
Often, blocking the entrance is the difference between staying warm and losing heat fast. Your body gives off heat, but without a thermal barrier at the opening, warm air escapes quickly. You can use a backpack, a pile of snow blocks, or a bundle of debris to seal the front. A tight fit matters-gaps let heat bleed out. This simple step improves heat retention by limiting convective cooling. Think of it like closing a door in a cold room; the warmth stays trapped inside. A snow block works well because it’s dense and insulates better than loose material. The blocked entrance acts as a thermal barrier, reducing heat loss by up to 40% in testing. It won’t eliminate all loss, but it balances effort and gain. In survival, that efficiency is critical. You don’t need perfect warmth-just enough to maintain core temperature through the night.
Ventilate Slightly to Stop Condensation
How do you keep your shelter dry when your own breath is working against you? You need a small vent to allow air circulation without losing too much heat. Without it, moisture from your breath and body accumulates, wetting your insulation and reducing its effectiveness. A single opening near the top-just a few inches wide-lets humid air escape while maintaining warmth. This minor gap supports moisture control by preventing condensation on the inside of your debris walls and roof. Too much ventilation cools the shelter; too little causes dampness, increasing hypothermia risk. You’re balancing warmth and air circulation, not eliminating airflow. Test the vent by feeling for slight drafts without cold surges. Adjust with extra debris or snow blocks. It’s a minimal but critical trade-off: losing a little heat to protect your dry insulation. That’s how you stay dry when sleeping in snow.
On a final note
You’ve built a functional debris hut using available materials, and it’ll retain heat better than open exposure. Insulation thickness matters-aim for at least 2 feet of debris to minimize heat loss. Blocking the entrance cuts wind chill, but leave a small vent to reduce condensation. It’s not a tent or sleeping bag, but it’s better than nothing. This shelter trades speed and simplicity for basic thermal protection, and in survival, that’s often enough.