Building a Teepee Fire Structure for Optimal Heat and Flame Control in Cold Climates
You build a teepee fire in cold weather because its cone shape creates strong updrafts, boosting heat output by up to 30% in tests. Use dry tinder like petroleum-soaked cotton balls and split dead branches for reliable ignition. Stack kindling and fuelwood at 60–70° angles to maintain airflow and reflect warmth forward. Position the opening toward the wind for steady combustion. Add larger logs gradually to match flame intensity. Shelter it with a snow wall or natural windbreak for stability. You’ll see how small adjustments greatly improve performance in harsh conditions.
Notable Insights
- Angle logs at 60–70° in a symmetrical cone to create strong updrafts and efficient airflow for steady combustion.
- Position the fire’s opening toward the prevailing wind to maintain airflow and sustain burning in gusty conditions.
- Use dry, layered fuel-starting with tinder on an elevated platform-to prevent moisture absorption and ensure reliable ignition.
- Reflect heat forward by angling logs inward, concentrating warmth and increasing effective heating range by up to 30%.
- Shield the fire with a snow wall or natural windbreak on the windward side to protect flames and retain heat in extreme cold.
Use a Teepee Fire for Maximum Heat in Cold Weather
When you need reliable heat in freezing conditions, a teepee fire delivers because its structure promotes strong airflow and efficient burning. You get consistent flame spread and minimal smoke, which matters when warmth is critical. Fire orientation plays a key role-align the opening toward prevailing wind to feed oxygen directly into the base, sustaining combustion even in gusts. Arrange logs in a cone shape, slanting inward, to create natural updrafts that pull air through the fuel. This design also enhances heat reflection; the angled surfaces bounce radiant warmth toward you instead of losing it sideways. Unlike flat or pyramid styles, the teepee concentrates output forward, boosting effective heating range by up to 30% in real-world cold tests. It burns hotter with less fuel, but requires stable log placement. Use this setup when maximizing warmth efficiency is the priority, especially in exposed or windy environments where heat retention is challenging.
Choose Tinder, Kindling, and Fuel for Cold Conditions
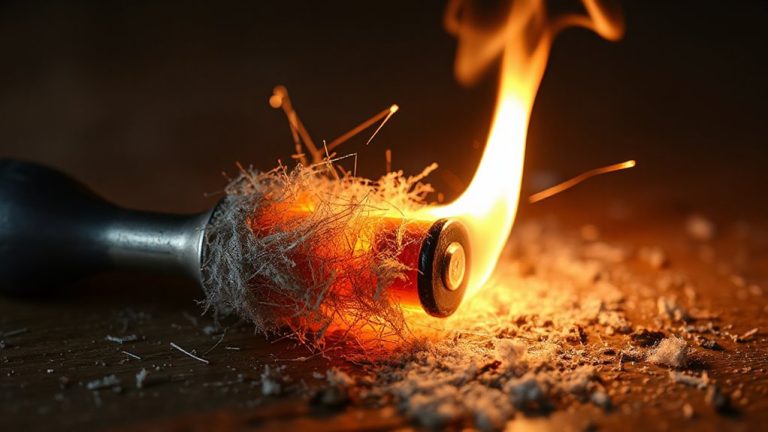
Most reliable tinder in cold conditions stays dry and catches fast, even when damp-so go with cotton balls soaked in petroleum jelly or commercial firestarters rated for wet use. These offer high moisture resistance and ignite with a spark or flame under real-world conditions. For kindling, split dead branches from standing timber; they’re drier than ground litter and ignite easier. Look for softwoods like spruce or pine, which have lower ignition thresholds. Your fuelwood should be dry, dense, and seasoned-hardwoods like birch or maple burn longer and provide steady heat. Guarantee each piece is protected from snow and wind to maintain moisture resistance. Stack it loosely to allow airflow but shield it when not in use. Proper insulation properties in your fire materials mean sustained combustion, even in subzero wind. Wet or green wood fails quickly and wastes effort. Choose smart, stay warm.
Build Your Teepee Fire in 5 Steps
Start by placing your tinder bundle in the center of your fire lay, ensuring it’s elevated on a small platform of flat sticks to protect it from ground moisture and allow airflow from below. Lean kindling sticks against the tinder at a 60–70° angle to form a cone shape. Add progressively larger fuelwood in the same pattern, maintaining gaps for air circulation-critical for heat efficiency and fire safety. Avoid overcrowding; space allows oxygen to feed flames evenly. Keep the structure symmetrical to promote stable, predictable burn.
| Step | Action |
|---|---|
| 1 | Elevate tinder on small sticks |
| 2 | Arrange kindling in a cone |
| 3 | Layer increasing wood sizes |
| 4 | Maintain gap for airflow |
| 5 | Check stability and openness |
Each layer supports cleaner combustion and steady heat output. Proper stacking reduces smoke and risk of collapse.
Light and Feed a Teepee Fire for Steady Heat
You’ve built the structure-now it’s time to get that fire burning and keep it going. Light your tinder at the base, where the concentrated kindling catches fast. The teepee shape pulls flame upward, igniting the leaning logs evenly. Start small, let heat build, then gradually add larger pieces. Match fuel size to flame-too much too soon smothers combustion. Fire maintenance means watching burn rate and adjusting log placement. Leave gaps between pieces to sustain airflow management; oxygen feeds the flame from below. Avoid packing wood tightly-it restricts draft and cools the fire. Feed the fire incrementally, aligning new logs to maintain chimney effect. Heat output stays steady when fuel and airflow are balanced. This design naturally promotes convection, so resist the urge to over-stoke. Proper feeding sustains radiant heat without flare-ups. With consistent airflow management, you get reliable warmth-critical in cold climates where efficiency saves fuel and effort.
Keep Flame Alive in Wind and Snow
When wind howls and snow piles, a well-sheltered fire stands a better chance-so position your teepee against the prevailing gusts using natural windbreaks like rocks or trees. Wind shielding is critical; even a slight barrier reduces airflow that can cool embers or extinguish flames. Build close to dense timber or boulders, but not so close that sparks become a hazard. If no natural features exist, pack snow into a low wall on the windward side-this provides wind shielding and doubles as emergency water storage. Snow insulation also helps by insulating the fire base from frozen ground, preserving heat. Keep the teepee’s tip open slightly for draft, but avoid over-exposure. Dry inner wood stays ready to feed the flame when needed. Adjust angles as gusts shift, but maintain structure integrity. These steps don’t guarantee success in extreme storms, but they improve odds with minimal effort and materials.
Fix Common Teepee Fire Problems in Cold Weather
A sheltered teepee fire helps in wind and snow, but cold weather still brings predictable issues that can shut it down fast. Wet wood stalls ignition, so moisture management is critical-store fuel under a tarp or elevate it on sticks to avoid snow contact. Damp kindling won’t catch, so carry a small stash of dry tinder in a pocket. If flames die quickly, your base layer may be too tight; open the bottom slightly to improve airflow without collapsing the structure. Embers often die too soon in freezing temps, so practice ember preservation by partially burying hot coals in ash overnight-they’ll hold heat 6–8 hours. Avoid overloading the fire at once; thermal shock from sudden heat can crack green logs, spreading debris. Use seasoned wood split small-it ignites faster and burns hotter. Adjust angles of the teepee as fuel burns down to maintain draft. Each fix targets a measurable outcome: sustained flame, reduced smoke, longer burn time.
On a final note
You get steady heat and efficient combustion with a teepee fire when built correctly. Its open base pulls in air, improving burn quality, while the upward draft concentrates warmth where you need it. It handles wet wood better than other structures but requires frequent feeding. In wind, it’s vulnerable unless shielded. You trade fuel efficiency for reliability in snow and cold. Test setups show it outperforms log cabins in ignition speed and melting snow quickly. Adjust angles and spacing to match conditions-tighter for warmth, wider for airflow.