Constructing a Tarp Shelter With Paracord and Natural Anchors in Rain
Pick slightly elevated, well-drained ground and avoid valleys or clay soil-water pooling fails shelters fast. Use paracord to anchor your tarp to trees or rocks at least 6 inches thick, spacing tie points 4 to 6 feet out. Tie a taut-line hitch for adjustability, clove hitch for ridge lines, and bowline for secure loops-all hold tight when wet. Angle the tarp steeply downhill to shed rain quickly and prevent leaks. Test tension and stability by shaking the setup; adjust until it holds firm. Your shelter stays dry and resists wind better when anchored right the first time-details on quick fixes and field repairs follow.
Notable Insights
- Choose elevated, well-drained ground with sandy or loamy soil to prevent rainwater pooling beneath the shelter.
- Use natural anchors like sturdy trees or embedded rocks, ensuring they are stable and at least 6 inches in diameter.
- Pitch the tarp with a steep downhill angle to shed rain quickly and prevent leakage through seams or pooling.
- Secure edges with paracord tied using reliable knots like the bowline, clove hitch, and taut-line hitch for stability in wet conditions.
- Maintain balanced tension by spacing anchor points 4 to 6 feet from the tarp and protect cordage from abrasion with padding.
Pick the Right Spot for Your Tarp Shelter
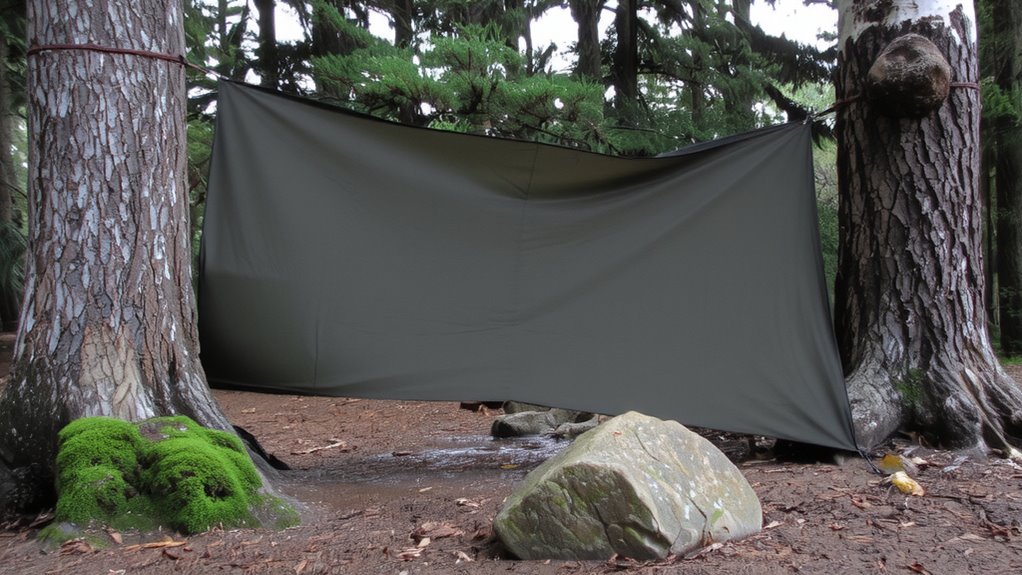
When choosing where to set up your tarp shelter, look for level ground that’s slightly elevated to avoid water pooling during rain. Good soil drainage is essential-avoid low spots or compacted clay that holds water. Sandy or loamy soil drains better, reducing dampness underfoot. Test the spot by digging a small hole; if water seeps in slowly, move elsewhere. Wind exposure matters just as much. You’ll want natural windbreaks like trees or rock formations to reduce strain on your tarp and paracord. Face the tarp’s open side away from prevailing winds to maintain stability. Overhead hazards like dead branches are a risk-always check above. Avoid ridge tops with high wind exposure and valleys where cold air settles. A mid-slope position often balances airflow and protection. Picking the right spot isn’t just comfort-it affects shelter durability and body heat retention when rain hits. For reliable protection, consider the best tarp shelter options.
Secure Your Tarp With Paracord and Natural Anchors
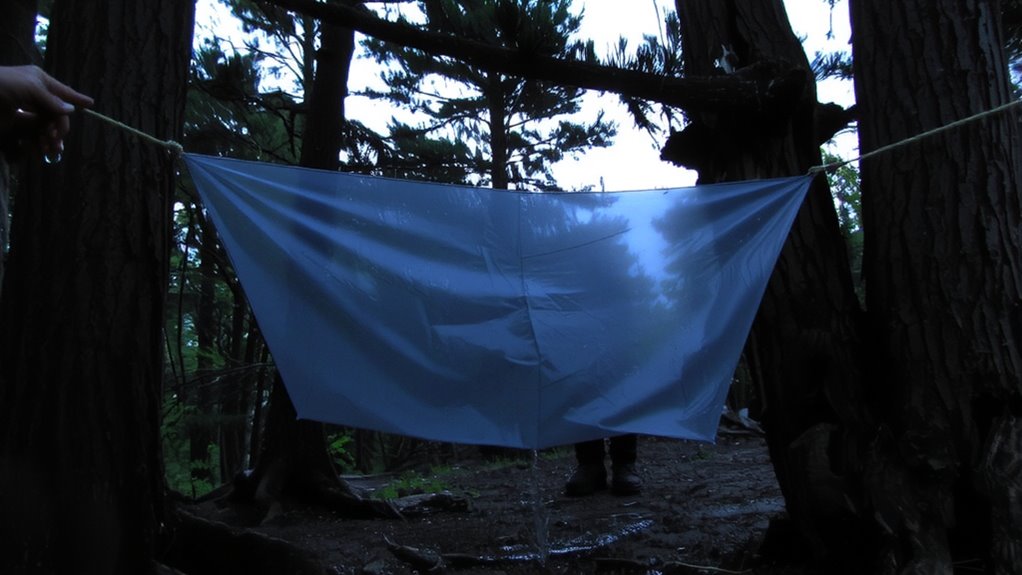
Though the location sets the stage, how you anchor the tarp determines whether it stays put under wind and rain. Use natural anchors like trees, rocks, or stumps when possible-they’re reliable and reduce pack weight. Position your paracord from the tarp’s corners to these anchors, ensuring even tension techniques across all sides to prevent flapping or pooling. Uneven tension increases failure risk, especially in sustained rain. Maintain proper anchor spacing: too wide, and you lose coverage; too narrow, and wind can lift the edges. A 4- to 6-foot distance from tarp edge to anchor balances stability and protection. Paracord’s 550-lb test strength handles typical stresses, but sharp edges weaken it. Protect cord with bark padding or hose sleeves. Test stability by gently shaking the shelter-adjust until minimal movement occurs. This method offers predictable performance in wet, windy conditions. For added grip and dexterity when handling paracord in wet conditions, consider wearing tactical shooting gloves.
Tie These 3 Knots for Wind and Rain Stability
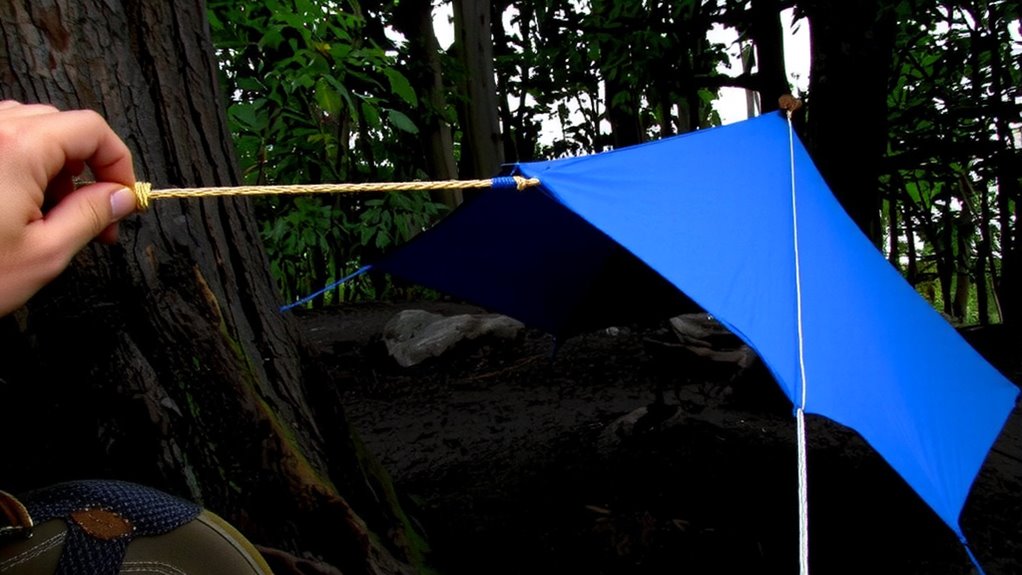
If you want your shelter to hold up in storms, knowing the right knots makes a real difference-three in particular deliver reliable performance under wind and rain. Start with the taut-line hitch; it adjusts easily and maintains knot tension as paracord expands or contracts due to cord elasticity. Under load, it slips just enough to stay secure without failing. Next, use the clove hitch at ridge line anchors-it’s quick to tie and holds firm when properly dressed, especially with paracord’s stretch. It grips tightly but can be undone after heavy rain exposure. Finally, the bowline forms a permanent loop at the end of your line, resisting slippage even when soaked. It won’t loosen on its own, making it ideal where consistent knot tension matters. Each knot balances security and practicality, leveraging cord elasticity instead of fighting it. They’re field-tested, functional, and fail only if poorly tied.
Angle Your Tarp to Shed Rain Fast
Since rain tends to pool and drip through fabric seams under flat angles, pitching your tarp with a steep downhill tilt moves water quickly and reduces soak-through. Proper slope optimization guarantees rain runs off instead of pressing through fibers. You need enough tarp tension to prevent sagging, but not so much that fabric strains or anchor points fail. A slack setup collects water; an over-tight one risks tearing in wind. Choosing a durable camping tarp material can significantly improve performance in prolonged wet conditions.
| Angle | Effect | Consequence |
|---|---|---|
| Flat | Water pools | Leaks through seams |
| Moderate | Slow runoff | Drips inside over time |
| Steep | Fast shedding | Stays dry with less soak-through |
Adjust angle based on rainfall intensity. Steeper slopes excel in heavy rain. Balance tarp tension and slope optimization for reliable, long-term performance.
Use Trees and Rocks to Brace Your Shelter
You can rely on trees and large rocks as natural anchor points to secure your tarp shelter without needing extra stakes in many terrain types. Tree spacing affects how you position your tarp-too wide, and you’ll need longer paracord; too narrow, and the shelter becomes cramped. Use solid, immovable trees at least 6 inches in diameter to guarantee stability. Test each tree by pushing on it-any movement reduces reliability. Rock placement matters just as much. Choose rocks embedded in the ground or large enough to resist shifting. Anchor paracord around the base, not the top, to prevent slippage. Avoid loose or fractured rocks-they can shift under tension. Pair trees and rocks strategically to balance pull points and maintain taut lines. This method cuts pack weight by eliminating stakes and adapts well to rocky or root-heavy soil. It’s proven effective in wind tests up to 25 mph when properly rigged.
Fix Leaks Fast With These Field Repairs
Even the most securely rigged tarp can develop leaks when pitched against driving rain or abrasive branches. When you spot water coming through, act fast to patch gaps with a durable tape like Tenacious Tape-stick it on dry, clean sections for better adhesion. If seams are leaking, reinforce seams using seam sealant or waterproof tape; most field tests show liquid sealants last longer but take time to cure, while tape is quicker but less permanent. For immediate fixes, layered duct tape works, though it degrades faster in UV light. Always carry a small repair kit with tape, sealant, and spare cord. Patch gaps along edges or punctures within minutes to maintain shelter integrity. Reinforce seams proactively if you expect prolonged exposure. These repairs aren’t perfect, but they’re proven under real weather conditions to reduce water entry markedly. Simple, lightweight solutions often outperform bulkier alternatives when speed and reliability matter most.
On a final note
You’ve anchored the tarp tightly with paracord and natural features, used proven knots, and angled the shelter to shed rain. It stays dry in steady downpours if pitched correctly. Wind resistance depends on bracing angle and anchor strength. Trees and rocks help, but they shift under load. Field repairs work short-term. It’s not waterproof under prolonged exposure, but it’s light, fast, and reliable enough for emergency use. Know its limits.