Field Repair Kit Essentials Specifically Designed for Torn Pack Fabrics
You need a patch rated 210D or higher to handle stress without tearing; match it to your pack’s coating-use silicone-bonded patches for silicone-coated fabrics, PU-backed for PU-coatings. Clean the area with alcohol, make certain it’s dry, and apply the patch with firm pressure using a credit card to eliminate bubbles. Include sharp scissors, tweezers, and a fabric marker in your kit for precision. UV-resistant, 4-mil tape with 500+ hours of tested durability seals better and lasts. Better choices balance adhesion, weight, and real-world wear-knowing what works saves time when it counts.
Notable Insights
- Use high-denier nylon or polyester patches compatible with PU or silicone coatings for durable fabric repairs.
- Include alcohol wipes and a fabric-rated marker to clean and outline damaged areas before patching.
- Pack sharp scissors and tweezers for precise trimming and alignment of patches on torn fabric.
- Choose repair tape 4 mil thick or more with UV and waterproof protection for long-lasting field fixes.
- Apply firm pressure with a smoothing tool to eliminate air pockets and ensure strong adhesive bonding.
How to Fix a Torn Backpack in the Field
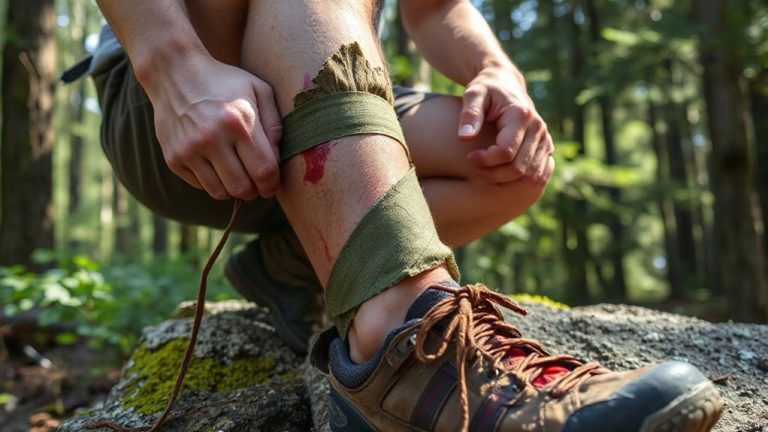
While you can’t always prevent a tear, knowing how to patch it fast keeps your pack functional and your trip on track. Start by cleaning the area around the rip-dirt reduces adhesion. Cut a patch slightly larger than the hole, then press it firmly over the tear. Most quality repair tapes bond well on dry nylon or polyester, but leave behind adhesive residue if removed later. This residue can attract grit, potentially worsening fabric fraying over time. To minimize fraying, seal raw edges with a small amount of liquid seam sealer if available. Reinforce high-stress areas with overlapping tape strips. Avoid stretching the fabric while repairing-it weakens the weave. These steps work best with a lightweight, packable field kit containing at least 2-inch-wide tape and a prep wipe. Duct tape works in a pinch but degrades faster and leaves more residue.
Why Field Repairs Fail (And How to Avoid It)
Even if you rush the repair, skipping prep means the patch won’t stick for long. Improper adhesion is the top reason field fixes fail, often due to dirt, moisture, or inadequate drying. You need clean, dry fabric for any patch to hold. Applying adhesive or tape over a damp or greasy surface guarantees early separation. Don’t assume a quick wipe is enough-scrub with alcohol and let it dry fully.
| Issue | Cause | Fix |
|---|---|---|
| Patch peels | Dirt on surface | Clean with alcohol |
| Separation | Improper adhesion | Apply firm pressure |
| Weak bond | Inadequate drying | Wait 5+ minutes |
| Bubbles | Moisture trapped | Dry completely first |
| Failure | Rushing steps | Follow prep fully |
Let adhesive cure as directed. Rushing leads to failure, not speed.
Best Patch Materials for Pack Fabric
Your pack’s lifespan hinges on the patch you choose-some materials hold up, others don’t. Nylon and polyester patches with high denier counts (like 210D or higher) offer solid durability testing results in tension and abrasion resistance. Heat-activated films like Tenacious Tape bond well, especially when adhesive compatibility matches your pack’s fabric coating-check if your pack uses PU or silicone. Urethane laminates last longer but add stiffness; that’s a trade-off you’ll face. Polyurethane-backed ripstop patches seal well against moisture and resist peeling after repeated flexing. For ultralight packs, thin but tested patches (e.g., 80–150D) with proven adhesive compatibility prevent delamination in humid conditions. Field results show failure often starts at the bond edge, so overlap at least 1 inch. Don’t assume all patches stick long-term-verify through real-world durability testing, not just lab specs. Choose patches proven under load, wet conditions, and temperature swings.
Must-Have Tools in a Repair Kit
Choosing the right patch material sets the foundation for a lasting repair, but having the proper tools guarantees it holds up when it matters. You need a small, sharp pair of scissors to trim patches cleanly and remove frayed edges. A smoothing tool, like a credit card or rubber squeegee, is essential-pressure secures strong adhesive selection adherence and eliminates air pockets. Tweezers help with precise patch alignment, especially on tight or vertical surfaces. Include a measuring tape to size patches accurately and match stress zones. A marker rated for fabric allows temporary guidelines without residue. A lightweight but stiff applicator helps spread liquid adhesives evenly if your kit includes them. These tools weigh little but dramatically improve bond strength and field reliability. Without them, even the best patch can fail due to misalignment or poor contact.
How to Seal Seams to Stop Rips Spreading
A rip at a seam isn’t just a hole-it’s a starting point for failure under stress. Left untreated, it’ll spread with tension or pack load. To stop it, reinforce the seam using seam taping or fabric binding. Seam taping seals stitch perforations, blocking water intrusion and reducing tear propagation. It bonds directly to the fabric, adding minimal weight. Fabric binding, meanwhile, adds a durable overwrap that absorbs stress. It’s thicker and more abrasion-resistant, ideal for high-load areas. Apply either after cleaning and drying the area. Taping works best on lightweight ripstop, while binding suits heavy-duty packs. Each method limits movement at the seam, cutting strain on adjacent fibers. You’re not just patching-you’re reinforcing a structural weak point. Both solutions extend field life, but choose based on fabric weight and stress level. Done right, a sealed seam won’t unravel further.
Choose Waterproof, UV-Resistant Repair Tape
Many repair tapes fail within weeks when exposed to sun and rain, but the best ones withstand months of field use without peeling or degrading. You need a tape that resists adhesive failure under prolonged environmental exposure. Standard tapes often lose grip after just a few cycles of heat and moisture, but high-grade silicone or polyurethane-backed tapes hold strong. Look for UV-resistant options-those labeled with 500+ hours of UV testing typically last longer in direct sunlight. Waterproof means it won’t delaminate when soaked; test this by submerging a bonded strip for 48 hours. Most reliable tapes are at least 4 mil thick, ensuring puncture resistance. Avoid cheap vinyl tapes-they fail fast. Real-world use shows that only a few, like specific silicone-coated fabrics, maintain integrity across seasons. Pick one that’s proven in harsh conditions, not just marketed as “outdoor-grade.” Your pack can’t afford adhesive failure mid-trail.
Reinforce Stress Points Before You Hit the Trail
Before you step onto the trail, take a moment to inspect high-wear areas like shoulder strap anchors, bottom corners, and zipper bases-these spots bear the most load and are prone to failure under stress. Reinforce them with waterproof, UV-resistant tape or a patch kit even if no tear’s visible. Your pack weight amplifies strain at these points, especially when fully loaded, so preemptive reinforcement reduces the chance of sudden fabric splits. Harsh trail conditions-like jagged rocks, wet brush, or constant friction from bouncing gear-accelerate wear. A 50+ lb pack on rugged terrain demands stronger protection than light day hikes. Tape should bond securely to nylon or polyester and remain flexible in cold or damp weather. You won’t always spot weak spots until they fail, so treating them early is a low-effort safeguard. Reinforcing now saves weight, time, and hassle later when repairs are harder.
On a final note
You need durable patch material, strong adhesive tape, and the right tools to stop a tear from spreading. Waterproof, UV-resistant tape performs better in sun and rain. Reinforcing stress points before failure cuts repair time later. A reliable field kit weighs little but handles tension and moisture. Not all repairs last, but these steps improve odds when you’re miles from help.