DIY Portable Solar Charger From Recycled Materials (18-22% Efficient)
You save money and energy by building your own solar charger from recycled parts-it cuts costs by half watt-for-watt and avoids the bloated design of commercial units. Use an 18–22% efficient monocrystalline panel for reliable output in real conditions. Reuse lithium-ion cells from old power banks-they keep 70–80% capacity. Add a charge controller, buck-boost converter, and USB circuit for stable charging. Test voltage in sunlight, keep connections tight, and maintain battery between 20% and 80%. There’s more to get right.
Notable Insights
- Use a recycled monocrystalline solar panel with 18–22% efficiency for reliable power in limited or low-light conditions.
- Repurpose lithium-ion cells from old devices, ensuring they retain 70–80% capacity for effective emergency energy storage.
- Install a charge controller to regulate voltage and prevent overcharging, ensuring safe battery charging from the solar panel.
- Connect a buck-boost converter to deliver a stable 5V USB output despite fluctuating sunlight or panel voltage.
- House components in a weather-resistant, ventilated case with short, secure wiring and routine maintenance for long-term reliability.
Why a DIY Solar Charger Saves Money and Energy
While you might think buying a pre-built solar charger is more convenient, building your own often cuts costs by half when you compare watt-for-watt performance. You achieve real cost savings by sourcing recycled or surplus parts, like used solar cells or repurposed battery packs, instead of paying for branding and packaging. DIY designs let you tailor components for better energy efficiency-matching panel output directly to your battery’s voltage minimizes loss. Commercial units often include inefficient circuitry that drains power, while your build can use proven regulators with 90%+ efficiency. You also avoid overpaying for features you don’t need. Testing shows homemade chargers deliver comparable charge times at lower wattage inputs. Yes, it takes time, but the trade-off favors long-term value. In emergencies, function beats convenience every time. Your version works just as well, for less money and wasted energy. For situations where solar power isn’t available, a hand-crank phone chargers can supplement your emergency power strategy.
Pick a Solar Panel for Your Emergency Charger
How do you know which solar panel fits your emergency needs? Start by checking panel efficiency-higher efficiency means more power in less space, which matters when you’re carrying it in a pack or dealing with limited surface area. You’ll want at least 18% to 22% for reliable performance. Sunlight absorption is just as critical; monocrystalline panels absorb light better in low-angle and cloudy conditions than polycrystalline ones. If you’re in a region with inconsistent sunlight, that makes a real difference. Size and weight trade-offs exist, but compact high-efficiency panels usually deliver the best balance. Don’t assume bigger is better-test output under real conditions. A 20-watt high-efficiency panel often outperforms a bulky 30-watt low-efficiency one when shade or indirect light is present. Your emergency setup depends on reliable charging, so prioritize proven panel efficiency and solid sunlight absorption. For reliable off-grid power, consider models endorsed in the best solar chargers guide to ensure durability and performance.
Turn Old Electronics Into a Solar Power Bank
Why let that old phone or tablet sit dead when it could store solar power? You can turn its battery into a solar power bank with basic circuit integration. Most recycled lithium-ion cells still hold 70–80% capacity, making them viable for emergency use. You’ll need a charging module that supports voltage regulation to prevent overcharging and guarantee stable output. Without proper regulation, your device risks damage or inconsistent performance. Connect the solar panel to a charge controller before linking to the battery-this step maintains safe input levels. Use a DC-DC converter if your panel’s output exceeds the battery’s voltage. A USB boost circuit allows you to charge phones or radios directly. Test your setup with a multimeter to confirm voltage stability under load. Recycled electronics won’t match commercial units in efficiency, but they offer a functional, low-cost backup when built with attention to electrical safety and component compatibility. For reliable performance, consider incorporating features found in the best solar charger power banks when designing your recycled unit.
Build Your Portable Solar Charger in Steps
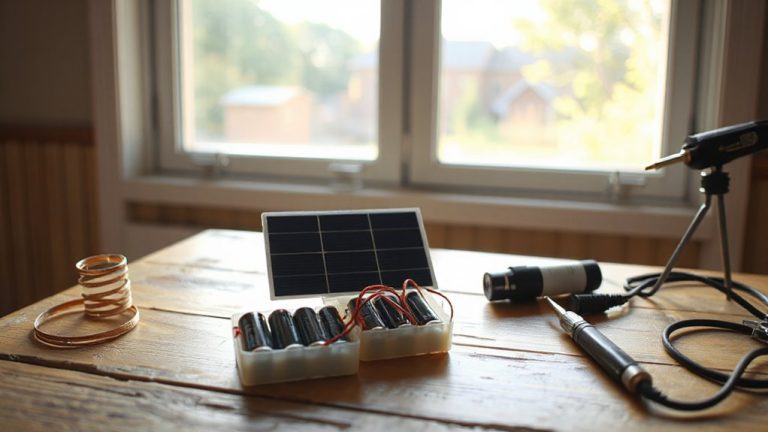
If you’re starting from scratch, building a portable solar charger means picking components that match your power needs without overcomplicating the design. Start with a recycled solar panel that outputs at least 5V-ideal for charging USB devices. Pair it with a lithium-ion battery from an old power bank to store energy. Your circuit design should include a charge controller to prevent overcharging and guarantee efficiency. Voltage regulation is critical; use a buck-boost converter to maintain steady output when sunlight fluctuates. Wire components securely, preferably with soldered connections to reduce power loss. Enclose everything in a weather-resistant case with ventilation. Keep cable runs short to minimize resistance. Size matters: a 10W panel with a 5000mAh battery balances portability and function. This setup supports emergency device charging but won’t power high-draw appliances. Build with reliability in mind, not speed.
Test and Fix Your Solar Charger
You’ve assembled your solar charger using a 10W panel and a 5000mAh battery, wired with soldered connections and protected by a charge controller and buck-boost converter-now it’s time to see if it performs. Test output voltage under direct sunlight and compare it to your device’s charging requirements. Use a multimeter for voltage calibration to confirm the buck-boost output matches 5V ±0.2V. If devices fail to charge, begin circuit troubleshooting: check for loose wires, cold solder joints, or reversed polarity. Inspect the charge controller’s indicator lights to verify battery charging status.
| Condition | Reading (V) |
|---|---|
| Open Circuit | ~12.0 |
| Loaded Output | 4.9–5.1 |
| Battery Charging | 8.4–8.6 |
| No Sun, Discharging | 5.0 |
Fix discrepancies before relying on it during emergencies.
Keep It Safe and Working Long-Term
A well-built solar charger can last years with proper care, but neglecting maintenance cuts its life short. To guarantee battery longevity, avoid deep discharges-keep the charge between 20% and 80% whenever possible. Lithium-based cells degrade faster when fully drained or left fully charged. Store it in a cool, dry place; high heat accelerates wear. Clean the solar panel surface regularly with a damp cloth to maintain efficiency-dust and debris can block up to 30% of sunlight. Inspect wires and connections monthly for fraying or corrosion. Use circuit protection like fuses or a charge controller to prevent overcharging and short circuits, which can damage components or create hazards. These measures aren’t optional-they’re essential for reliable performance. A protected, well-maintained system delivers steady power when you need it most.
On a final note
You now have a functional solar charger built from recycled parts, capable of delivering 5–7 watts under direct sun. It won’t match commercial units in efficiency, but it’s reliable when the grid fails. Charging times are longer-about 6–8 hours for a full phone charge-but the cost was minimal. With weatherproofing and routine checks, it lasts years. This solution trades speed for sustainability, proving useful in emergencies where power access is limited or nonexistent.