A Guide to Crafting Simple Solar Chargers From Common Household Materials for Rechargeable Batteries
You can build a solar charger for under $10 using a 6V panel, USB boost module, and NiMH batteries from old devices. Connect the panel to a charge controller to prevent overcharging, then wire it to the USB module. Use thick, short cables and solder joints for efficiency. Match input voltage to battery needs-2.4V for two AA NiMH cells. Test in direct sun; expect 100–300mA output. Homemade units cut waste and save money, and there’s more to optimizing one with basic tools.
Notable Insights
- Use a 6-volt solar panel to safely charge AA/AAA NiMH batteries when paired with a voltage regulator.
- Connect a charge controller to prevent overcharging and extend battery lifespan during solar charging.
- Incorporate a USB boost module to provide stable 5V output for charging small USB devices.
- Build the circuit with soldered joints and insulated wiring to minimize resistance and prevent short circuits.
- House components in a weatherproof enclosure, reusing parts from old electronics to reduce cost and waste.
Gather Your DIY Solar Charger Materials
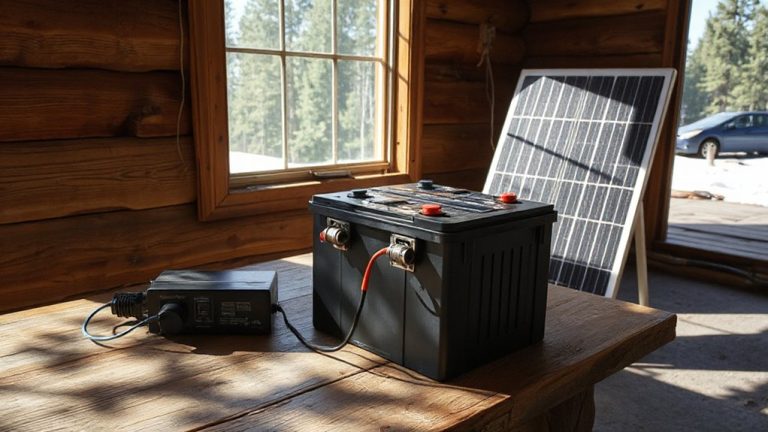
You’ll need a few key components to build a functional DIY solar charger, and choosing the right ones makes all the difference in performance. Start with a 6-volt solar panel-it’s common, affordable, and provides sufficient voltage for charging small batteries under direct sunlight. You’ll also need a matching voltage regulator to prevent overcharging and a USB output module if powering USB devices. A battery holder fits the rechargeable type you’re using, typically AA or AAA NiMH. Connect wires, solder, and heat shrink tubing guarantee secure, insulated connections. Most of these parts cost under $20 and last years with care. You’ll use basic household tools like a screwdriver, wire cutters, and a soldering iron-tools you likely already own. Solar panels vary in efficiency, but for small-scale use, even budget models work fine. Avoid skimping on wiring gauge; too thin increases resistance and reduces output. For reliable performance, consider choosing among the best solar chargers as a reference when selecting components.
Build a Simple Solar Charger in 5 Steps
Putting together a simple solar charger doesn’t require advanced skills or expensive gear, just a clear plan and the right sequence. First, connect your solar panel to a charge controller to regulate voltage and guarantee battery safety. Second, wire the controller’s output to a USB boost module if charging via USB. Third, secure all connections with solder and electrical tape to maintain solar efficiency. Fourth, mount the components in a weather-resistant case, letting the panel face outward. Fifth, attach rechargeable batteries or a power bank to test output. You’ll get about 5V at 100–300mA in full sun, depending on panel size. Lower light reduces charging speed noticeably. This setup won’t charge fast, but it works reliably when built right. Prioritize secure insulation and correct polarity to prevent shorts. It’s basic, but functional-ideal for emergencies or low-power needs. For portable charging on hikes, consider using one of the top-rated backpacking solar panels for better efficiency and durability.
Match Voltage for NiMH and Li-ion Batteries
Solar panels and basic circuits can deliver power, but matching that output to your battery type is where reliability hinges. You need proper voltage matching to avoid damage or ineffective charging. NiMH batteries typically charge at 1.2V per cell, so a 2-cell pack needs about 2.4V input. Li-ion cells require 3.7V nominal, with charging up to 4.2V. If your solar panel outputs 5V, it might be too high for NiMH without regulation, risking overvoltage. For Li-ion, an unregulated 5V source can lead to instability without a charging module. Voltage mismatches compromise battery compatibility and reduce lifespan. Use a buck converter or charge controller to align panel output with battery needs. You’re better off checking voltage with a multimeter than guessing. Getting this right guarantees safer, more effective charging-no shortcuts. For reliable results, consider using one of the expert-recommended solar chargers that are designed with built-in regulation for various battery types.
Fix Weak Output and Charging Issues
If your solar charger isn’t delivering consistent power, the issue likely stems from either insufficient panel output or system inefficiencies that bottleneck the charging process. Check your solar panel’s voltage under direct sunlight-it should exceed the battery’s rating by at least 1.5 volts. Weak output often comes from poor solder joints; cold or fractured connections increase resistance and reduce power delivery. Reflow each joint and guarantee solid conductivity. Damaged cable insulation can also cause voltage drops or shorts, especially in humid or outdoor conditions. Replace frayed wires or exposed sections with heat-shrink tubing or electrical tape. Use thick, short cables to minimize loss. Confirm continuity with a multimeter. If the battery still charges slowly, verify the regulator circuit isn’t limiting current more than necessary. Bypassing inefficient components may help, but only if voltage stays within safe limits. Small fixes often restore functionality without rebuilding the whole system.
Why Homemade Solar Beats Store-Bought?
You’ve already fixed weak output and charging issues, so now it’s worth considering whether a store-bought solar charger was the best starting point at all. Homemade units cut costs markedly-often under $10-while matching store-bought performance. That’s real cost efficiency. You reuse old solar garden lights, broken phone chargers, or scrap wiring, reducing waste instead of adding to it. Most commercial units ship globally, increasing their environmental impact through packaging and transportation. Yours doesn’t. You control the materials, source locally, and skip the carbon-heavy supply chain. Store-bought models may include over-engineered circuits that fail in the field, but your design stays simple, repairable, and functional. You’re not locked into proprietary parts. If something fails, you fix it fast. No waiting for replacements. For long-term reliability, lower cost, and reduced environmental impact, your version isn’t just equal-it’s better.
On a final note
You’ve built a basic solar charger using household supplies, and it works-just don’t expect fast charging. Output stays low, around 5V/100–300mA, so charging takes hours. It suits emergency use, not daily power needs. Store-bought units deliver regulated voltage and better efficiency but cost more. This DIY version saves money and functions when needed, though you sacrifice speed and reliability. Know the trade-offs: simplicity over performance, preparedness over convenience. It’s a backup, not a replacement.