Constructing a Raised Platform Shelter in Mosquito-Infested Wetlands
Pick high, firm ground just above the floodplain, at least 18 inches above the highest water line, to stay dry and avoid mosquito breeding zones. Use rot-resistant cedar or pressure-treated lumber for posts and beams, set 24 inches deep with gravel backfill. Build a tight marine-grade aluminum floor with gaps under 1/4 inch to block bugs. Top with a sloped steel roof and overhangs, plus screened vents. Netting around the base adds extra protection-if you’re looking to refine each layer for long-term survival, practical upgrades follow.
Notable Insights
- Choose a site on high ground above the floodplain to reduce flood and mosquito risks.
- Use rot-resistant materials like cedar or black locust to increase shelter longevity in wet conditions.
- Elevate the platform at least 18 inches above the highest water line to avoid flooding and dampness.
- Install tightly spaced marine-grade aluminum grating with gaps no wider than 1/4 inch to block mosquitoes.
- Include screened vents and roof overhangs to improve airflow and prevent insect entry.
Choose the Safest Spot for Your Raised Shelter
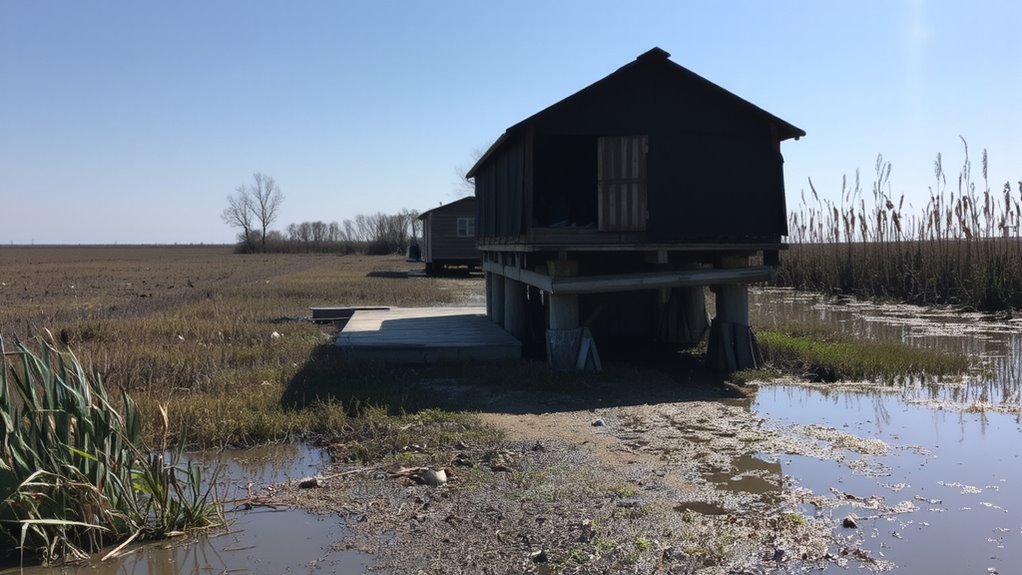
Where should you place your raised platform shelter in the wetlands? Look for high ground that’s just above the floodplain to minimize flood risks. You’re not immune to seasonal surges, so check water marks on trees and soil erosion patterns to assess past flooding. Avoid depressions or channels where water flows after rain. Position the shelter near firm soil-sandy or gravelly bases offer better stability than pure mud. Distance from dense reeds reduces mosquito concentration but increases wildlife encounters. Animals move along natural corridors, so avoid game trails and feeding zones. Elevation should be at least 18 inches above the highest observed water line. This reduces flood risks without making construction impractical. Visibility matters too-stay clear of blind spots where animals might approach unseen. Choose access points that allow quick exits if wildlife encounters turn risky. Your safety depends on terrain awareness, not luck. Pick wisely.
Gather Materials That Resist Rot and Bugs
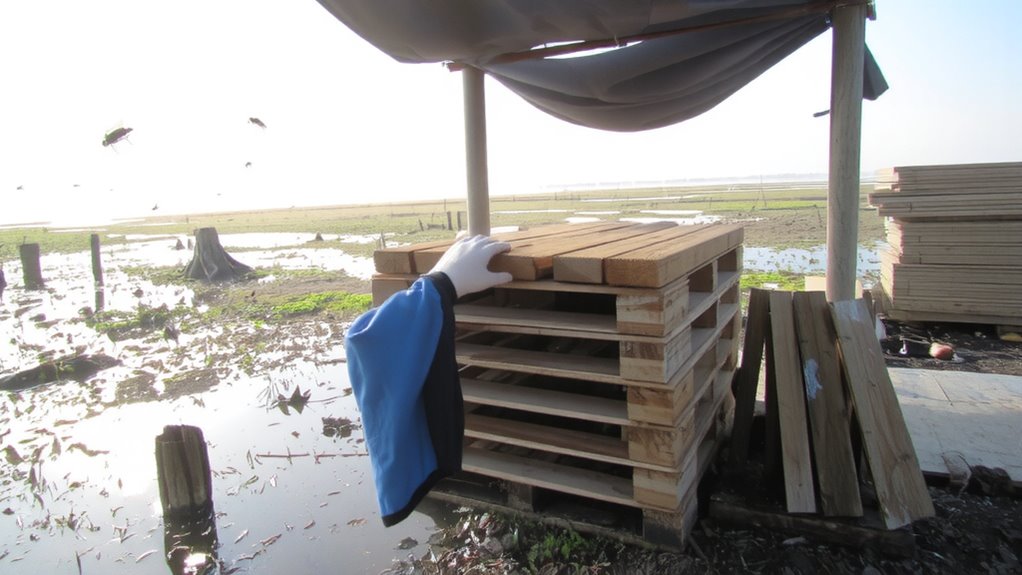
Cedar and black locust are your best bets for platform beams and supports-both resist rot and repel insects without chemical treatments. If you can’t source them, pressure-treated lumber is a reliable alternative; it’s rated for ground contact and withstands moisture well, though it won’t deter bugs on its own. You’ll still need a separate insect repellent for surrounding areas, as treated lumber doesn’t actively repel mosquitoes or nesting pests. Avoid untreated pine-it rots fast in wet conditions and attracts termites. Black locust lasts over 25 years in the ground, while cedar resists fungal decay thanks to natural oils. Treated lumber performs well long-term but can leach chemicals, so use it where direct soil contact is unavoidable. Seal all wood ends and cuts to preserve protection. Choose hardware with zinc or galvanized coating to prevent rust. Your shelter’s longevity hinges on material choices, not luck.
Build a Strong Elevated Frame
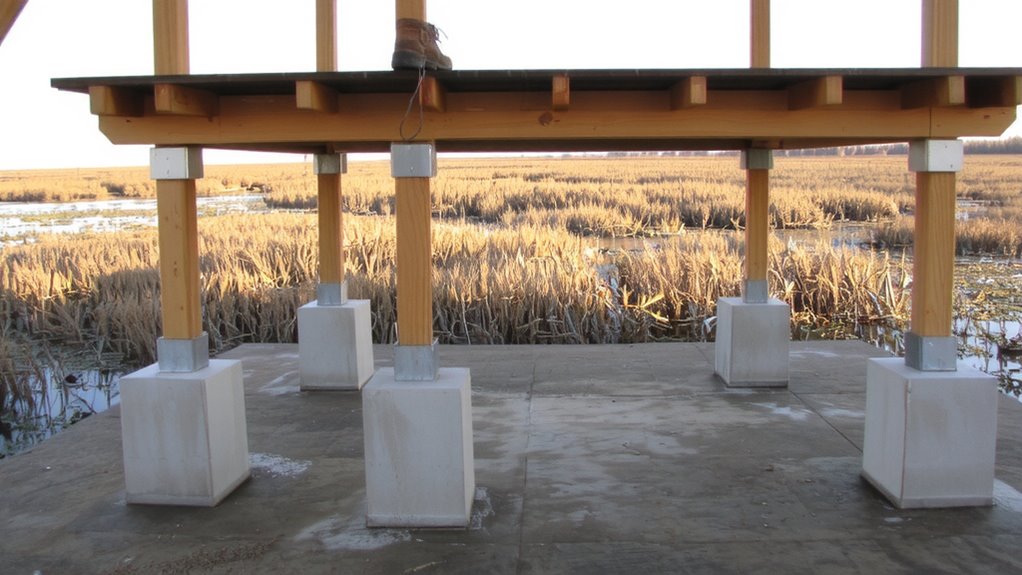
A solid frame makes or breaks your shelter’s stability in soft, uneven ground. Use pressure-treated 4x4s or naturally rot-resistant timber like greenheart for posts-set them at least 24 inches into stable soil or bedrock. Anchor them with gravel backfill to prevent shifting. For beams, 2×8 or 2×10 lumber spaced 8 feet apart provides reliable support without excessive sag. Joist spacing should be 16 inches on center to balance material use and structural rigidity. Closer spacing, like 12 inches, increases load capacity but adds weight and cost. Match joist spans to expected loads: a 6-foot span at 16-inch intervals handles 50 lbs per square foot, enough for shelter and gear. Check connections-use galvanized hurricane ties and structural screws, not nails, for critical joints. Overbuild slightly-wetlands ground heaves, and rigidity degrades over time. This frame must endure seasonal moisture and shifting support.
Create a Floor That Blocks Mosquitoes
You’ve got the frame set, so now it’s time to build a floor that keeps mosquitoes out while staying durable underfoot. Use elevated grating made from marine-grade aluminum or treated fiberglass to prevent sagging and resist corrosion in wet conditions. The gaps should be no wider than 1/4 inch to block mosquito entry. Attach the grating securely so it won’t shift underfoot, supporting up to 250 lbs per square foot. Then seal all seams where panels join using silicone caulk or rubber gaskets-sealed seams stop insects from slipping through weak points along edges or corners. Avoid wood slats with larger gaps, as they allow mosquitoes easy access. Elevated grating with sealed seams doesn’t trap moisture, reducing mold and improving longevity. It’s lighter than solid plywood and allows debris to fall through. While slightly less comfortable to stand on barefoot, it’s effective and practical in high-insect environments.
Add a Roof With Overhangs and Ventilation
Since rain and sun exposure are constant concerns in wetlands, choose a roof built from corrugated steel or polycarbonate panels-they shed water fast and withstand hail or debris without cracking. You’ll want a roof pitch of at least 20 degrees to guarantee water runs off quickly and doesn’t pool. A steeper pitch also improves wind resistance by reducing uplift forces during storms. Make sure the roof extends at least 12 inches on all sides to create overhangs that block driving rain and provide shade. Include small, screened vents near the peak to allow hot air to escape while keeping insects out. This passive ventilation reduces condensation and keeps the shelter interior more comfortable. Use rust-resistant fasteners to secure panels, especially in humid conditions. The combination of proper pitch, overhangs, and ventilation guarantees durable, all-weather protection without complex materials or maintenance.
Include Mosquito Netting Around the Base
While shelter design often prioritizes weather protection, neglecting insect defense in wetlands leaves you exposed to persistent mosquito pressure, so install fine-mesh mosquito netting around the base of the platform to block entry without sacrificing airflow. Use a mosquito mesh with openings smaller than 1.2 mm to exclude even the smallest insects. Attach it tightly from the platform edge to the ground or lower skirt, ensuring no gaps. This foundation sealing step is critical-any breach compromises protection. Choose a durable, UV-resistant mesh to withstand prolonged exposure. Over time, vegetation and debris may accumulate, so elevate the netting slightly above the soil to reduce wear. Regular inspection maintains integrity. Mesh degrades slower than chemical repellents, offering longer-term reliability. Unlike sprays, it requires no reapplication. You’ll trade minor setup time for consistent, passive defense. In high-bite zones, this simple barrier proves more effective than clothing or repellents alone. Foundation sealing with mosquito mesh is essential prep, not optional. A well-designed barrier can integrate features found in the best camping hammock mosquito nets for enhanced durability and coverage.
On a final note
You’ve built a functional shelter that keeps you dry and bug-free. Pressure-treated wood lasts longer, but it’s heavier. A taut mosquito net seals the base-essential where bugs swarm at dusk. Sloped roofing with overhangs sheds rain, while side vents reduce condensation. The elevated frame prevents moisture rot and improves airflow. It’s not luxurious, but it performs: 36 inches off the ground deters most ground insects, and nylon netting with 156 holes per square inch blocks mosquitoes effectively.