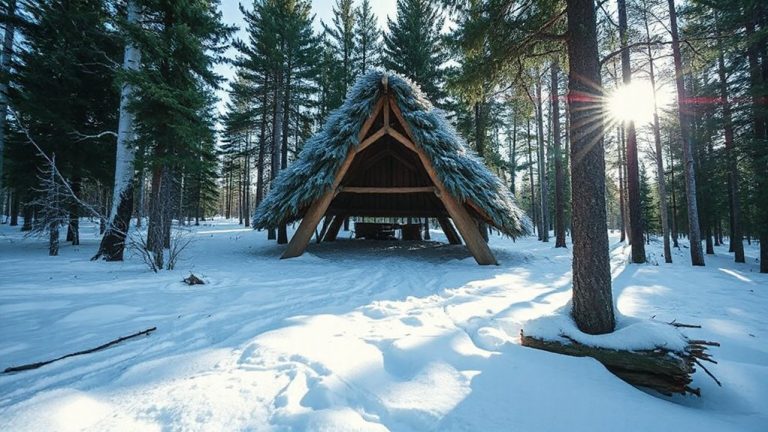
How to Build a Debris Hut in Dense Forest Using Natural Insulation Materials
Pick a sheltered spot behind natural windblocks like trees or rocks, avoiding ridges and deadfall. Build a strong frame with sturdy fallen branches anchored securely and angled at 45 degrees. Pile on at least 2 feet of dry leaves, moss, and bark for insulation, sealing gaps to trap heat. Raise your sleeping platform with logs and soft vegetation to reduce ground chill. Keep the shelter tight and dry, and you’ll stay warm even in cold forest conditions-details on optimizing each layer follow.
Notable Insights
- Choose a sheltered spot with natural windblocks like dense trees or rocks to minimize wind exposure.
- Build a sturdy frame using fallen branches, anchoring a ridgepole and securing ribs at a 45-degree angle.
- Insulate with at least 2 feet of dry leaves, moss, and bark layered to shed rain and retain heat.
- Create a raised sleeping platform from branches and leafy boughs to reduce ground moisture and heat loss.
- Seal hut ends with ferns or moss, maintain insulation, and ensure small ventilation to control condensation.
Choose the Best Spot for Your Debris Hut
Where should you start when picking a spot for your debris hut? Begin by evaluating wind exposure and terrain slope. You’ll want a location with minimal wind exposure-natural windblocks like rock outcroppings or dense tree stands help retain body heat. Avoid ridge tops and open clearings where wind cuts through unimpeded. Next, check the terrain slope. A slight incline (5–10 degrees) aids drainage but too much slope causes instability and cold air pooling at the low end. Flat ground risks water accumulation unless elevated slightly. You’re aiming for dry, compact soil beneath leaf litter. Stay clear of dead standing trees or loose debris above your site. Overhead hazards and poor microclimate control reduce effectiveness no matter how well built. Choose wisely-it directly impacts insulation performance and long-term comfort.
Build a Debris Hut Frame With Fallen Branches
Start by gathering sturdy fallen branches to form the frame of your debris hut-these act as the structural backbone and must support the weight of insulating materials without collapsing. Branch selection matters: choose straight, dry limbs about 3–4 inches in diameter for the main ribs; smaller ones work for cross-lacing. Avoid rotten or brittle wood, as they compromise structural stability. Anchor a long ridgepole on a solid base, like a log or rock, and lean forked branches against it at a 45-degree angle to form a ribbed skeleton. Secure junctions with natural lashings or by notching where possible. The frame should withstand moderate pressure when tested-push gently to check rigidity. Over-engineer slightly; extra support prevents collapse under wet debris. Keep the frame low and narrow to reduce stress points. A well-built frame lasts longer and holds insulation more effectively, directly affecting your warmth and safety. When sheltering in remote areas, having a reliable emergency shelter can provide backup protection if natural structures fail.
Insulate With Leaves, Moss, and Bark
Now that the frame’s in place and holding steady under pressure, it’s time to pack on insulation. Start by piling dry leaves thickly over the entire structure-aim for at least 2 feet deep. They form effective thermal layers but lose insulating value if compressed too much. Moss works well too, especially green or sphagnum types, which offer decent moisture retention and pack tightly against gaps. Use bark slabs on the lower third of the hut to block rising damp and add structural coverage. Layer bark shingles like tiles to shed rain. Avoid wet or decaying material-it adds weight and reduces warmth. Dry leaves trap air efficiently, while moss retains some heat even when damp. The key is stacking multiple natural materials to build redundant thermal layers. Test firmness with your palm; if you feel the frame, add more debris. This combo balances insulation and moisture retention without trapping excess humidity inside.
Make a Raised Bed With Forest Materials
A raised bed keeps you insulated from ground moisture and cold, which sap body heat fast. Build it by layering sturdy branches or logs into a platform about 6–8 inches high-just enough for airflow and minimal material use. This elevated sleeping surface reduces conductive heat loss better than ground-level rest. Use leafy boughs, dry moss, or grass to form a dense natural bedding layer on top, at least 4 inches thick, for cushioning and insulation. A well-packed forest mattress made from decomposing leaves and soft vegetation retains warmth and resists compression. While a raised bed requires more effort than flat ground setup, it outperforms in damp conditions where moisture penetration is a risk. Test stability by pressing down; if it sags, reinforce with extra cross supports. Elevating guarantees consistent thermal performance and improves sleep quality during extended exposure.
Add a Door and Seal the Ends
You’ve got your raised bed built and insulated, which handles the ground-level heat loss, but warmth retention means nothing if drafts sneak in through the ends of your debris hut. Effective end sealing is critical-use thick bundles of ferns, moss, or leafy branches to plug both openings. Your door design should be small, just large enough to crawl through, minimizing air exchange. A hinged branch flap or a removable brush block works well. Seal gaps around the door with soft debris to prevent wind infiltration. For long-term protection, consider how top survival shelters incorporate insulated sealing techniques to maximize thermal efficiency.
Stay Warm: Maintain Your Debris Hut
With heat retention depending on consistent insulation, check your debris layers every few days, especially after rain or heavy wind, since compressed or damp material loses up to half its R-value. Replenish collapsed sections with fresh branches and dry foliage to maintain thickness-aim for at least 2 feet across the roof and walls. Moisture control is critical; if your bedding feels damp, replace it with layered spruce boughs or dry leaves to prevent conductive heat loss. Ventilation gaps near the base help reduce condensation but shouldn’t compromise wind resistance. If using a small fire for warmth, practice strict fire safety: place the fire at least 6 feet from the hut, use a rock barrier, and never leave flames unattended. Embers can ignite debris, so keep a water source nearby. Routine maintenance guarantees steady performance. Overlooking small shifts in material density or humidity can degrade comfort and safety over time. For extended wilderness stays, consider pairing your shelter with a high-R-value sleeping bag recommendation to enhance thermal protection.
How Debris Traps Heat in Forests
Heat stays put where debris piles up, and that’s true whether you’re inside your shelter or walking through the woods. Dead leaves, pine needles, and broken branches trap air, slowing heat transfer because natural debris has low thermal conductivity. You’ve seen it-moss-covered logs stay warm at dawn while bare rocks cool fast. That’s debris doing its job. The material’s moisture retention helps, too. Damp debris holds heat better than dry, but too much water wicks warmth away, so balance matters. A 12-inch layer of mixed dry foliage provides measurable insulation-roughly R-2 per 6 inches in field tests. It’s not perfect, but it’s available. Air pockets form between uneven pieces, reducing conductive loss. Unlike solid materials, loose debris adapts to gaps and contours, sealing drafts. You won’t get furnace-level warmth, but you’ll retain body heat. In practice, shelter covered with forest litter outperforms bare tarp setups in prolonged cold. Use what the forest drops-it’s free, effective insulation.
On a final note
You’ve built it right if the hut traps body heat and blocks wind. Test insulation by feeling for cold spots-add debris where needed. A tight frame with thick layers of leaves, moss, and bark holds warmth better than thin fills. Raised beds prevent heat loss to damp ground. This shelter works in mild to cold forest conditions but needs maintenance when wet. It’s reliable, low-cost, and uses only what the forest drops.