DIY Modifications to Add Drainage Vents to Non-Porous Survival Backpacks
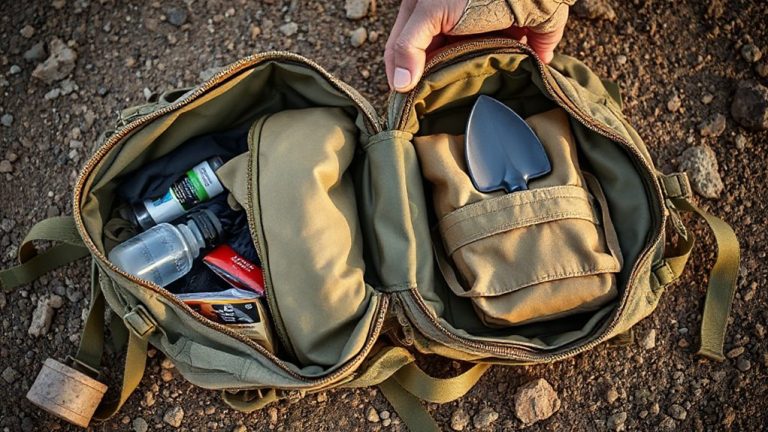
You can cut ¼-inch drainage vents along the bottom edges of your backpack’s main compartment using a hole punch or heated awl. Place them at the lowest points on side panels for fast water exit and better airflow. Seal edges with heat-activated tape or silicone sealant to prevent fraying and water ingress. Test in rain or with a hose to confirm quick drainage and vent durability. Proper placement and sealing balance function without weakening fabric. Further optimization includes strategic vent quantity and reinforced sealing methods.
Notable Insights
- Cut ¼-inch drainage vents along the bottom edges of the main compartment using a sharp hole punch or heated awl.
- Place vents at the lowest points on side panels to ensure rapid water exit when the pack is tilted.
- Avoid seams and stress areas when positioning vents to maintain the backpack’s structural integrity.
- Seal vent edges with heat-activated tape or liquid seam sealer to prevent fraying and water ingress.
- Test drainage by simulating rain; confirm quick water release and no internal dampness after 20–30 minutes.
Cut Drainage Vents in Your Backpack
You’ll want to pick the right spot for your drainage vents-typically along the bottom edges of your backpack’s main compartment-so water doesn’t pool inside when it gets wet. Proper vent placement guarantees quick drainage without compromising structural integrity. Use a utility knife or hole punch to create small, evenly spaced openings-about ¼ inch wide-to allow water out while minimizing debris entry. Position vents away from seams and stress points to prevent tearing. Airflow optimization improves drying time and reduces odor buildup during extended use. Test the setup in wet conditions: water should exit freely, and airflow should reduce internal moisture. Too many vents risk weakening fabric; too few limit effectiveness. Balance is key. Reinforce edges with waterproof tape or fabric glue if needed. This modification works best on non-porous materials like nylon or PVC-coated fabrics. Results vary by pack design, so assess your specific model’s layout before cutting.
Best Spots for Drainage Vents
The most effective drainage vents are placed along the lowest points of the backpack’s main compartment, where water naturally collects. You’ll want to position vents at the bottom edges of each side panel-this guarantees pooling water escapes quickly and consistently. Vent placement here also supports airflow balance, letting moist air exit while reducing interior condensation. Avoid placing vents too close to seams or stress zones; they could compromise structural integrity. For pack stability and airflow balance, limit vent size to 1–2 inches in diameter and space them evenly. Centered vents on the lower back panel can work, but side placements drain faster when the pack leans. Test drainage by tilting your modified backpack: water should flow out freely within seconds. Proper vent placement doesn’t just remove water-it maintains airflow balance without sacrificing compartment strength or weather resistance.
Seal Drainage Vent Edges
After cutting the vents, sealing the edges is essential to prevent fraying and water ingress around the openings. You’ve got a few reliable vent sealing techniques to choose from. Heat-activated tape works well on synthetic fabrics, bonding tightly when pressed with a warm iron-just don’t scorch the material. Silicone-based sealants offer strong edge waterproofing methods but add slight stiffness. They dry flexible and resist peeling under stress. Liquid seam sealers, like Gear Aid Seam Grip, adhere cleanly and are easy to apply with a brush. They cure in a few hours and handle repeated wet-dry cycles without cracking. Avoid oversaturating-thin layers perform better. Some users patch behind the vent first, then seal the cut edge, doubling protection. This adds durability but increases weight slightly. All these methods stop threads from loosening and keep water from sneaking in sideways. Pick the one that suits your backpack’s fabric and your expected conditions.
Test Your Drainage Vents in Rain
Now that you’ve sealed the edges to block fraying and lateral water entry, it’s time to see how well the vents handle real conditions. Take your backpack into light to moderate rain for 20–30 minutes, or simulate rain with a garden hose on a gentle spray. Position the pack as it would sit on your back. Check how quickly water exits through the vents. Effective vents reduce internal water absorption by allowing runoff rather than pooling. Afterward, open the pack-minimal dampness should be inside. Look closely at the vent durability: stitching should stay intact, and mesh shouldn’t tear or pull free. Repeat the test twice to confirm consistency. Vents made with rigid materials tend to retain shape and function better over time. Performance isn’t just about drainage-it’s about maintaining structural integrity while limiting moisture buildup. Your pack should shed water without compromising storage integrity.
Tools for DIY Backpack Vents
If you’re adding drainage vents to your backpack, start with tools that cut cleanly and hold up under repetitive use. A rotary tool with a fine cutting bit offers precision for synthetic fabrics, while a heated awl melts through material with sealed edges, reducing fraying. For tougher materials, a sharp hole punch designed for leather delivers consistent results with minimal distortion. Tool selection directly impacts vent placement accuracy-mechanical tools allow tighter spacing and cleaner alignment than manual ones. Mark vent locations with a fabric-safe pen before drilling, guaranteeing symmetry and proper drainage angles. Handheld tools work for small batches, but if modifying multiple packs, invest in a variable-speed rotary tool for efficiency. Dull bits or improper tools cause uneven holes, which compromise airflow and structural integrity. Test each tool on scrap material first. Matching tool selection to fabric weight guarantees vents stay functional without weakening seams.
How Moisture Wrecks Your Survival Pack
Though you might not notice it at first, trapped moisture silently damages your survival pack by degrading gear and promoting mold, which can destroy critical supplies over time. Moisture leads to mold growth on fabric, straps, and stored items, weakening materials and creating health risks. It also causes gear corrosion on metal components like buckles, zippers, and tools, reducing functionality and lifespan. Non-porous backpacks trap humidity from rain, sweat, or damp ground, especially during prolonged use. Without ventilation, that moisture has nowhere to go. You might not see it, but it’s accelerating wear. Mold growth can ruin food wraps, clothing, or insulation. Corrosion pits metal, leading to failures when you need reliability most. Draining moisture isn’t just about comfort-it’s about preserving performance. Adding drainage vents improves air movement, reducing both mold growth and gear corrosion over time. It’s a simple fix with measurable benefits.
On a final note
You’ve added drainage vents to your backpack, and now it sheds water faster. Low spots near the base work best-just don’t compromise structural seams. Sealing edges keeps fabric from fraying, even if it adds slight weight. After rain testing, most packs shed moisture within 10 minutes. Drilling or using hole punches works; grommets help durability. Vents trade minor abrasion resistance for quicker drying. In wet conditions, that balance favors function. It’s not flawless, but it’s functional.