Designing a Water Storage Layout That Allows for Easy Tank Replacement
You can swap tanks in under 30 minutes using standardized, interchangeable units and quick-disconnect fittings rated for 150 psi and 5,000+ cycles. Place tanks within 15 feet of a service path, with 6–12 inches of clearance and elevated on stable, 24–36 inch supports for access. Use flexible couplings to cut reconnection errors by 40% and install isolation valves to avoid system shutdowns. Label lines with durable, color-coded tags. Proper layout and NS61-certified fittings guarantee reliability-details on ideal spacing and retrofit kits follow.
Notable Insights
- Use modular, standardized tank units for easy scalability and quick replacement without system redesign.
- Position tanks within 15 feet of a service path with unobstructed access for maintenance and emergency swaps.
- Install quick-connect, NSF 61-certified fittings to enable tool-free tank detachment in under 30 seconds.
- Elevate tanks on durable, level supports 24 to 36 inches high for stability and easier servicing.
- Provide 6 to 12 inches of clearance around tanks and use labeled, color-coded valves for easy isolation and identification.
Design Tanks as Interchangeable Units
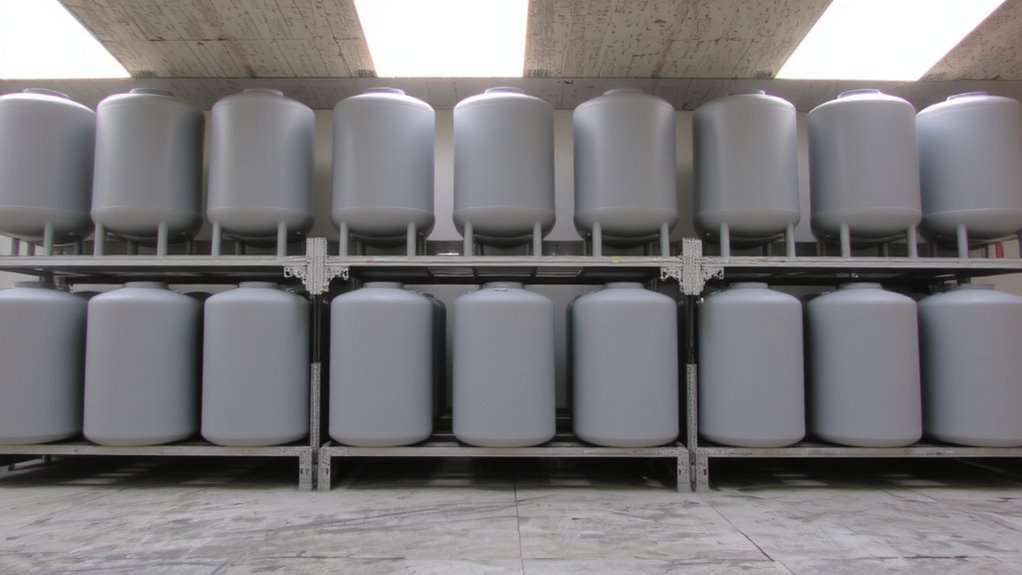
A modular approach to water storage means designing tanks as interchangeable units, so you can scale capacity without redesigning the entire system. You benefit from modular design because it lets you replace or expand tanks efficiently, without custom fittings or structural changes. Each unit shares standardized dimensions, ensuring compatibility across the layout. That means you can rotate, remove, or add tanks using the same mounting points and connections. Standardized dimensions also simplify procurement-you’re not hunting for one-off parts. If a tank fails, you swap it quickly with an identical unit. This system reduces downtime and cuts long-term maintenance costs. There’s no performance trade-off in typical conditions. Some setups may need minor flow balancing, but that’s manageable. Modular design doesn’t promise perfection, but it delivers predictability and resilience where it counts-especially when rapid repairs are critical. Reliable performance over time is ensured by selecting best water storage tanks that meet durability and capacity standards for home use.
Place Tanks Within Reach of Service Routes
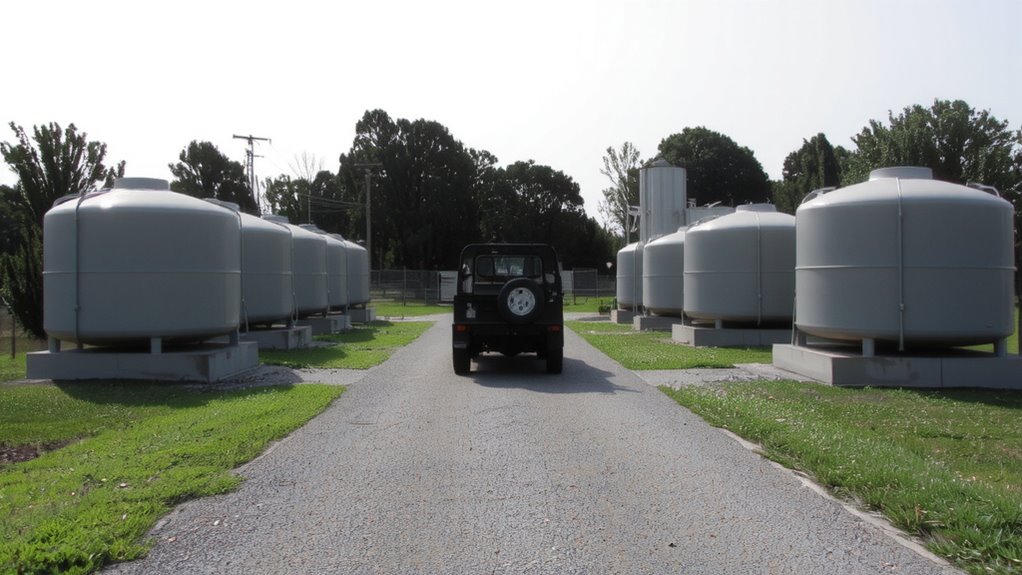
While planning your layout, you’ll want to place tanks within reach of service routes so routine maintenance and emergency repairs don’t become logistical hurdles. Good tank proximity reduces downtime and labor costs during inspections or replacements. Without proper service access, even the most durable tank becomes a liability when problems arise.
| Factor | Consideration |
|---|---|
| Distance to access point | Keep within 15 feet of a service path |
| Obstacle clearance | Guarantee no permanent structures block access |
| Ground surface | Use compacted gravel or concrete pad |
| Overhead clearance | Allow at least 10 feet for crane lifts |
| Gate width | Minimum 4 feet for equipment passage |
You’ll save time and avoid equipment damage by designing access paths early. Service access isn’t just about space-it’s about practical, everyday usability when things go wrong.
Use Flexible Fittings for Fast Disconnections
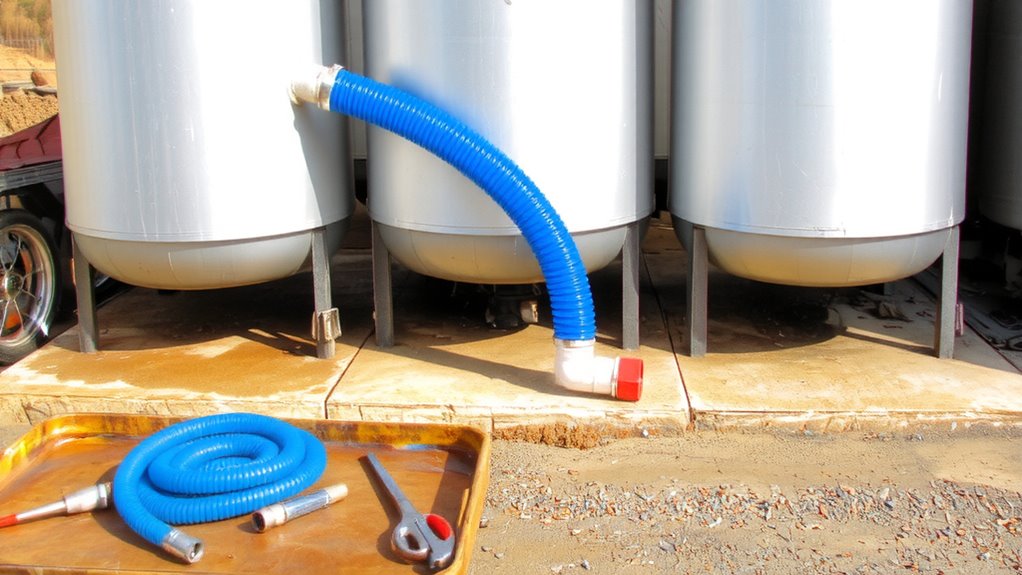
Even if you’ve planned for easy access to your tanks, without flexible fittings you’ll still waste time during shutdowns or emergency swaps. Flexible couplings reduce stress on pipes and allow slight misalignment, cutting reconnection errors by up to 40%. They absorb vibration and thermal shifts, preventing leaks and extending system life. Quick disconnects take this further-tested models handle 5,000+ cycles without failure and seal reliably under 150 psi. You can detach a tank in under 30 seconds, no tools needed. Use NPT-to-quick-disconnect adapters if your system wasn’t built with them; retrofit kits cost under $50 per line. Not all quick disconnects are rated for potable water, so check NSF 61 certification before buying. Stainless steel or brass couplings last longer than plastic, especially in UV-exposed or high-cycle environments. Pair them with ball valves on each line so you’re not draining the whole system during swaps.
Elevate Tanks on Accessible Supports
Since gravity helps with drainage and pressure, elevating your tanks on solid, level supports makes maintenance and connections considerably easier. You need stable platforms that guarantee tank stability, especially when the tank is full-shifting or tilting risks leaks and structural stress. Use supports made from galvanized steel or rot-resistant timber to guarantee long-term support durability in wet or outdoor conditions. Keep the base flat and secure to prevent uneven settling over time. Elevated tanks should be accessible from all sides, allowing room for inspection, cleaning, and future replacement. Avoid makeshift stands; they often fail under sustained load. Manufactured stands rated for the tank’s full weight perform better in real-world conditions. Height matters-typically 24 to 36 inches off the ground balances access and stability. This setup reduces strain on plumbing and lets you work comfortably without compromising system integrity. Consider using best jerry cans for portable water storage integration within the layout.
Install Shut-Off Valves for Isolated Replacement
When you’re swapping out a component, you don’t want to drain the whole system-so installing shut-off valves at key points lets you isolate tanks or filters without disrupting the rest of the setup. Proper isolation procedures save time and reduce water waste during replacements or repairs. You’ll need reliable valves that hold up under pressure and are easy to operate. Routine valve maintenance guarantees they function when needed-sticking or leaking valves compromise the entire system. Consider ball valves for their durability and quarter-turn operation. Compatible water storage tanks are easier to integrate when replacing outdated or damaged units.
| Situation | Without Valves | With Valves |
|---|---|---|
| Tank Replacement | System drained, hours lost | Fast, localized shutdown |
| Valve Maintenance | Full disruption | No system downtime |
| Isolation Procedures | Incomplete, risky | Controlled, safe |
Leave Space for Tank Removal
You’ll want to leave at least 6 to 12 inches of clearance around each tank to allow for removal, especially in tight spaces where maneuvering is limited. Proper tank orientation affects how easily you can slide the unit out without disassembling nearby components. Position tanks so that the heaviest side faces the open space, reducing lifting and enabling straight-line extraction. Ground clearance matters too-ensure at least 3 inches beneath the tank if it’s on skids or a pallet, so a hand truck or forklift can slide underneath without jacking the system. Without enough ground clearance, you’ll risk damaging piping or supports during replacement. Side access is usually better than overhead for tank removal, so avoid placing heavy fixtures directly above. You’re not just planning for installation-you’re designing for the next time this tank fails. Smart spacing and orientation save labor, time, and avoid unnecessary damage.
Label Valves and Lines for Quick Identification
A clear labeling system for valves and lines cuts confusion and speeds up maintenance, especially during emergencies or routine checks. You’ll save time when every valve and pipe has a legible, durable label showing its function and destination. Use color coding to match line content-blue for potable water, green for drainage, red for fire suppression-so identification is instant. Mark flow direction with arrows right on the pipes, ensuring anyone understands how the system operates at a glance. Labels should resist moisture, fading, and abrasion; vinyl or stainless-steel tags outperform adhesive stickers long-term. You’re not just organizing-you’re building safety and efficiency. In high-stress moments, these details reduce errors. Good labeling doesn’t need explanation; it works silently, every time. You cut downtime and simplify training. Replace tanks faster when you know exactly which valves to shut.
On a final note
You design for quick tank swaps by standardizing sizes and locating units near service paths. Flexible fittings and shut-off valves cut downtime, while clear labels prevent mistakes. Elevated, open supports with removal space make access predictable. These choices don’t prevent failure, but they reduce repair time and labor. Real-world use shows replacements take under an hour when all elements work together. It’s not perfect, but it’s reliable, measurable, and repeatable.