Evaluating the Risk of Roof Sheathing Failure in High Winds
Your roof sheathing can fail in high winds if it’s thin, improperly fastened, or degraded by moisture. Older 1/2-inch panels with wide nail spacing won’t hold up, especially at edges and corners where uplift reaches 60 psf. Use 5/8-inch plywood with ring-shank nails every 6 inches on edges for better performance. Adhesives help but only with proper nailing. If your sheathing sags or shows water stains, it’s already weakening-knowing these risks tells you what comes next.
Notable Insights
- Older roof sheathing may lack the thickness or fastener spacing required for current wind resistance standards.
- Wind uplift forces are strongest at roof corners and edges, increasing failure risk in these zones.
- Inadequate nailing, such as wide spacing or improper placement, significantly reduces sheathing’s ability to withstand high winds.
- Moisture damage and material degradation, including soft spots or mold, weaken sheathing and compromise structural integrity.
- Using structurally rated plywood, ring-shank nails, and wind retrofits can enhance sheathing performance in high-wind events.
What Roof Sheathing Is and Why It Fails in Wind
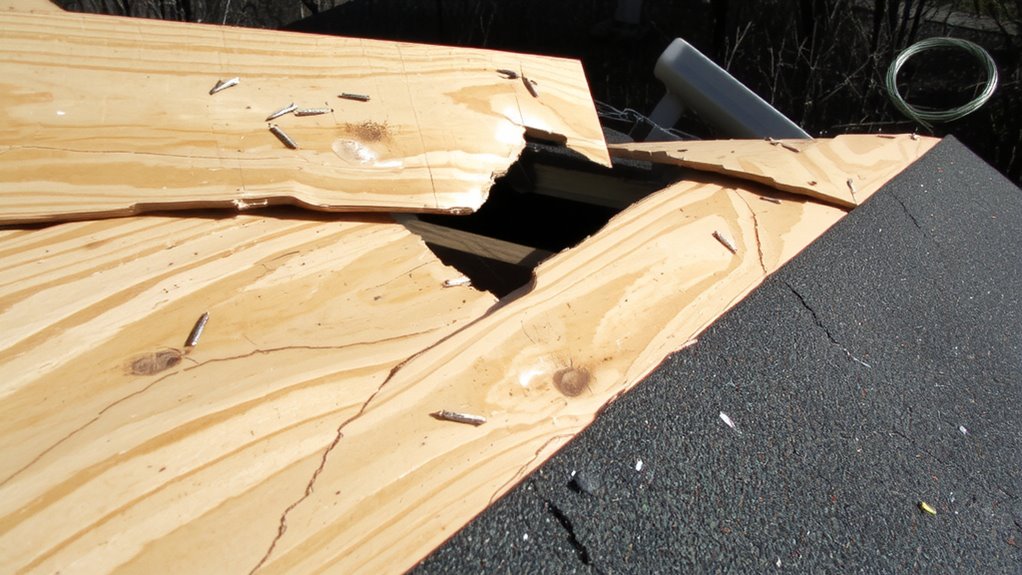
Roof sheathing is the structural layer nailed directly to trusses or rafters, forming the base for roofing materials-and when high winds hit, its job is to hold the roof together. Over time, roof age reduces its strength, especially if installed materials weren’t rated for local wind zones. Older sheathing, typically 1/2-inch plywood or OSB, may no longer meet current code requirements for thickness or nail spacing. Material decay accelerates this weakening, particularly at joints and edges where moisture collects. You can’t always see rot from above, but soft spots or sagging hint at compromised integrity. Even if the shingles look fine, degraded sheathing fails under stress. Fasteners pull out easier when wood fibers deteriorate, and nailed edges lose grip. In high winds, that small loss of hold becomes a starting point for total failure. Regular inspection helps, but after 20+ years, consider upgrading to meet modern wind-load standards.
How Wind Uplift Causes Roof Sheathing Failure
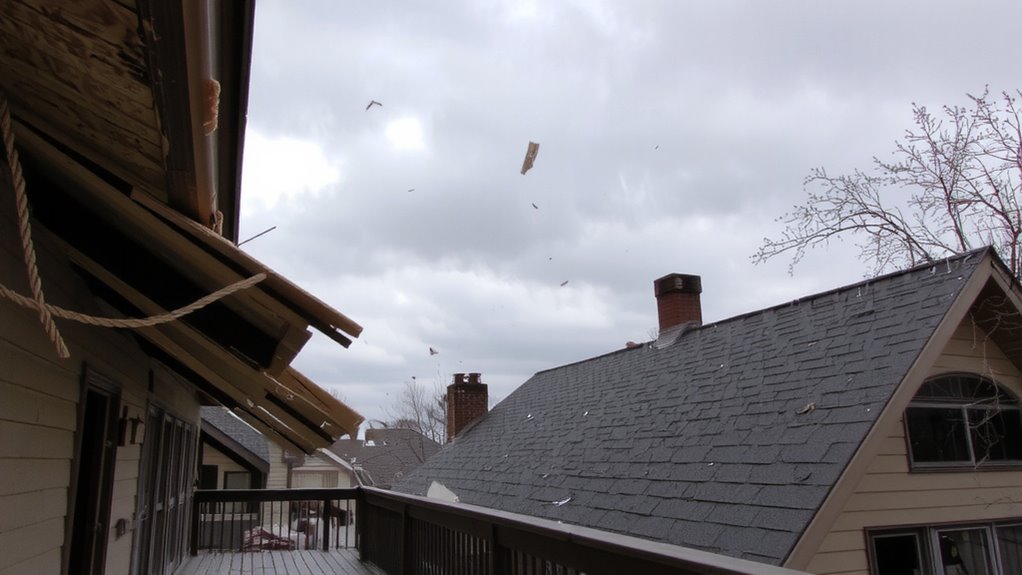
When wind moves across your roof, it creates uplift forces that pull upward on the sheathing-especially along edges and corners where pressure is strongest. These areas experience the highest wind pressure, making them prone to failure if not properly secured. Repeated exposure causes structural fatigue, weakening connections over time even if damage isn’t visible. The combination of sudden gusts and long-term stress tests the roof’s ability to hold fast.
| Roof Zone | Wind Pressure (psf) | Risk Level |
|---|---|---|
| Corners | 45–60 | High |
| Edges | 30–45 | Moderate |
| Field | 20–30 | Low |
You can’t stop the wind, but understanding these zones helps you reinforce the right areas. Failure usually starts where wind pressure peaks and structural fatigue accumulates. Strengthening these points improves overall performance without overbuilding the entire roof.
Common Fastening Mistakes That Lead to Sheathing Failure
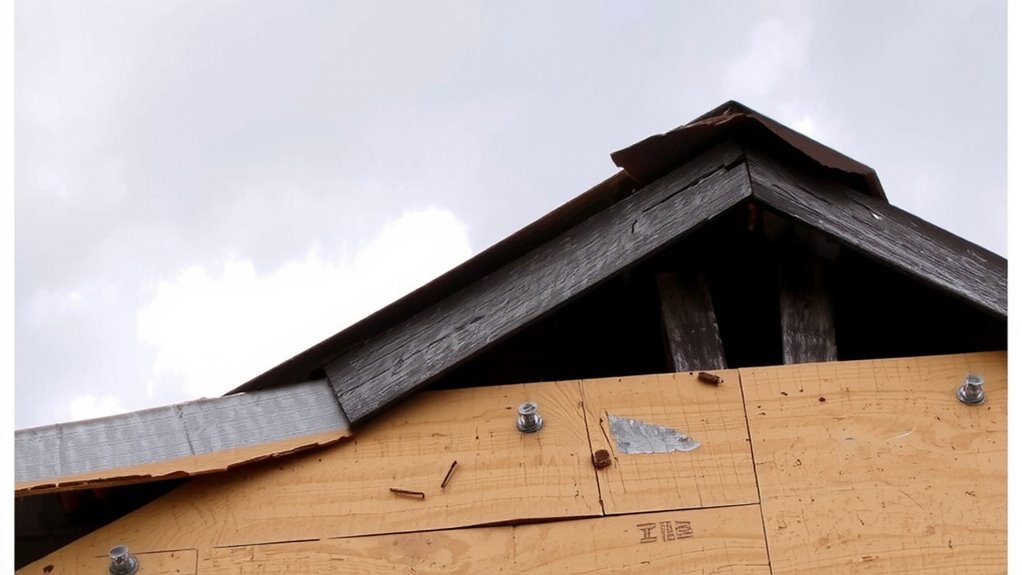
While proper fastening seems straightforward, skipping details can undo even the strongest sheathing. You might think more fasteners always help, but incorrect fastener spacing causes uneven load distribution and increases failure risk. Placing nails too far apart reduces wind resistance, while spacing them too close can split wood or create stress points. Fastener spacing must follow code-typically 6 inches on edges and 12 inches in the field-for reliable performance. Adhesive use isn’t a substitute for proper nailing, but when used alongside, it enhances shear strength and reduces plate movement. However, not all adhesives bond well in cold or wet conditions, so you need weather-appropriate formulations. Skipping adhesive in high-wind zones leaves sheathing more vulnerable. You’re better off combining code-compliant fastener spacing with strategic adhesive use. This combination delivers measurable improvement, confirmed in uplift testing. Cut corners here, and your roof’s defense weakens fast.
Signs Your Roof Sheathing Could Fail
A few subtle signs can tell you if your roof sheathing’s holding up or about to give way under stress. You might notice sagging areas in your roofline, especially after strong winds-this often means the sheathing’s losing structural integrity. Check your attic regularly; visible water damage on the underside of the decking is a red flag. Moisture intrusion weakens wood over time, making it more prone to failure. That same dampness can lead to mold growth, which not only damages the material but also indicates persistent leaks. Discolored patches, musty odors, or soft spots on the ceiling indoors are secondary clues. Nail pops or lifted edges along roof panels suggest movement and inadequate fastening. None of these issues work alone-when combined, they increase the risk of sheathing detachment. Early detection improves your odds of avoiding major structural compromise when high winds hit.
Best Materials to Prevent Roof Sheathing Failure
You’ve checked for sagging, water stains, and nail pops-now it’s time to make sure your roof sheathing can actually hold up when the wind hits. Material selection plays a critical role in performance. OSB is common and strong when dry, but swells under prolonged moisture exposure. Plywood offers better moisture resistance and holds up more consistently in wet conditions. For high-wind areas, use structurally rated panels with edge support-typical 7/16-inch OSB works if properly fastened, but 1/2-inch or 5/8-inch plywood adds reliability. Ring-shank nails along edges and tighter fastener spacing improve wind uplift resistance. Steel sheathing is rare but delivers superior durability and moisture resistance, though cost and complexity limit use. No material fixes poor installation-correct nailing and sealing matter as much as the panel choice. Prioritize moisture resistance and code-compliant fastening to guarantee your sheathing stays intact when winds climb.
When to Call a Pro for Sheathing Repair
How much wind damage is too much to handle on your own? If you see large sections of compromised sheathing or visible structural sagging, it’s time to call a pro. Minor cosmetic dings don’t justify professional help, but safety and stability risks do.
| Damage Level | Action Needed |
|---|---|
| Small nail pops | DIY repair |
| Large gaps or buckling | Emergency tarping |
| Roof deck detachment | Immediate professional assessment |
Extensive damage often requires emergency tarping to prevent water intrusion. Waiting too long increases risk and complicates insurance claims. Professionals document issues properly, increasing claim approval odds. When in doubt, get a certified roofer on-site. You’re not just fixing wood-you’re securing your home’s integrity. Delaying expert help can turn repairable damage into costly structural failure. Don’t gamble with incomplete fixes or improper materials.
How to Strengthen Your Roof Sheathing for High Winds
Though wind resistance starts with proper installation, upgrading your roof sheathing demands choices backed by structural testing and code compliance. You can increase wind resistance by switching to thicker sheathing, like 7/16-inch or 5/8-inch CDX plywood, which outperforms thinner panels in uplift tests. Use ring-shank nails instead of smooth ones-spacing them at 6 inches along edges reduces failure risk. A wind retrofit with approved clips or connectors, such as hurricane straps or H-clips, improves roof deck performance during extreme gusts. Don’t overlook roof bracing-proper gable-end and interior bracing reduces stress on sheathing by stabilizing the frame. These upgrades must align with local building codes and tested assembly ratings. While added cost is expected, performance gains are measurable in lab-certified uplift resistance. You aren’t eliminating risk, but you’re improving survival odds where high winds threaten.
On a final note
You can trust tested sheathing and proper fastening to resist wind uplift. Use 7/16-inch OSB or plywood, nailed every 6 inches on edges with ring-shank nails. Stapling or wide nail spacing cuts performance by up to 50%. Reinforced ridge connections and sealed seams add reliability. No material works if installed wrong-inspect for loose panels or dimples. When in doubt, a pro assessment beats guesswork.