Wound Irrigation Hack: 35cc Syringe + Bottle at 5-8 PSI
Use a 35cc syringe with a catheter tip attached to a sterilized 500ml bottle for effective improvised irrigation. Fill the bottle with cooled boiled water or sterile saline to deliver fluid at a safe 5–8 psi. Hold the syringe 1–2 cm above the wound, angling the stream across the surface to avoid driving debris deeper. Flush for at least 60 seconds. This setup balances pressure and volume control-critical for cleaning without damage-and leads into smarter field hygiene choices.
Notable Insights
- Use a 35 mL syringe with a catheter tip for safe, effective pressure during improvised wound irrigation.
- Sterilize a 500 mL plastic bottle with boiled water or bleach, then air dry before use.
- Pierce the bottle cap and insert the syringe tip to create a leak-proof, gravity-fed irrigation system.
- Fill the bottle with cooled boiled water or sterile saline to ensure safe, clean wound flushing.
- Hold the syringe 1–2 cm above the wound and flush for at least 60 seconds to remove debris.
Choose the Right Syringe for Wound Cleaning
A 10 mL to 35 mL syringe delivers the right balance of volume and pressure for effective wound irrigation without causing tissue damage. You need enough fluid flow to lift debris, but excessive force can drive contaminants deeper or injure tissue. This syringe size range provides ideal control in the field. Smaller than 10 mL doesn’t hold enough fluid per push; larger than 35 mL increases pressure risks and is harder to manage with one hand. The nozzle type matters just as much-use a clean catheter tip or blunt irrigation tip to direct flow precisely. Needles or sharp nozzles aren’t safe. Attach tubing if you must reach awkward angles, but keep it short to avoid clogging. Nozzle type affects spread and penetration, so test it first on a surface. Match syringe size and nozzle type to wound depth and location. You’re not sterilizing; you’re removing visible contaminants efficiently.
Use Safe Fluid: Boiled Water or Saline
You’ve picked the right syringe and nozzle-now what you fill it with matters just as much. Fluid safety is critical; even small contamination risk can worsen a wound. Use boiled water cooled to room temperature or sterile saline-both are effective and accessible. Tap water isn’t sterile and may carry pathogens, especially in areas with compromised water systems. Bottled water varies in purity and isn’t always sterile, so boiling is a more reliable way to guarantee safety. Saline solutions are ideal because they match your body’s salt concentration, reducing tissue irritation.
| Fluid Source | Contamination Risk |
|---|---|
| Boiled water | Low (if cooled safely) |
| Sterile saline | Very low |
| Tap water | High |
Choose boiled water or saline to minimize infection risk and support proper wound care.
Build a Simple Irrigation Tool With a Syringe and Bottle
How do you irrigate a wound effectively when supplies are limited? Use a clean bottle and a syringe to build a simple irrigation tool. Start with bottle sterilization-rinse the container with boiled water or bleach solution, then air dry. A 500ml plastic bottle works well; it holds enough fluid and fits standard caps. Remove the cap, pierce the center with a heated nail to create an opening, then insert the tip of a 35–60ml syringe. Secure it tightly-this is your syringe assembly. The seal must prevent leaks but allow easy plunger movement. Once assembled, fill the bottle with cooled boiled water or saline. Hold the bottle upright, let gravity feed fluid into the syringe. This method delivers consistent flow without complex gear. It’s not pressurized, but it’s reliable when proper irrigation tools aren’t available.
Flush the Wound: Pressure, Angle, and Technique
Now that you’ve got your syringe and bottle set up, it’s time to get the wound clean. Use steady pressure to flush out debris-too little won’t reach deeper contaminants, too much can drive bacteria further in. Aim for 5–8 psi, which a 35cc syringe with 19-gauge catheter tip can achieve. Hold the syringe 1–2 cm above the wound, angling the stream across the surface rather than straight down to avoid forcing fluid into surrounding tissue. Adjust for wound depth: shallow wounds need less pressure, deeper ones require longer flushing to reach all layers. Use room-temperature fluid; cold stings and may constrict blood vessels, reducing cleaning effectiveness, while hot can damage tissue. Normal saline or clean drinking water works. Flush for at least 60 seconds to guarantee coverage.
When to See a Doctor After DIY Irrigation
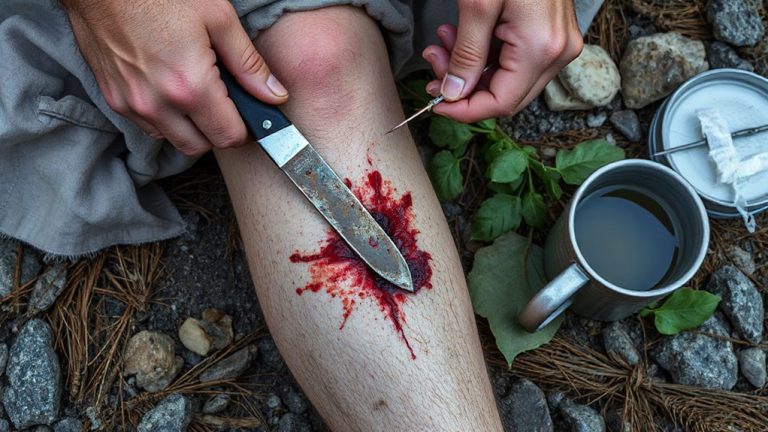
While most minor wounds respond well to proper irrigation, it’s worth watching for signs that the injury’s beyond what home treatment can handle. If you notice signs infection-like increasing redness, swelling, pus, or warmth around the wound-seek medical care. These suggest bacteria are spreading despite cleaning. Severe pain that doesn’t ease after irrigation or worsens over time isn’t normal and may indicate deeper damage or contamination. Also, see a doctor if the wound is deep, caused by a dirty or high-force impact, or involves a puncture, as these often need professional evaluation. Animal bites or wounds with embedded material should never be managed at home. When in doubt, getting a medical opinion reduces risk. Delaying care can turn a minor issue into a serious complication, especially with infections that progress quickly. Don’t wait-act when symptoms exceed basic expectations. A well-stocked wilderness first aid kit can help manage early wound care but isn’t a substitute for professional medical attention.
Avoid These Mistakes in Emergency Wound Care
If you’re treating a wound in an emergency, skipping irrigation because the injury looks clean can do more harm than good-debris and bacteria aren’t always visible, and failing to flush the area means trapping contaminants under bandages where infections start. You increase infection risk by using unsterilized tools or dirty water. Improper sterilization of syringes or bottles compromises what should be a clean process. Don’t assume all liquids are safe-avoid urine, alcohol, or unknown solutions.
| Method | Effective? | Risk Level |
|---|---|---|
| Tap water (clean) | Yes | Low |
| Bottled water | Yes | Low |
| Urine | No | High |
| Alcohol on wound | No | High |
Use only clean liquids and sterilized containers. Reusing syringes without proper cleaning raises infection risk. Always flush before bandaging-never skip this step, no matter how minor the cut seems.
On a final note
You’ve got what you need: a 10–20 mL syringe delivers enough pressure to clean most wounds when you attach it to a clean bottle. Use boiled water or saline-never alcohol or hydrogen peroxide. Flush at a 45-degree angle to push debris out, not in. It’s effective but not a fix for deep or infected wounds. DIY irrigation works in a pinch, but know its limits-when in doubt, get medical help.