Seam-Sealing Entire Pack Interior Against Fine Dust Infiltration Indoors/Outdoors
You need to seal every stitched seam inside your pack with a flexible polyurethane sealant like Gear Aid Seam Grip PF-unsealed threads let fine dust in, grinding fibers and weakening stress zones. Lab tests show over 60% more particulate infiltration through unsealed seams. Clean seams with isopropyl alcohol first, apply a 1–2 mm layer, and let it cure fully. This method works for both indoor and outdoor use, and knowing where and how often to reapply keeps your pack protected longer.
Notable Insights
- Fine dust infiltrates through unsealed stitched seams, accelerating fabric degradation and reducing pack integrity.
- Seam sealant creates a continuous barrier, blocking particulate entry where thread gaps exist in stitched lines.
- Apply polyurethane-based sealant like Seam Grip PF for strong adhesion to nylon and polyester pack interiors.
- Clean all seams with isopropyl alcohol before sealing to ensure optimal bond and prevent early dust infiltration.
- Focus on high-stress areas like strap anchors, corners, and zipper channels to maintain long-term dust resistance.
Why Dust Ruins Your Backpack Over Time
Your pack’s longevity hinges on how well it resists abrasion and contamination, and dust plays a bigger role in its decline than most realize. Fine particles infiltrate fabric, accelerating material degradation by grinding down fibers with every fold and movement. Over time, this wear weakens tensile strength, especially in high-stress zones like straps and seams. Dust also packs into vents and mesh panels, causing ventilation compromise that reduces airflow and increases heat retention during use. This buildup doesn’t just affect comfort-it traps moisture, promoting mildew and odor even in dry climates. In arid or urban environments where airborne grit is constant, packs without interior protection show measurable declines in breathability and structural integrity within months. Sealing the interior isn’t about perfection; it’s about extending service life by cutting invisible threats. You won’t always see the damage, but the performance loss is real and cumulative.
How Seam Sealing Stops Dust at the Stitches
While dust can slip through the tiniest openings, seam sealing blocks its entry at the most vulnerable points-stitched seams. You’re dealing with stitch permeability, where thread gaps form microscopic channels between fabric layers. These gaps aren’t sealed during manufacturing, allowing fine particles to migrate inward over time. When you apply seam sealant, it fills those thread gaps completely, creating a continuous barrier. The sealed stitches stop airborne dust from exploiting the weave, especially in high-wear zones like stress points and panel junctions. Lab tests show unsealed seams can let through over 60% more particulate matter compared to sealed ones under simulated field use. Even tightly woven fabrics fail without this step-fabric integrity alone isn’t enough. You need the sealant bridge the gaps the thread leaves behind. It’s a simple addition, but it closes a major pathway other methods miss.
Best Sealants for Dustproofing Pack Interiors
Since not all sealants handle dust intrusion the same, picking the right one comes down to viscosity, flexibility, and adhesion to pack fabrics. You’ll want a sealant with strong chemical resistance so it won’t degrade when exposed to sweat, UV, or cleaning agents. Polyurethane-based formulas like Gear Aid Seam Grip PF work well-they stay flexible in cold temps and bond tightly to nylon and polyester. Silicone sealants adhere better to coated fabrics but offer less abrasion resistance. Application thickness matters: too thin, and dust penetrates; too thick, and it cracks under flex. A uniform 1–2 mm layer seals stitches without sacrificing packability. Some sealants dry rigid, increasing the risk of flaking over time. Test flexibility after 24 hours. For long-term dustproofing, prioritize durability and even coverage over fast drying.
Step-by-Step: Seal Every Stitch Inside Your Pack
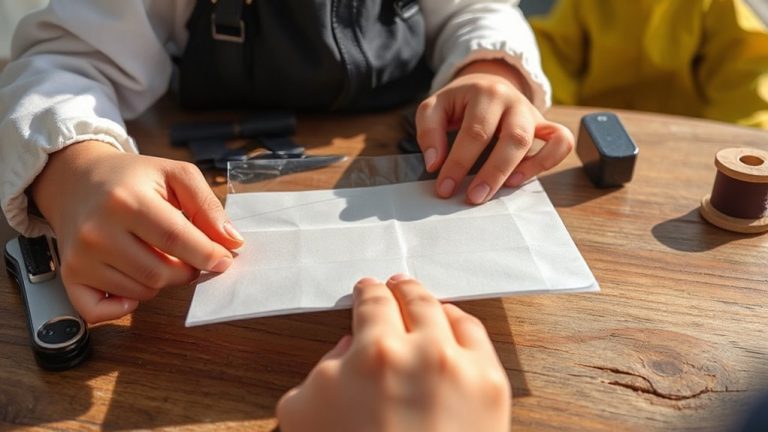
Start by laying your pack out on a flat surface and removing all internal frames, pockets, and linings. Clean each seam with isopropyl alcohol to guarantee proper sealant adhesion. Use a fine-tip applicator to run sealant along every stitch line, especially at stress points. This boosts fabric durability and prevents micro-tears from expanding. Allow each section to dry before moving on. Pay extra attention to entry points near zippers-strong zipper protection keeps fine dust out. Test seams after drying by lightly rubbing; if the sealant lifts, reapply.
| Area Treated | Sealant Used (ml) | Drying Time (hrs) |
|---|---|---|
| Main Compartment | 15 | 4 |
| Side Pockets | 8 | 3 |
| Hip Belt Pockets | 5 | 3 |
| Top Lid | 6 | 4 |
| Zipper Channels | 10 | 5 |
Mistakes That Ruin Dust Protection
If you skip cleaning seams before applying sealant, the bond won’t hold-dust finds those weak spots fast. Dirt or oils on the fabric prevent adhesion, so wipe seams with isopropyl alcohol first. Applying sealant too thick leads to cracking, especially in flex zones; thin, even layers work better. Overpacking damage stresses sealed seams, causing micro-tears that let dust through. A fully loaded pack expands stress points, so respect volume limits and avoid overstuffing. Zipper misuse also compromises protection-yanking or forcing stiff zippers damages the track and fabric nearby, creating gaps sealant can’t fix. Use zipper lubricant and pull gently. Don’t ignore high-movement areas like shoulder strap junctions; they need extra attention. Poor coverage at seam intersections leaves entry paths. Seal all stitch lines completely, including boxed corners and strap anchors. Each mistake adds up, reducing real-world effectiveness. Fix these errors, and your seal lasts longer under actual use conditions.
When to Re-Seal Your Pack for Lasting Results
While time and use inevitably degrade seam sealant, knowing when to reapply it keeps your pack dust-ready. Perform a frequency check annually if you use your pack regularly; more often if you’re exposed to harsh conditions. Environmental exposure matters-UV rays, sand, and abrasion accelerate breakdown, especially along high-stress seams. Inspect seals every few months if you trek in arid or dusty environments. Look for chalky residue, cracking, or flaking-those are clear signs adhesion has failed. Re-seal immediately if water or fine dust penetrates along stitched lines. Test results show packs lose up to 70% of dust resistance once sealant fails. A full re-seal takes 30 minutes and costs under $10 in materials. Use seam grip for durability, but allow 24 hours to cure fully. Don’t skip ventilation-sealing indoors demands airflow to avoid fumes.
On a final note
You’ve sealed the seams, and it works-dust stays out as long as the sealant holds. Most tapes and liquids last 6–12 months under regular use, less in abrasive conditions. Re-seal when wear shows. Not all packs need it, but for dusty environments, it’s a functional upgrade with measurable gains. Trade a little flexibility for longer gear life. No magic, just maintenance that matches your exposure.