Utilizing Positive Pressure Ventilation via Manual Squeeze Bottle in Field Settings
You rely on a BVM because it delivers 500–600 mL per squeeze using positive pressure, works without power, and sustains ventilation in the field. Use it when breathing fails-apnea, overdose, or trauma-but avoid it with penetrating chest injuries. Set it up fast: connect mask, attach oxygen at GCC
Notable Insights
- Manual squeeze bags deliver positive pressure ventilation using a self-inflating design that requires no power source, ideal for field use.
- Ensure a proper mask seal with the E-C clamp technique to maintain airway patency and prevent leaks during ventilation.
- Deliver each breath over one second, aiming for visible chest rise, especially in apneic or inadequately breathing patients.
- Use 15 L/min oxygen flow to maximize FiO₂ and inflate the reservoir bag for effective high-concentration oxygen delivery.
- Avoid use in penetrating chest injuries or suspected tension pneumothorax due to risks of worsening positive pressure complications.
What’s a BVM and How Does It Work?
How do you deliver breaths when there’s no ventilator nearby? You use a bag-valve-mask (BVM). The BVM design is simple: a self-inflating bag, one-way valves, and a face mask. Squeeze the bag, and it pushes air through the valve system into the patient’s lungs. Release it, and the bag refills automatically. Airflow mechanics rely on positive pressure-each squeeze creates enough pressure to open the airway and inflate the lungs, typically delivering 500–600 mL per breath with proper technique. You don’t need a power source, which makes it reliable in field settings. However, achieving effective ventilation depends on a good seal and consistent squeeze force. Without training, tidal volume and rate can vary. The device is lightweight, portable, and durable, but performance hinges on user skill. It’s not foolproof, but it’s a critical tool when electricity or machines aren’t available.
When to Use BVM Ventilation in the Field
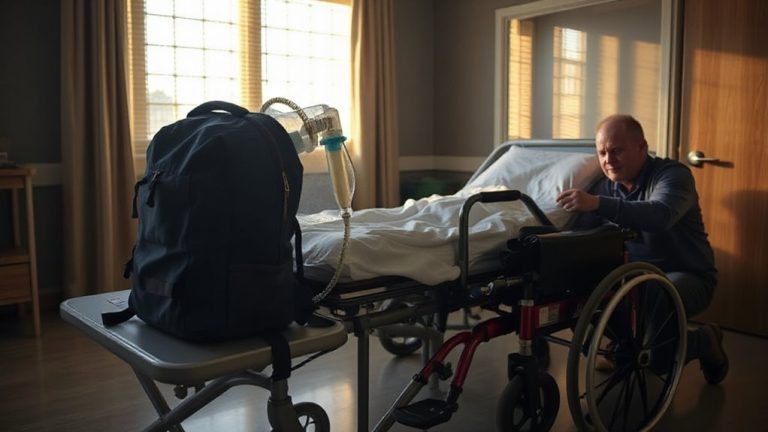
You’ve got a BVM in your kit because it works without power and fits in a backpack, but knowing when to use it matters just as much as knowing how. Use BVM ventilation when breathing stops or becomes inadequate-indicators include apnea, shallow breaths, or failure to maintain SpO₂. These are clear indications for use. You’ll need it in cardiac arrest, opioid overdose, or severe chest trauma where spontaneous breathing fails. But don’t use it blindly. Know the contraindications to avoid-like penetrating chest injuries or known ruptured lungs, where positive pressure could worsen tension pneumothorax. Also avoid it if a complete airway blockage is suspected. Field conditions mean limited resources, so correct application improves survival odds. Weigh risks: improper use can cause harm. Assess airway patency, breathing effort, and potential trauma before acting. The BVM is simple but effective-if used at the right time.
Set Up the BVM Quickly in an Emergency
When seconds count, having the BVM ready in under 30 seconds can make the difference between life and preventable death, so lay it out flat and connect the bag to the mask or endotracheal adapter before inflating the oxygen reservoir with 15 L/min from the tank-if you’re using one. Guarantee correct oxygen flow to achieve high-concentration delivery. Though proper hand positioning isn’t applied yet, mentally prepare for it. Don’t wait to troubleshoot kinks or leaks-anticipate them now.
| Step | Action | Purpose |
|---|---|---|
| 1 | Connect bag to mask/ET adapter | Guarantees circuit integrity |
| 2 | Attach oxygen tubing | Enables correct oxygen flow |
| 3 | Inflate reservoir at 15 L/min | Maximizes O₂ reserve |
| 4 | Check for leaks or damage | Prevents failed ventilation |
Speed and preparation directly impact patient survival. A delay of 10 seconds adds risk. Practice setup blindfolded-it reveals inefficiencies fast.
Seal the Mask and Deliver Effective Breaths
Now that the BVM is assembled and the oxygen reservoir is inflated, your next move is to secure a tight mask seal-without it, even perfect timing and gear prep mean nothing. Use the E-C clamp technique: your thumb and index finger form the “C” to press the mask, while the other three fingers lift the jaw, guaranteeing mask alignment stays centered over the nose and mouth. A poor seal leads to air leaks, reducing delivered tidal volume by up to 50%. Effective breaths require visible chest rise, which depends on consistent pressure and proper mask fit. Deliver each breath over one second, watching for symmetrical rise-this breath timing matches physiological norms and avoids gastric inflation. Don’t squeeze too fast or too hard; volume delivery matters less than controlled, consistent ventilation. Good alignment and timing together guarantee effective oxygenation in the field, where precision can’t be sacrificed for speed.
Avoid Common BVM Ventilation Mistakes
A common mistake during BVM ventilation is applying excessive pressure, which doesn’t improve oxygenation but increases the risk of gastric inflation and airway trauma. You’ll compromise effectiveness if you neglect proper technique. Improper hand positioning leads to poor mask seal, causing air leaks and reduced tidal volume delivery. Use the CE technique-one hand firmly securing the mask, the other lifting the jaw-to maintain airway patency. Inadequate oxygen flow, such as using less than 10–15 L/min, results in entrained room air and lower FiO₂, limiting therapeutic benefit. Deliver breaths over one second with just enough force to make the chest rise visibly. Overzealous squeezing provides no added advantage and worsens complications. Consistent pressure, correct hand placement, and sufficient oxygen flow are non-negotiable. These factors directly impact ventilation success in field settings where resources are limited and outcomes hinge on precision.
Monitor Patient Response and Adjust
How do you know your ventilation efforts are working? Check skin color, chest rise, and pulse-these show if oxygen is getting through. Patient reassessment every 30 to 60 seconds is critical. Look for changes in effort, rate, and oxygen saturation if available. Adjust breath timing as needed-over-ventilation causes gastric inflation, while under-ventilation leads to hypoxia. Aim for one breath every 5 to 6 seconds in adults, slightly faster in children. Watch for passive exhalation and avoid forceful squeezes. If the chest isn’t rising, reposition the airway and recheck seal. Response dictates pace-bradycardia or dropping SpO₂ means you may need to increase rate or depth. Continuous monitoring guarantees alignment with patient needs. Breath timing isn’t fixed-it depends on airway resistance and compliance. Stay alert, stay adaptive-your adjustments directly impact survival.
On a final note
You’ll rely on the BVM because it’s portable, durable, and delivers consistent tidal volumes when used correctly. It requires no power, works in extreme conditions, and inflation time stays under 3 seconds per breath. Skill matters-poor seal or timing reduces effectiveness. Training improves performance, but fatigue can degrade it in prolonged use. It’s not perfect, but in remote or austere settings, few options match its reliability and simplicity for maintaining oxygenation.