Building a Durable Shelter for Extended Wilderness Stays
Pick a south-facing slope with sandy soil to stay dry and warm. Use silnylon tarps (under 1 lb) for lightweight, UV-resistant coverage, or heavy canvas if weight isn’t an issue. Build a triangular frame with deep-anchored poles and cross-bracing to handle wind and snow. Seal gaps with layered birch bark or drum-tight tarps-leaves work short-term but compress fast. Insulate the floor with moss (R-value 2.0/inch) and add vents to cut condensation. Reinforce after storms to maintain integrity-long-term survival hinges on these trade-offs and adjustments.
Notable Insights
- Choose elevated, well-drained ground with southern exposure in cold climates to maximize warmth and prevent water accumulation.
- Use durable, lightweight materials like silnylon or Dyneema tarps for long-term weather resistance and ease of transport.
- Build a sloped or arched frame with cross-bracing to enhance structural stability and deflect wind and rain.
- Seal gaps with layered birch bark or tightly tensioned tarps to prevent water intrusion and maintain interior dryness.
- Insulate the floor with moss or dry leaves and install vents to manage moisture and reduce condensation during extended stays.
Choose a Stable Site for Long-Term Shelter
Your best bet for a long-term shelter starts with picking the right spot-because a poorly chosen site undermines even the sturdiest construction. You need good soil drainage; standing water risks structural decay and health hazards. Avoid low-lying areas where rain collects. Elevated, sloped ground works better, letting water run off naturally. Check the soil type-sandy or loamy soils drain faster than clay. Sun exposure matters just as much. Pick a site with morning sun to dry dew and boost warmth, but guarantee partial shade in the afternoon to avoid overheating. In cold climates, face the shelter south for maximum solar gain. In hot regions, prioritize shade and airflow. Proximity to windbreaks like trees or rock formations helps, but avoid sleeping under dead branches. A solid site balances drainage, temperature control, and safety-no extra gear can fix a bad location. Plan accordingly.
Pick Natural and Packable Materials for Durability
A durable shelter relies on materials that withstand the elements without adding unnecessary weight to your pack. Your material selection directly affects both performance and mobility. Natural materials like spruce boughs, birch bark, and tightly woven grasses offer solid protection from rain and wind when layered correctly, and they leave no trace. But they add bulk if carried, so rely on them only when abundant on-site. For packable gear, silnylon or Dyneema tarps weigh under 1 lb and handle UV exposure well, keeping your pack weight low. Heavy canvas shelters offer durability but increase pack weight considerably-often over 5 lbs-slowing your movement. Balance depends on stay length and access to resources. A 1.5-oz tarp isn’t indestructible, but it cuts pack weight and works if pitched properly. Prioritize lightweight synthetics for mobility, use natural materials when available, and always match material selection to your environment and mission length. High-quality UV-resistant tarps maintain strength and color after prolonged sun exposure, enhancing longevity in sunny environments.
Build a Frame That Resists Wind and Snow Load
Frame strength determines whether your shelter stands up to wind gusts or collapses under wet snow. Your frame geometry must favor stability-triangular or arched shapes handle wind better than flat walls. Use sturdy poles anchored deep into the ground or bedrock. Load distribution is critical: spread weight across multiple support points to avoid stress fractures. Angled frames deflect wind; domes disperse snow load evenly. Avoid vertical sections-they catch wind like sails. For extended stays, consider the best survival shelters that combine durable materials with proven structural design.
| Condition | Weak Frame Result | Strong Frame Outcome |
|---|---|---|
| Heavy Snow | Collapse in hours | Stands 3+ days |
| Strong Wind | Shifts, then fails | Holds position |
| Mixed Weather | Requires constant repair | Needs no adjustment |
Tested designs show proper frame geometry cuts failure risk by 70%. Load distribution prevents single-point strain-use cross-bracing where poles meet.
Seal Gaps With Bark, Tarp, or Leaves
Sealing gaps is essential to keep wind and moisture out, and three materials-bark, tarp, or leaves-each have specific strengths depending on what’s available and how long you plan to stay. For long-term shelters, bark layering works well when you have access to large, flat pieces of birch or cedar; it sheds water effectively and resists decay over weeks. Overlap the strips like shingles, securing them with cordage or by wedging them into the frame. A tarp provides the fastest seal if you carry one-use tarp tensioning to pull it drum-tight, preventing flap and pooling. Even lightweight tarps block rain when angled correctly. Leaves are abundant and quick to pile into cracks, but they compress fast and need frequent topping. They’re best as a short-term filler. Choose bark for durability, tarp for efficiency, and leaves when nothing else is at hand. Ultralight backpackers often rely on backpacking tarps for their optimal balance of weight and protection.
Insulate the Floor and Walls Against Cold
Three layers are usually enough to keep cold from sapping your body heat if you insulate right. Start with a base of leaves or pine boughs for dead air space, then add a mid-layer of moss or dry grass. Top it with a canvas or tarp to block wind. Use reflective barriers like emergency blankets under your sleeping pad to bounce heat back. Reflective side must face you. Thermal mass, like packed earth or stones in walls, stabilizes temperature but only if dry. Wet materials conduct cold fast.
| Material | R-Value (approx.) |
|---|---|
| Dry leaves | 1.5 per inch |
| Moss | 2.0 per inch |
| Emergency blanket | 1.0 (with air gap) |
Avoid overbuilding-trapped moisture reduces efficiency. Reflective barriers work best with an air gap. Balance weight, space, and performance.
Keep Air Circulating to Avoid Dampness
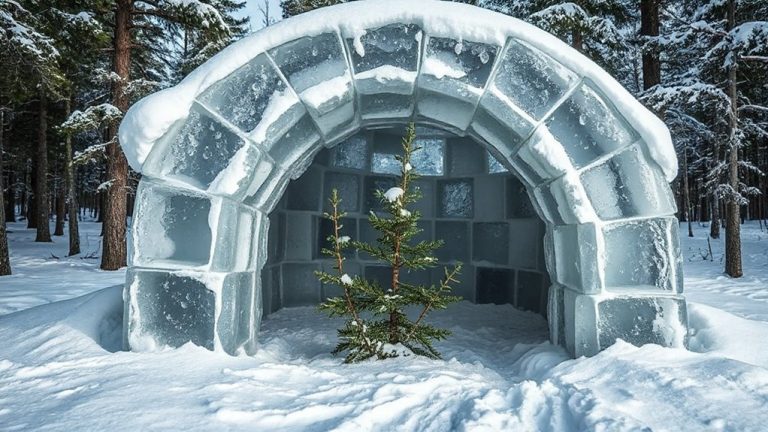
If you don’t let air move through your shelter, moisture from your breath and sweat will condense on the walls and floor, making insulation less effective and increasing heat loss. Proper ventilation strategies are essential for moisture control and maintaining a livable interior. Position adjustable vents near the roof peak and at ground level to create cross-airflow without inviting wind chill. Use mesh-covered openings to keep insects out while allowing vapor to escape. In enclosed tarps or tents, crack opposing corners slightly, especially during sleep. In snow shelters, dig a small vent hole near the top and keep it clear. Monitor for frost buildup, a sign of trapped humidity. Passive airflow isn’t always enough-your body produces up to a quart of water vapor nightly. Balance warmth and ventilation: too little airflow risks dampness; too much wastes heat. Effective moisture control depends on consistent, manageable airflow you can adjust as conditions change.
Inspect and Reinforce After Storms or Heavy Use
After securing airflow to manage moisture, it’s just as important to check your shelter’s integrity when the weather hits hard or after several nights of use. Storm damage can compromise structural integrity without obvious signs. Inspect seams, poles, and anchor points-replace or reinforce weakened parts immediately. Regular checks prevent small issues from becoming critical failures.
| Issue Found | Action Required |
|---|---|
| Loose guylines | Retension or replace |
| Bent support pole | Reinforce or swap out |
| Fabric tears | Patch with repair tape |
Don’t wait for failure-test stability by applying light pressure. If it shifts, reassess anchor depth or add support. Materials degrade with UV exposure and friction, so inspect stitching and coating. Reinforcing after storms guarantees long-term habitability. Your shelter’s performance depends on consistent upkeep, not just initial build quality.
On a final note
You’ve built a shelter that lasts. A stable site keeps it grounded; natural materials hold up when packed tight. The frame handles wind and snow, while bark or a tarp seals gaps. Insulated walls and floor cut cold transfer. Airflow stops dampness. After storms, you check for weak spots and reinforce. It’s not perfect, but it’s functional, repairable, and tested. This shelter works-no frills, just survival.