Constructing a Snow Mound Shelter in Arctic Conditions
You need four feet of settled, wind-packed snow to build a stable quinzhee in Arctic conditions-fluffy powder won’t hold shape. Pile snow at least six feet wide and three feet high, then let it sinter for two hours. Use two-foot sticks as depth guides when hollowing from the bottom up, keeping walls 12 inches thick. Add three vent holes and insulate the floor with a foam pad (R-value ~2.0). Expect internal temps 10–20°F above outside air. Proper construction makes it a reliable option when more gear fails.
Notable Insights
- Select a flat, sheltered area with deep, wind-packed snow and avoid avalanche-prone slopes.
- Pile snow into a dome at least six feet wide and three to four feet high for structural stability.
- Use wet, dense snow or allow sintering time to bond particles and strengthen the snow mound.
- Insert depth sticks before digging and maintain 12-inch thick walls during hollowing for safety.
- Add ventilation holes, insulate the floor, and use a foam pad to retain heat overnight.
Where to Build a Quinzhee in the Arctic
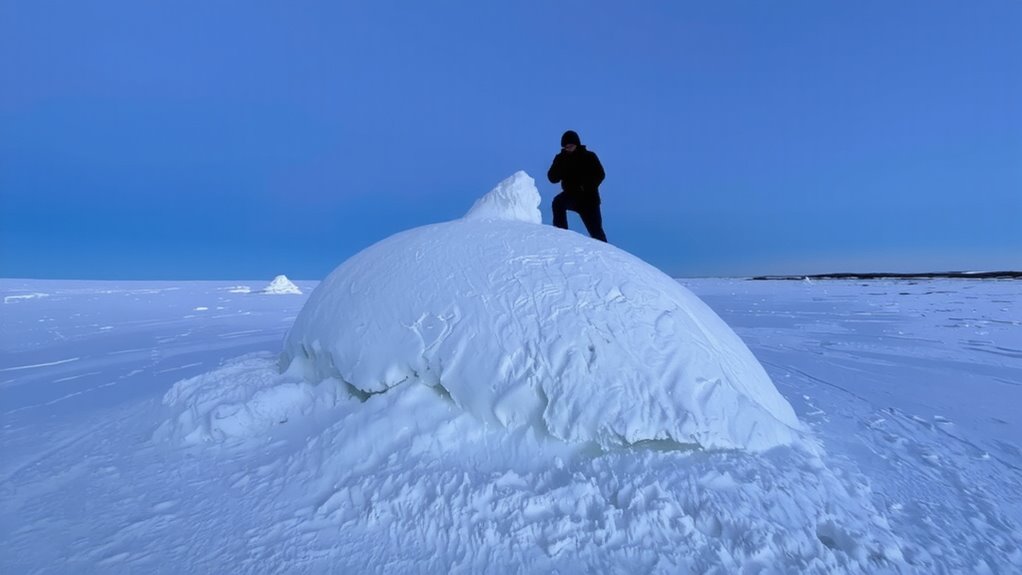
A few inches of snow won’t cut it-you need at least four to five feet of settled, packable snow to build a stable quinzhee in the Arctic. Site selection is critical. Choose a flat or gently sloped area with deep, wind-packed snow; avoid avalanche-prone slopes or thin snow cover. Wind exposure matters-build on the leeward side of natural windbreaks like ridges or dense trees to reduce drifting and erosion. High wind exposure increases collapse risk and makes entrance tunnel construction harder. Don’t pick spots near large trees with heavy snow loads-that avalanche risk isn’t worth it. Open areas with consistent snow depth give you reliable material for shaping. You’ll need compacted snow that holds a form but isn’t icy. Test packability by making a snowball-if it holds shape, the snow works. Poor site selection means wasted effort and unsafe shelter. Pick wisely to conserve energy and stay protected.
Building the Snow Mound for a Quinzhee
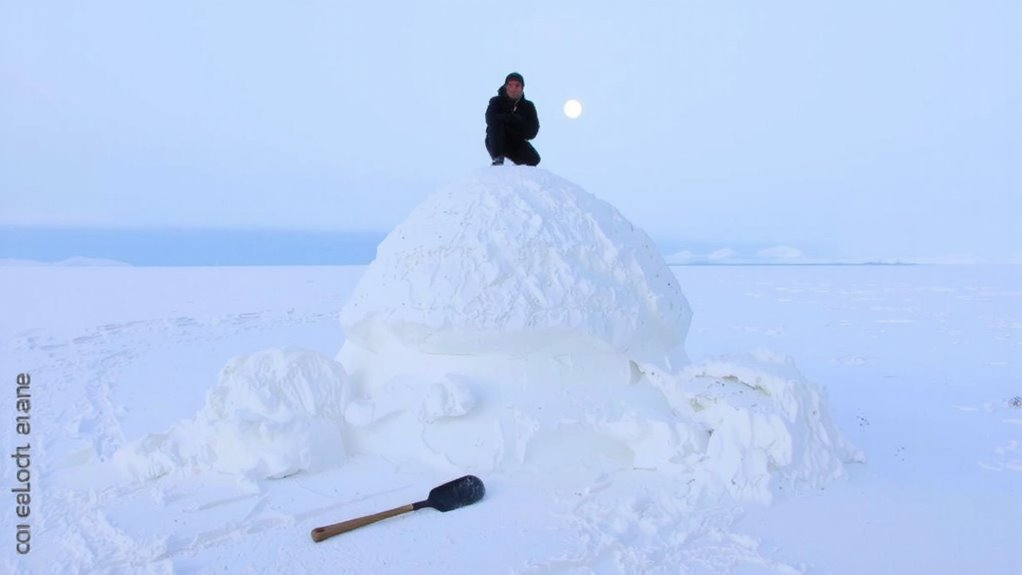
Success starts with volume-pile at least six feet of snow in diameter and three to four feet high to give yourself enough material to hollow out a usable interior. You need dense, consistent snow accumulation to guarantee the mound packs well and settles evenly. Use a shovel or snow saw to move snow efficiently, breaking up chunks so layers bond tightly. Let the mound sinter for one to two hours; this boosts structural integrity by fusing snow particles into a stable block. Avoid light, powdery snow-it lacks cohesion. Compact layers as you build to minimize air gaps. Here’s what works best:
| Method | Snow Type | Result |
|---|---|---|
| Shoveled pile | Wet, dense | Strong, reliable |
| Drift harvest | Wind-packed | Moderate success |
| Powder heap | Dry, fluffy | Poor structural integrity |
Time and compression matter more than size alone.
How to Hollow Out a Quinzhee Safely
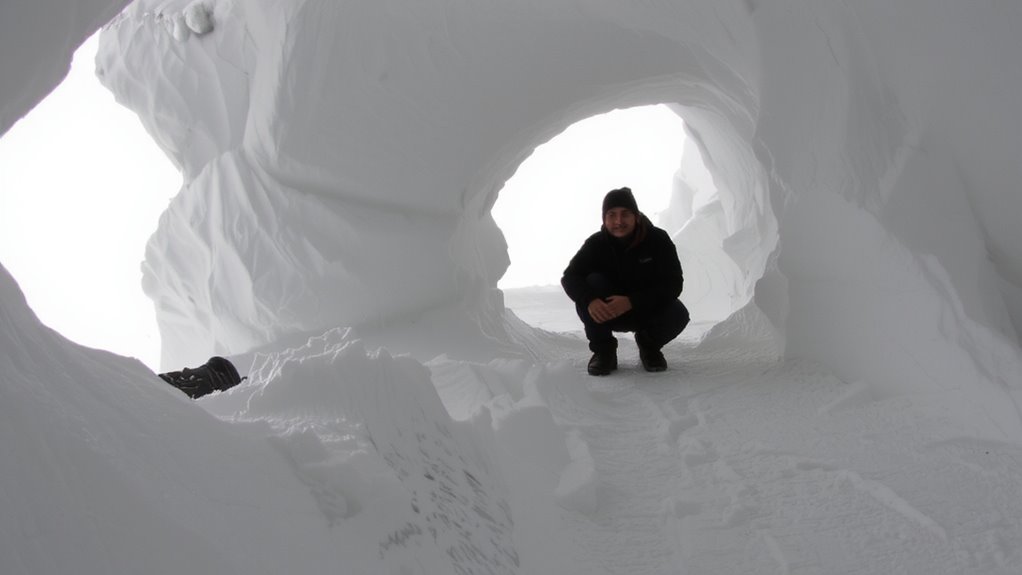
Once the snow mound has sintered for one to two hours, you can begin hollowing out the interior, but only after driving sturdy sticks-about two feet long-into the pile at regular intervals to act as depth guides. Start digging from a low entrance to preserve structural stability, removing snow gradually and evenly. Use a compact shovel or pack board as your primary digging tool; they offer better control and reduce the risk of puncturing the walls. Your digging technique should emphasize smooth, sweeping motions rather than aggressive hacking, which can compromise wall integrity. Keep the walls at least 12 inches thick-measured from the inside to the base of each stick-to guarantee strength and insulation. Work slowly and monitor for sagging or cracking. One person should dig while another monitors from outside to assess progress and safety. Avoid standing directly beneath unsupported roof sections. This method balances speed and caution, maintaining shelter integrity without unnecessary risk.
Insulating and Ventilating Your Quinzhee
While the walls and roof of your quinzee are solidifying, don’t overlook the need for insulation and airflow-you’ll stay warmer and safer with both. Proper snow density matters: aim for a packed snow ratio of about 0.45 g/cm³, dense enough to insulate but not so compact it limits breathability. You can test this by pushing a branch into the wall; it should penetrate slightly but meet resistance. For ventilation, poke three to four vent holes near the top using a ski pole or stick-one is rarely enough. These allow for consistent airflow management, reducing the risk of CO₂ buildup and moisture condensation. Size each hole about 2 inches wide, and check them periodically to prevent blockage from drifting snow. Insulate the floor with spruce boughs or a closed-cell foam pad to cut ground chill. Good airflow management doesn’t reduce warmth-it stabilizes interior temperature and improves safety.
Staying Warm Overnight in a Quinzhee
If you’re relying on body heat to keep warm inside a quinzee, your sleep setup has to minimize heat loss without trapping moisture. Use a closed-cell foam pad under your sleeping bag-its R-value around 2.0 reduces ground conduction, directly improving body heat retention. Add an inflatable sleeping pad on top for extra insulation; its trapped air resists cold transfer. Avoid overheating by venting excess warmth near your head, or condensation will dampen insulation and lower sleep quality. Wear dry, loose-fitting thermal layers to retain warmth without restricting blood flow. A balaclava helps, especially around the neck and head. Don’t sleep fully zipped in your bag-partial opening prevents moisture buildup. A vapor barrier liner can extend synthetic bags’ effectiveness, though it requires careful use. Your breathing zone should stay clear of snow walls to prevent CO₂ accumulation. Proper setup means stable internal temps, often 10–20°F above outside levels, supporting restful sleep. For added comfort and warmth, consider using a self-inflating mattress designed for cold-weather camping, which combines insulation with ease of setup.
When a Quinzhee Is Your Best Survival Option
A quinzhee isn’t always the fastest or easiest shelter to build, but when you’re stuck in deep snow and have no tarp, tent, or snow cave tools, it becomes your most viable option. You only need a shovel and time-no specialized gear. Snow stability matters; if the snow doesn’t pack well, your mound won’t hold. Test it by forming a snowball-if it crumbles, you’ll need to wait for better conditions or add layers gradually. Wind-drifted snow usually works best. Unlike an igloo, a quinzee doesn’t require precise blocks, making it more forgiving in emergency preparation scenarios. It insulates well once hollowed, maintaining internal temps around 32°F even when it’s -20°F outside. Yes, it takes 1–2 hours to build and settle, but in a survival situation with stable snow, it’s reliable, effective, and often your best bet.
On a final note
You’ll use a quinzhee when no better shelter’s available. It takes 3–5 hours to build, needing deep, packable snow. A 8-foot diameter mound works for one person, with walls at least 12 inches thick. A vent hole is non-negotiable-CO₂ buildup kills. Insulate the floor with spruce boughs or a pad. It holds +15°F inside when properly sealed, but collapses in rain or heavy wind. Not ideal, but beats freezing.