Evaluating Airway Protection in a Vomiting, Unconscious Hiker
Check if the hiker responds; if not, clear the airway immediately. Roll them onto their side using a log-roll to protect the spine and let vomit drain. Use the recovery position to prevent choking and keep the tongue from blocking the throat. Test the gag reflex once with a clean spoon handle-if absent, the risk of aspiration rises. Watch for gurgling or coughing, which signal fluid in the airway. You’ll find better ways to manage this with the right field strategies.
Notable Insights
- Immediately roll the hiker into the side recovery position to prevent airway blockage from vomit.
- Maintain head, neck, and spine alignment during log-rolling if spinal injury is suspected.
- Perform a chin lift or jaw thrust to clear the tongue and open the airway.
- Check for gurgling breath sounds, which indicate fluid in the airway and risk of aspiration.
- Evacuate immediately if breathing is labored, cyanosis is present, or protective reflexes are absent.
How to Keep an Unconscious Hiker’s Airway Open
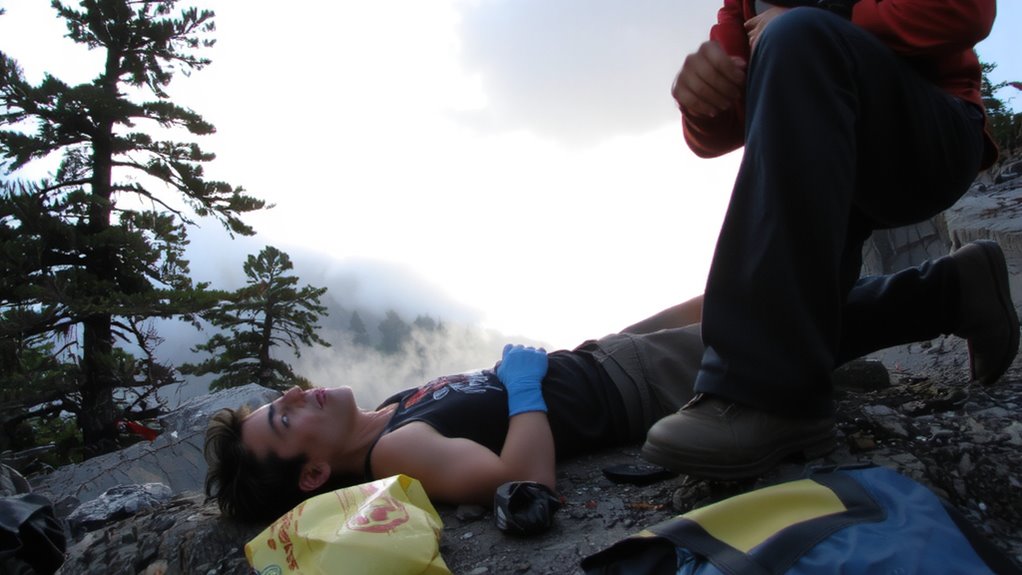
You’ve got to act fast if a hiker is unconscious-airway blockage is the immediate danger. Without intervention, tongue relaxation or vomit can cause airway obstruction, quickly leading to respiratory failure. Your first move is positioning: roll the hiker onto their side in the recovery position. This uses gravity to keep the airway open and allows fluids to drain. If you suspect spinal injury, log-roll them with caution, keeping the head, neck, and spine aligned. Avoid pressing on the throat. A nasal airway adjunct can help if the tongue is blocking the passage, but only if you’re trained. Jaw thrusts work better than head tilts in trauma cases. These steps buy time-usually 3–5 minutes-before hypoxia sets in. Even minor delays increase risk. You’re not curing the problem-you’re preventing collapse. Every second counts when oxygen is running out.
Check for Unresponsiveness and Breathing in the Field

If the hiker isn’t moving or responding, assume it’s serious and check for responsiveness immediately. Tap their shoulder and shout. If they don’t respond, check breathing and circulation within 10 seconds. Look for chest rise, listen for breath sounds, and feel for airflow. A pulse check at the carotid artery confirms circulation. Absent or gasping breaths require intervention. Always consider airway obstruction, especially if vomiting occurred.
| Sign | What It Means |
|---|---|
| No response | Unconscious, needs assessment |
| No breathing | Begin rescue protocol |
| Weak pulse | Perform pulse check frequently |
| Gurgling sounds | Possible airway obstruction |
| Bluish skin | Oxygen deprivation, urgent care needed |
Time matters-each delay reduces survival odds. Use your training. Stay calm. Assess breathing and pulse check swiftly. If there’s a possibility of airway obstruction, act before positioning.
Position a Vomiting Hiker to Prevent Choking
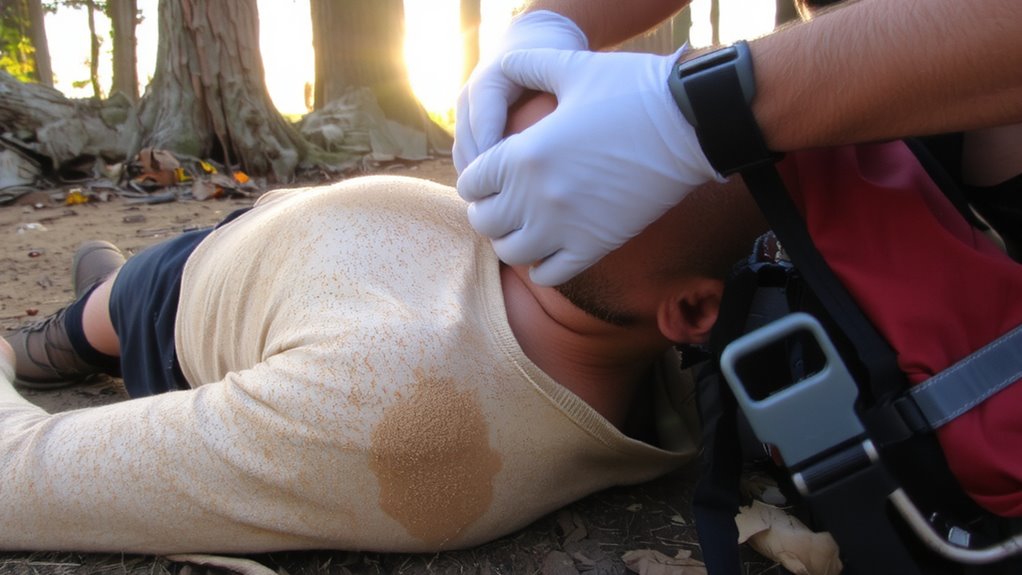
When a hiker is unconscious and vomiting, their airway can become blocked fast, so immediate repositioning is critical. Turn them onto their side quickly into the Side recovery position to let fluids drain from the mouth. This angle reduces the risk of aspiration and helps keep the airway open. Use one hand to support their head while you perform a chin lift, gently tilting the jaw upward to clear the tongue from the back of the throat. The chin lift doesn’t take long but can make a measurable difference in airway patency. You’ll need to maintain this position until help arrives or the hiker regains consciousness. The Side recovery position is stable and requires minimal effort to maintain in the field. It’s proven in real-world use and doesn’t rely on equipment. Combine it with regular breathing checks for the best outcome.
Test for Gag Reflex Using Backcountry Methods
A quick gag reflex check can confirm whether an unconscious hiker’s airway defenses are still active. Use a clean tongue depressor or spoon handle for gag reflex assessment-gently press the back of the tongue. No response means protective reflexes may be down, raising aspiration risk. This simple act is a core part of backcountry medical testing when advanced tools aren’t available.
| Method | Tool Needed | Reliability |
|---|---|---|
| Tongue depressor | Sterile or clean | High |
| Spoon handle | Metal or plastic | Moderate |
| Fingertip | Gloves on | Low |
Stick to tools that won’t injure. Avoid over-testing. One firm attempt is enough. If the gag reflex is absent, assume airway protection is compromised. Monitor closely, keep the hiker positioned safely, and prepare for rapid evacuation.
Spot Early Signs of Aspiration in Remote Areas
How quickly can you catch the signs of aspiration before it turns critical? In remote areas, delayed recognition increases risk. You’ll need to watch closely. If the hiker’s unconscious and vomiting, aspiration is likely. Early clues include sudden coughing spasms-even weak ones-since they signal airway irritation. Gurgling sounds during breaths mean fluids are in the trachea or lungs. These aren’t subtle; position your ear near their mouth. You’ll hear wet, bubbling noise with each inhale. Unlike snoring, gurgling doesn’t stop when you tilt the head. Coughing may pause, but gurgling often persists. Don’t wait. These signs mean protection failed. You’ve got minutes, not hours. Assess every breath. Note changes in rate or depth. Trust what you see and hear more than assumptions. Field conditions limit tools, so rely on observation. Spotting these early buys time.
Clear and Maintain Airway With Improvised Gear
If you’re working with what’s on hand, your best bet is to use rigid tubing like a cleaned snorkel or irrigation catheter to clear the airway, since soft materials collapse under suction. Improvised suction devices made from syringes or catheter-tip bulbs can remove liquid debris if powered by hand, but they lack the force of medical units. Test them first: if suction won’t pull water through the tube, it won’t clear vomit. Combine this with an emergency jaw thrust to lift the tongue from the posterior airway without moving the neck. This maneuver is more effective in unconscious patients than head-tilt. Maintain position with a rolled jacket under the shoulders. Recheck airway patency every few minutes. Rigid materials outperform flexible ones in real-world conditions. While not ideal, these tools can preserve oxygenation when standard equipment isn’t available. They’re functional but demand constant monitoring.
When to Evacuate: Critical Airway Warning Signs
Though you’ve cleared the airway and stabilized positioning, you’re not out of danger yet-any sign of deteriorating respiratory function means immediate evacuation is non-negotiable. If the hiker shows shallow breathing, cyanosis, or irregular respiratory patterns, these are red flags. You must perform a neurological assessment hourly; worsening GCS scores or unresponsive pupils indicate brain compromise. Maintain spinal immobilization throughout-if you suspect trauma, any movement could worsen injury and compromise the airway further. Don’t wait for symptoms to escalate. Even with a clear airway now, delayed swelling or vomiting can recur without warning. Transport immediately if protective reflexes like gag or cough diminish. No field intervention guarantees safety long-term. Evacuation isn’t optional when airway control is tenuous. Your priority is preventing respiratory arrest in remote settings where rescue resources are limited and response times are unpredictable. Act before it’s too late.
On a final note
You’ll need to act fast if the hiker’s unconscious and vomiting. Keep the airway open with a recovery position tilted to the side-simple, effective. Use a jaw thrust if spine injury’s a concern. No gag reflex? That’s trouble. Aspiration risk climbs fast. Improvise suction with a bulb syringe if you’ve got one; otherwise, roll them quickly. Evacuate if breathing sounds gurgly or they’re not responsive-this isn’t something you can fix on the trail.