Constructing a Debris Shelter With Ferns and Grass in Temperate Zones
Pick flat, elevated ground sheltered by boulders or thickets, and gather dry, wrist-thick branches for a ridgepole frame. Layer green ferns and long grass from the bottom up, overlapping by 6 inches to shed rain. Use 8–10 inches of material in sequence: ferns, grass, ferns, then a compacted grass top. Seal gaps with moss or extra grass, insulate the floor with 6+ inches of ferns, and leave a small vent to reduce condensation-this shelter stays dry even in hours of steady rain.
Notable Insights
- Select a flat, elevated site with natural windbreaks and avoid flood-prone dry riverbeds.
- Build a ridgepole frame using a sturdy 8–10 foot fallen branch anchored securely at both ends.
- Layer green ferns and long grass from bottom to top in overlapping shingle-style for waterproofing.
- Seal gaps with moss or grass and maintain 6–12 inches of thatch density to block wind and moisture.
- Insulate the ground with 6+ inches of dry ferns or leaves and allow small ventilation gaps to reduce condensation.
Pick a Safe Spot and Gather Ferns, Grass, and Branches

While it might seem easy to just start piling up whatever’s nearby, choosing the right spot matters more than you’d think-set up too close to a hillside, and you’re risking rockfall or runoff during rain. Pick flat, elevated ground with natural windbreaks like thickets or boulders. Avoid dry riverbeds; they flood fast. Once the site’s secure, start gathering materials. Look for dense patches of ferns and tall grass-both insulate well and shed water when layered thick. You’ll need armfuls, not handfuls. Fallen branches should be wrist-thick and dry, but skip rotting wood. Stay alert during wildlife observation; fresh tracks mean the area’s active, which affects safety. While foraging, double-check plant IDs-some greens mimic toxic look-alikes. Edible foraging is smart, but never risk poisoning. Prioritize shelter over food. A poor site undermines everything, no matter how good your debris pile looks. Safety and location always come first.
Build a Ridgepole Frame From Fallen Branches
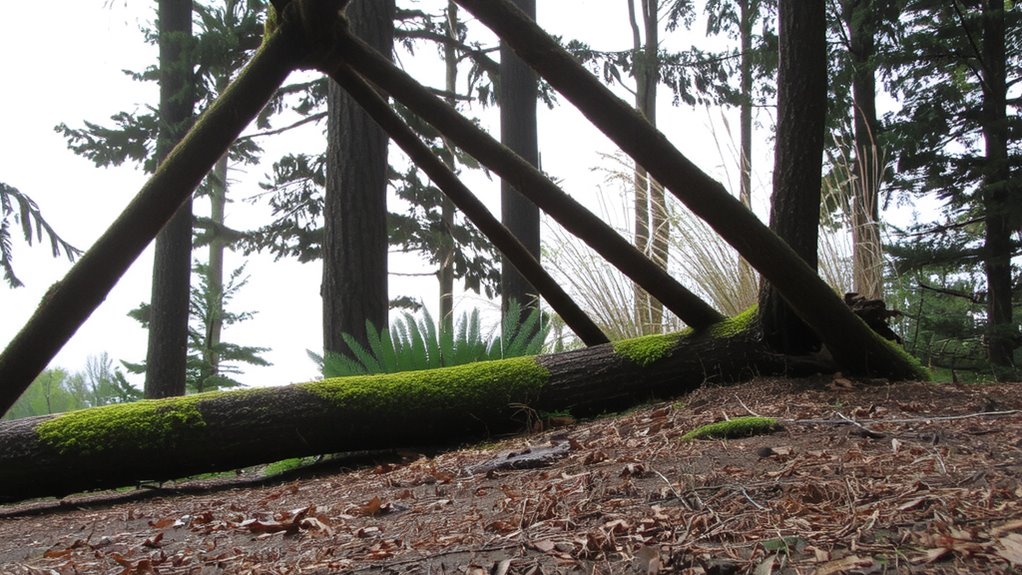
Stability starts with a strong backbone, and your shelter’s frame is no exception. You need a ridgepole - the main support running along the shelter’s peak - made from a straight, sturdy fallen branch about 8 to 10 feet long. Branch selection matters: choose one free of rot, cracks, or heavy bark loss to guarantee durability. Anchor both ends securely, either by propping them on sturdy logs or wedging them into rock formations or the ground. Side branches or diagonal supports should slope down from the ridgepole to the ground, forming a ribbed frame. These must be evenly spaced and firmly set to promote frame stability. Use smaller branches to cross-lash where poles intersect, but avoid tying anything too tight - natural materials expand and contract. The frame must withstand wind and debris load without shifting. A well-built structure here supports everything that follows.
Layer Ferns and Grass for Waterproof Insulation
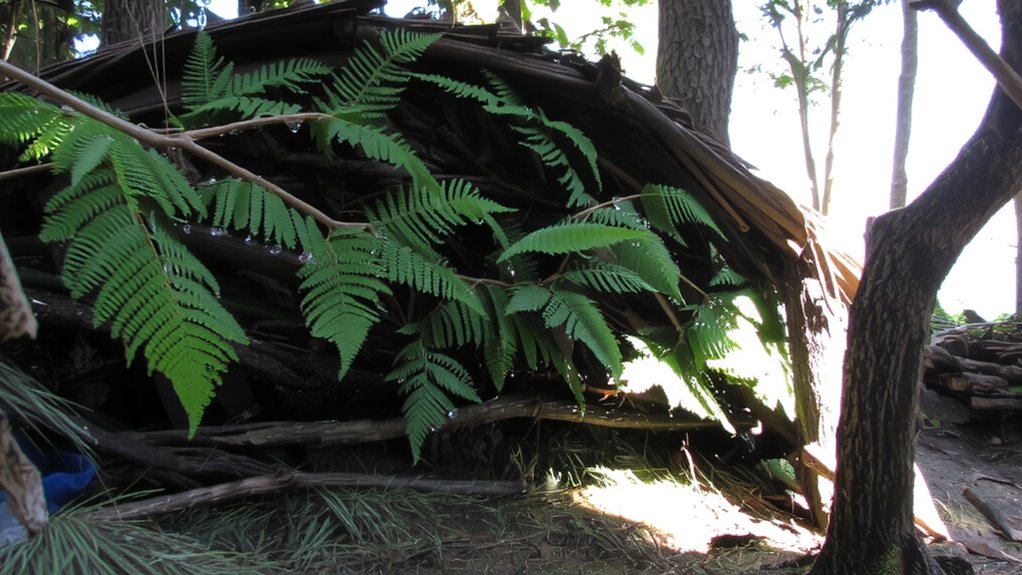
Once you’ve got the frame secure, start layering green ferns and long grass over the lashed poles, beginning at the bottom and working upward like shingles on a roof-this helps shed water instead of trapping it. Maintain consistent fern density and grass thickness to improve insulation and water resistance. Overlap each layer by at least 6 inches to prevent leakage during steady rain.
| Layer | Material | Thickness/Depth |
|---|---|---|
| 1 | Green ferns | 2–3 inches |
| 2 | Long grass | 3–4 inches |
| 3 | Ferns again | 2 inches |
| 4 | Grass topping | 4 inches |
| 5 | Compact finish | Hand-pressed |
Higher fern density blocks moisture better; thick grass adds dead air space for warmth. You’ll need about 8–10 inches total coverage for reliable performance in damp, cool conditions. Avoid sparse spots-they compromise the whole layering system.
Seal Gaps to Block Wind and Rain
You’ve layered the ferns and grass like shingles, giving you a solid base for water runoff and insulation, but gaps between bundles or along the edges can still let in wind and rain. To fix this, pack extra grass or moss into openings, focusing on seams where branches meet the frame or where layers overlap. Effective seam sealing prevents drafts and water intrusion, especially on the windward side. Check thatch density by pressing your palm into the surface; if you easily feel the frame, add more material. A dense thatch layer-ideally 6 to 12 inches thick-blocks airflow and sheds moisture better. Overlap new bundles like tiles when filling gaps to avoid creating new weak points. Simple, consistent coverage matters more than perfect looks. Wind exploits thin spots, so prioritize uniform thickness over speed. This step won’t eliminate all dampness, but it markedly improves shelter performance in steady rain or breeze.
Insulate the Ground to Stay Warm at Night
Lying directly on the ground can drain your body heat fast, so insulating your sleeping area is critical for staying warm at night. Thermal radiation from your body transfers into the soil unless you create a barrier. Use dry materials like ferns, grass, or leaves beneath you to improve heat retention. These natural layers trap air, reducing conductive heat loss. Thickness matters-aim for at least 6 inches to be effective.
| Material | R-Value Approximation |
|---|---|
| Dry grass | 1.5 per 6 inches |
| Pine boughs | 2.0 per 6 inches |
| Dead leaves | 1.8 per 6 inches |
| Fern layer | 1.7 per 6 inches |
| Compacted moss | 1.2 per 6 inches |
Thicker doesn’t always mean better if the material’s damp. Prioritize dryness for reliable performance. For extended winter camping, consider combining natural insulation with a sleeping pad featuring a high R-value rating.
Ventilate to Prevent Condensation Buildup
A well-insulated shelter keeps heat in, but without airflow, moisture from your breath and body builds up fast. That dampness leads to condensation, which soaks your bedding and lowers your core temperature. To maintain air circulation, leave a small gap at the top or side of your shelter. This allows humid air to escape while letting drier outside air flow in. Good moisture control isn’t about blocking all airflow-it’s about managing it. Ferns and grass shed water well but trap humidity if packed too tightly. Use them densely for insulation but avoid sealing every opening. Test ventilation by spending a few minutes inside; if fog forms on the interior, adjust the gaps. Proper airflow reduces dampness without sacrificing warmth. Balanced air circulation keeps your insulation dry and your shelter functional through changing conditions.
When to Reinforce or Leave Your Debris Shelter
While weather conditions and structural integrity should guide your decisions, knowing when to reinforce or abandon your debris shelter comes down to observable signs of wear and environmental shifts. If heavy rain or wind increases weather exposure and your roof starts sagging, it’s time to add more layers of ferns and grass. Check the ridgepole and support beams daily-any cracks or bends compromise structural integrity. Small shifts are fixable; major warping means rebuild elsewhere. If the ground inside stays dry and the frame holds, reinforce. But if repeated storms soak your insulation or the frame leans dangerously, leaving is safer. You’ll spend less energy relocating than constantly repairing. Monitor temperature differences inside versus out-drops suggest gaps letting heat escape. Reinforce during calm weather, not in the storm. Know the limits: no debris shelter lasts forever under constant weather exposure.
On a final note
You’ve built a functional debris shelter using natural materials. Ferns and grass provide decent insulation and weather resistance when layered thickly. The ridgepole frame holds up well under moderate wind and rain. Ground insulation reduces heat loss, but condensation can build without airflow. It’s not as durable as a tarp, but requires no gear. Reinforce it if storms are expected; otherwise, it’s enough for short-term warmth and protection in temperate conditions.