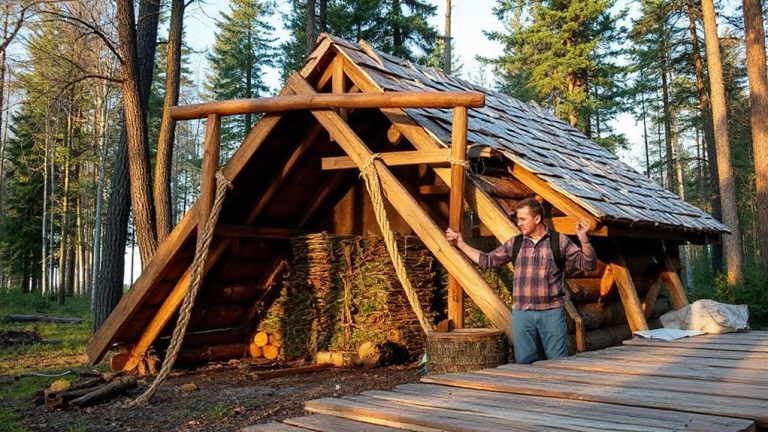
Building a Shelter From Natural Materials: Debris Hut & Snow Shelter Guide
Pick flat, elevated ground with firm soil and avoid valleys or cracked earth to reduce flood risk. Use dead, dry branches for framing-wrist-thick and 6–8 feet long-and test by snapping to avoid rot. Build a debris hut with 24 inches of dry leaves or moss for R-values up to 2.5 per 6 inches. Anchor with a ridgepole, add angled ribs, and seal the entrance with a door plug. A lean-to needs green wood rafters lashed at 45 degrees, spaced 6–8 inches apart. For snow shelters, use wind-packed snow at least 2 feet deep, build dome walls 12 inches thick, and add a low tunnel and vent. You’ll find each design adjusts to local materials and weather when you know what to prioritize.
Notable Insights
- Choose flat, elevated ground with compacted soil and avoid flood-prone areas like valleys or dry riverbeds.
- Test soil stability by digging a small hole and relocating if water seeps in.
- Use dead, straight branches for framing and inspect materials for dryness and strength before use.
- Build a debris hut with a ridgepole, ribbed frame, and 24 inches of insulating material like leaves or moss.
- Construct a snow shelter from wind-compacted snow, ensuring 12-inch thick walls and a low entrance tunnel.
Check Terrain, Weather, and Hazards First
Why set up camp in a spot that could flood or collapse in a storm? You need solid ground-soil stability matters because loose or sloped earth shifts under weight or rain, risking shelter failure. Avoid valleys, dry riverbeds, or cracked ground; they’re prone to water runoff or erosion. Check for fresh animal activity-tracks, droppings, or nests-since animals often claim safe, hidden spots, but their presence increases risk of encounters. Flat, elevated ground with firm, compacted soil is ideal. Test it by digging a small hole; if water seeps in, move elsewhere. Overhead hazards like dead branches or loose rocks are just as critical. Wind patterns matter too-natural windbreaks help, but don’t trap cold air in depressions. You’re not just picking a place-you’re evaluating durability and safety. A good site prevents problems before they start. A reliable emergency shelter can provide critical protection when natural materials aren’t sufficient.
Gather Natural Materials Nearby
Your shelter’s strength starts with the materials you choose, so look for straight, dry branches about wrist-thick and 6 to 8 feet long-they’ll form a sturdy frame without cracking under pressure. Check nearby fallen wood before breaking live limbs; dead stands save time and preserve resources. Gather leafy branches, moss, or ferns for coverage-they trap air and shed water when layered thick. Use bark stripping from deadfall trees to test bark weaving techniques; tight weaves hold better in wind. Flat, palm-sized stones work for anchoring edges or stone stacking to weigh down support lines. Avoid damp or rotten material-it fails under stress and insulates poorly. Collect more than you think you’ll need; redundancy compensates for breakage or misjudged loads. Prioritize lightweight, flexible rods for lashing points. All materials should snap cleanly, not splinter. Test each piece with a bend and snap-quality matters more than quantity. Proximity cuts effort, so stay within 50 feet unless terrain demands more. A durable and lightweight shelter can also be created with modern gear like best backpacking tarps, which offer quick setup and reliable weather protection.
Build a Debris Hut With Natural Insulation
A debris hut starts with a strong ridgepole anchored between the ground and a stable support, like a tree fork or rock-this spine holds everything together. Lean smaller branches along both sides to form a ribbed frame. Then pile on thick layers of natural debris-leaves, pine needles, moss-for effective thermal layering. The thicker the cover, the better it retains body heat. A well-built hut traps warm air inside while blocking wind, but avoid over-packing, which can cause moisture trapping. Keep the entrance small and use a door plug to minimize airflow.
| Insulation Material | R-Value Estimate |
|---|---|
| Dry leaves | R-2 per 6″ |
| Pine boughs | R-1.8 per 6″ |
| Moss (compressed) | R-2.5 per 6″ |
Aim for at least 24 inches of debris for reliable warmth in cool conditions.
Make a Lean-To Using Fallen Branches
Start with a sturdy ridgepole-this is the backbone of your lean-to. Secure it between two trees or uprights at about waist to chest height. Your branch selection matters: choose straight, strong limbs about 1.5 inches in diameter for rafters. Lean them at a 45-degree angle against the ridgepole, spacing them every 6–8 inches. This layout guarantees structural stability and supports layered cover. Use smaller branches or saplings to weave across the rafters, creating a lattice for debris or a tarp. Avoid dead, brittle wood-it compromises strength. Green wood holds better when lashed but may shrink as it dries. The angle and spacing allow wind resistance while minimizing material use. This design sheds rain reasonably well but isn’t sealed. It offers quick setup and decent overhead protection. You’ll need supplementary insulation if temperatures drop. It’s a basic shelter, but with smart branch selection and proper spacing, it maintains structural stability in mild to moderate conditions.
Construct a Snow Shelter From Packed Snow
Snow walls packed tight with a snow saw or shovel hold up better than loose drifts, so choose a spot with wind-compacted snow at least 2 feet deep. Good snow compaction creates structural integrity-critical for overhead support in shelters like quinzees or snow caves. You’ll need to block and shovel snow into a dome shape, then hollow it out once it firms up. Avoid digging directly into a drift unless it’s naturally settled and dense; fresh, powdery snow lacks strength and proper thermal insulation. Compacted snow traps air pockets, which boosts thermal insulation and reduces heat loss. Walls should be at least 12 inches thick all around. A low entrance tunnel, slightly below sleeping level, helps contain warmth. Ventilation is minimal-just a small hole poked through the top to prevent CO2 buildup. This design balances stability and heat retention using snow compaction as a structural and insulating foundation.
Seal Your Shelter Against Rain and Wind
If you’re relying on natural materials to keep rain and wind out, your shelter’s outer layer must shed water while blocking airflow, and that means using dense, overlapping coverings like spruce boughs, bark slabs, or packed moss. Thatch layering works well when applied at a 45-degree angle-this directs runoff away from the interior. Overlap each bundle tightly to prevent wind intrusion. For extra protection, use mud plastering on walls or between logs; it seals gaps and adds thermal mass. Apply it in layers, letting each dry before adding the next to reduce cracking.
| Need | Result |
|---|---|
| Dry interior | Achieved with proper thatch layering |
| Draft-free space | Possible through mud plastering |
| Longevity | Increases with dense, compacted materials |
| Comfort | Noticeably improved, even in storms |
Both methods are time-tested and reliable when done correctly.
On a final note
You’ve assessed the terrain and weather, so your shelter choices make sense. Natural materials work when used right-debris huts insulate well, lean-tos go up fast, and snow shelters block wind. Each has trade-offs: debris huts take effort, lean-tos offer less protection, and snow shelters need firm packing. Test stability before relying on them. No material beats proper construction. A well-sealed shelter keeps heat in and elements out, which is what matters most.