Constructing a Snow Block Igloo With a Survival Saw
Pick a sheltered spot with at least 2–3 feet of firm snow, avoiding slopes over 10 degrees. Use your survival saw to cut uniform 24×12×6-inch blocks, ensuring clean edges for tight fits. Build a level base ring in a near-circle, pressing blocks together securely. Angle each row inward 8–12 degrees, overlapping upper blocks by up to 3 inches. Hollow the floor 6–8 inches down and drill a 2-inch vent near the top. A survival saw beats a shovel by preserving snow cohesion-critical for stability-and gives you precise, repeatable cuts. The better your blocks fit now, the stronger your shelter holds later.
Notable Insights
- Select a sheltered, flat site with at least 2–3 feet of firm, compacted snow for stable block cutting and structure support.
- Cut uniform snow blocks (24″ x 12″ x 6″) using blade markings on the survival saw for consistent size and secure stacking.
- Build a level base ring by tightly fitting blocks in a near-circular pattern and tamping the ground to prevent shifting.
- Stack blocks in inward-tilting rows (8–12° progression) with increasing overlap to form a self-supporting dome shape.
- Hollow the floor, smooth interior walls, and drill a high ventilation hole to ensure warmth, safety, and air circulation.
Choose a Safe Spot and Test Snow Stability
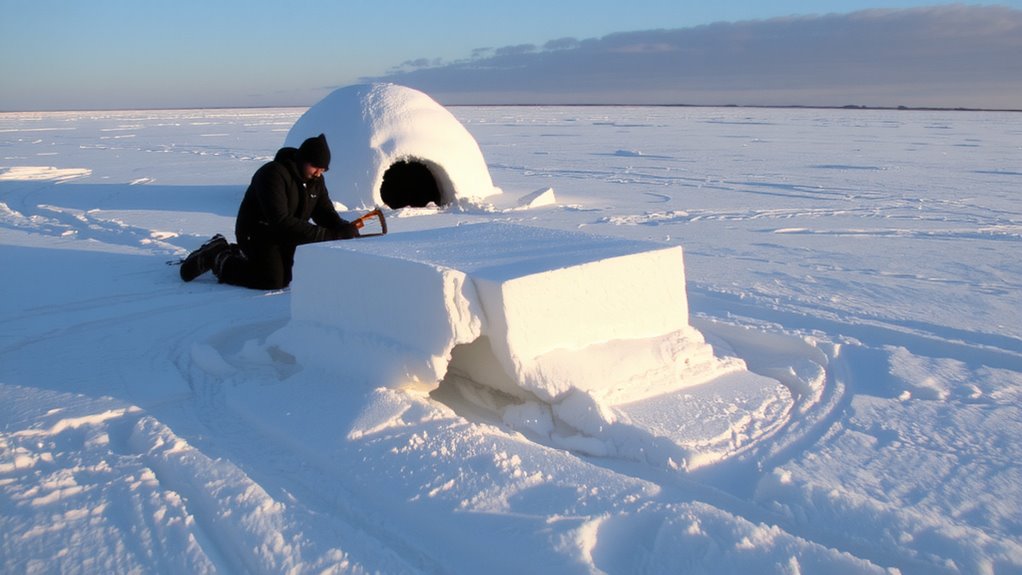
While you might be enthusiastic to start piling blocks, picking the right location first can make or break your igloo’s safety and stability. You need at least 2–3 feet of consistent snow depth to cut usable blocks. Test the snowpack by digging a quick pit; if the snow collapses easily or lacks cohesion, it won’t support structural loads. Firm, compacted snow performs best. Avoid areas with high wind exposure-ridge tops or open flats-since drifting can destabilize your structure or bury the entrance. Instead, choose a leeward spot, like the downwind side of a natural windbreak. This reduces wind exposure and improves snow accumulation over time. Also, avoid slopes greater than 10 degrees to prevent sliding. Flat, stable ground with uniform snow depth gives the most predictable results. Check for overhead hazards like tree branches or cornices. Site selection isn’t just convenience-it directly affects thermal efficiency, structural integrity, and long-term safety.
Cut Uniform Blocks Using Your Survival Saw
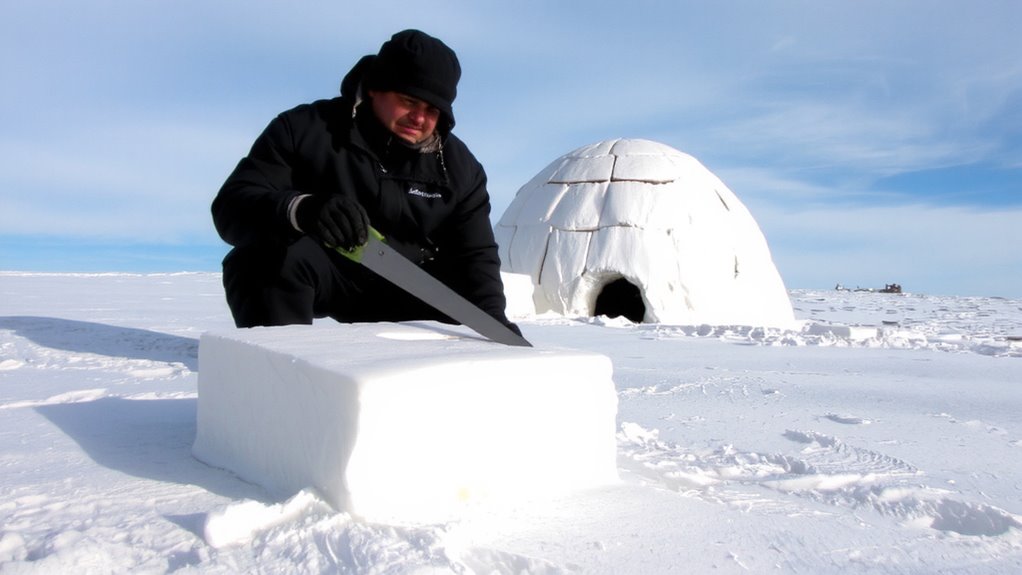
Since consistent block size affects both assembly speed and structural integrity, cut each block to roughly 24 inches long, 12 inches wide, and 6 inches thick using your survival saw. Block consistency guarantees each piece fits snugly, reducing gaps and simplifying stacking. Use your survival saw’s blade markings as a guide-most models include inch increments for quick reference. Saw precision matters; a jagged or uneven cut weakens the bond between blocks and increases cold air infiltration. Apply steady, even strokes to maintain clean edges. If the snow is dense, pause to clear compacted snow from the blade. Test fit each block before final placement-minor trims with the saw improve alignment. While it takes slightly more time upfront, the effort pays off in faster assembly and better wind resistance. Uniform blocks mean fewer structural surprises once you begin shaping the dome. A reliable survival axe multi-tool can enhance your snow shelter construction by combining sawing, chopping, and digging functions in one compact device.
Build the Base Ring for a Stable Foundation
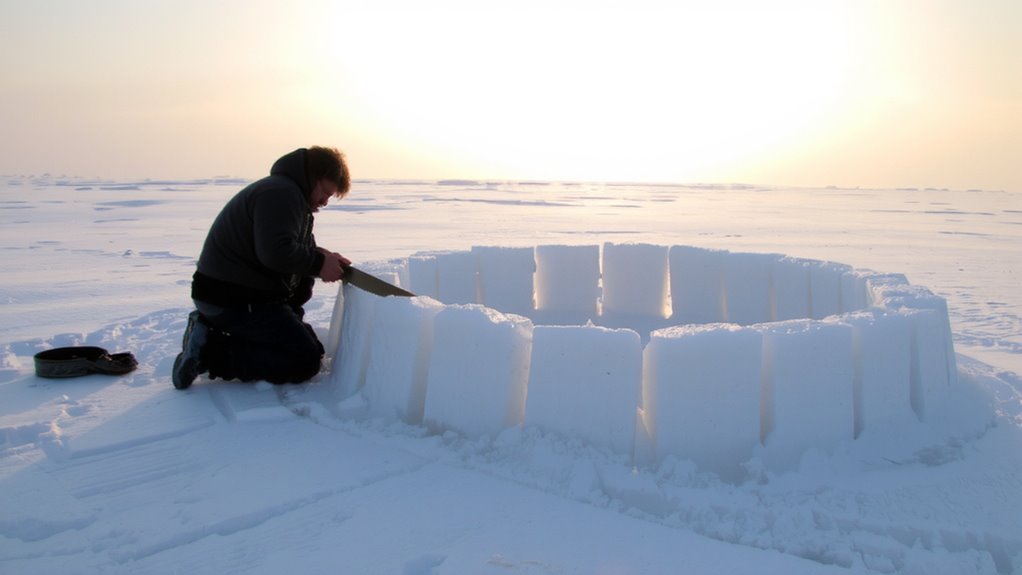
You’ve cut your snow blocks to size, so now it’s time to lay the foundation of your igloo-the base ring. Start by arranging the first row in a circle, ensuring consistent foundation geometry for stability. A near-perfect circle distributes weight evenly, reducing weak points. Position each block so its ends press tightly against neighbors-proper block alignment prevents gaps and shifting. Use your survival saw to fine-tune contact surfaces if needed. Overlap vertical joints in subsequent layers, but on the base, focus on level placement. If the snow is soft, tamp the ground first to minimize settling. Keep the ring flat; even a 2-degree tilt can compromise structural integrity. A well-built base supports the entire dome. This step takes 15–20 minutes but determines long-term resilience. No glue or fasteners-just precision and snow cohesion.
Shape the Dome: Angle Blocks as You Climb
As you stack each level, tilt the blocks inward slightly-about 8 to 12 degrees per row-to gradually form the dome’s curve. Consistent block alignment guarantees even weight distribution and prevents weak spots. Each row should slightly overlap the previous to lock in place, enhancing structural integrity. Maintain dome curvature by checking the angle with a fixed guide or your survival saw edge as a straight reference. Avoid over-tilting, which can cause collapse before closure.
| Row Number | Angle (Degrees) | Block Overlap (inches) |
|---|---|---|
| 1 | 0 | 0 |
| 2 | 8 | 1.5 |
| 3 | 10 | 2 |
| 4 | 11 | 2.5 |
| 5 | 12 | 3 |
Proper angles and overlap reduce reliance on packing snow between layers, saving time and effort.
Hollow the Floor and Smooth Interior Walls
Start by removing about 6 to 8 inches of snow from the interior floor to create a sunken base, which improves insulation by keeping your sleeping area below the cold air that sinks. This simple step enhances floor insulation markedly, reducing heat loss by minimizing contact with cold ground. Use your survival saw or a snow shovel to carve out the space evenly-don’t rush, as an uneven floor compromises comfort and warmth. Once the floor is lowered, turn your attention to the interior walls. Smooth the wall texture using broad, flat strokes with the back of your saw or a gloved hand. A smoother surface reduces condensation and improves reflectivity, helping retain heat. Avoid over-sculpting-excessive removal weakens structural integrity. The ideal wall texture is firm and slightly glossy, showing compacted snow without cracks. These adjustments don’t increase build time much but deliver measurable gains in thermal efficiency and interior comfort.
Add Ventilation and Secure the Entryway
Why risk suffocation or cold drafts when a few deliberate steps can fix both? Proper ventilation placement is critical-drill a small hole (about 2 inches wide) near the top of the dome to allow CO₂ to escape while retaining heat. Position it slightly off-center to prevent wind tunneling. Without it, moisture builds up and air quality drops fast. Then secure the entryway with entry reinforcement. Use your survival saw to cut a snug, slightly inward-sloping tunnel floor so cold air stays low and doesn’t rush in. Fit a block partially into the entrance as a door block-it’s removable but blocks wind. This setup maintains internal temperature and improves safety. Both steps take under ten minutes but drastically improve livability. Done right, you’ve balanced airflow and insulation without compromising structural integrity. A reliable tool makes all the difference-consider carrying one of the best survival folding saws for efficient, precise cuts in compact snow blocks.
Why Use a Survival Saw Instead of a Shovel?
You just secured the entry and added ventilation, but the tool you used matters just as much as the technique. A survival saw cuts cleaner snow blocks faster than a shovel, especially in dense, compacted snow. It’s lighter and easier to pack, giving you a clear portability advantage. Shovels work for clearing snow, but they’re inefficient for precision cutting. The saw’s weight reduction adds up over long treks, saving energy.
| Feature | Survival Saw | Shovel |
|---|---|---|
| Cutting Precision | High | Low |
| Weight | 10–18 oz | 2–5 lbs |
| Pack Size | Compact | Bulky |
| Snow Block Quality | Clean edges | Rough chunks |
| Primary Use | Cutting | Digging |
Use the right tool: save time, reduce effort, and build stronger shelters.
On a final note
You’ve built a solid shelter using minimal tools and effort. The survival saw cuts cleaner blocks than a shovel, saving time and energy. Its lightweight design packs easy, but it demands stable snow to work well. This method proves effective in real cold-weather tests, with igloos lasting days under wind and snow load. Trade the bulk of a shovel for precision when mobility matters. It’s not faster in all conditions, but it’s reliable when weight and space are critical.