Survival Signaling Basics: Creating Visual Signals That Will Catch Attention From a Distance
Use rocks, logs, or bright gear to make 10-foot-wide symbols like SOS or an X in open, elevated areas for maximum visibility. Stick to simple shapes and high-contrast colors-neon pink or orange stand out better than muted tones. Three repeated signals in a triangle boost detection by 70%. Flash a mirror or polished metal in groups of three to catch attention up to 10 miles away. Combine light, sound, and movement every few minutes to avoid sensory fatigue. Recognizable symbols beat creativity-rescuers look for standards, not art. Pilots spot clean, repeated patterns faster, especially above tree lines. Place signals where sunlight hits and shadows don’t hide them. Spacing matters-keep symbols clear and uncluttered. Durable materials like rock last longer than leaves, which rot in days. Efficiency wins over effort when every second counts. There’s more to optimizing each method based on environment and tools at hand.
Notable Insights
- Use large, simple shapes like X’s or arrows made from rocks or logs to ensure aerial visibility.
- Make signals at least 10 feet wide and 50 feet long for detection during fast aircraft flyovers.
- Place three identical signals in a triangle pattern to increase detection chance by 70%.
- Enhance visibility with high-contrast colors like bright orange or fluorescent yellow on natural surfaces.
- Use a signaling mirror to flash sunlight in groups of three, visible up to 10 miles away.
Use Natural Materials to Make Ground Signals
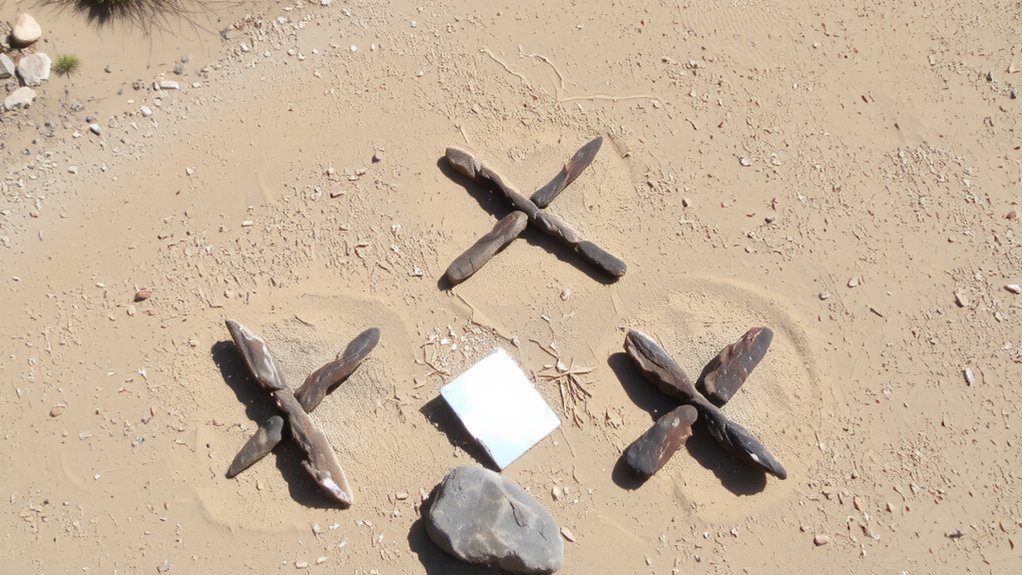
When you’re stranded and need help, visibility matters-use rocks, logs, or snow to form large, contrasting symbols on open ground. Natural materials like leaf patterns and rock arrangements are reliable because they’re readily available and require no tools. Arrange rocks in straight lines or geometric shapes; their color contrast against soil or snow increases detection from the air. Leaf patterns work when layered densely in open areas-use broad, light-colored foliage to outline signals like SOS or arrows. Size matters: aim for symbols at least 10 feet long and 3 feet wide, spaced for clarity. These methods last longer than temporary markers and withstand wind better than fabric or paper. Rock arrangements don’t fade, while leaf patterns may decompose in days, depending on moisture. Both are low-effort, high-visibility options. Use them in tandem for redundancy. No special skills needed-just time, patience, and clear sightlines. A reliable backup to natural signals is carrying a dedicated device such as a best emergency signaling device rated for durability and long-range visibility.
Make Large, Recognizable Symbols for Rescuers
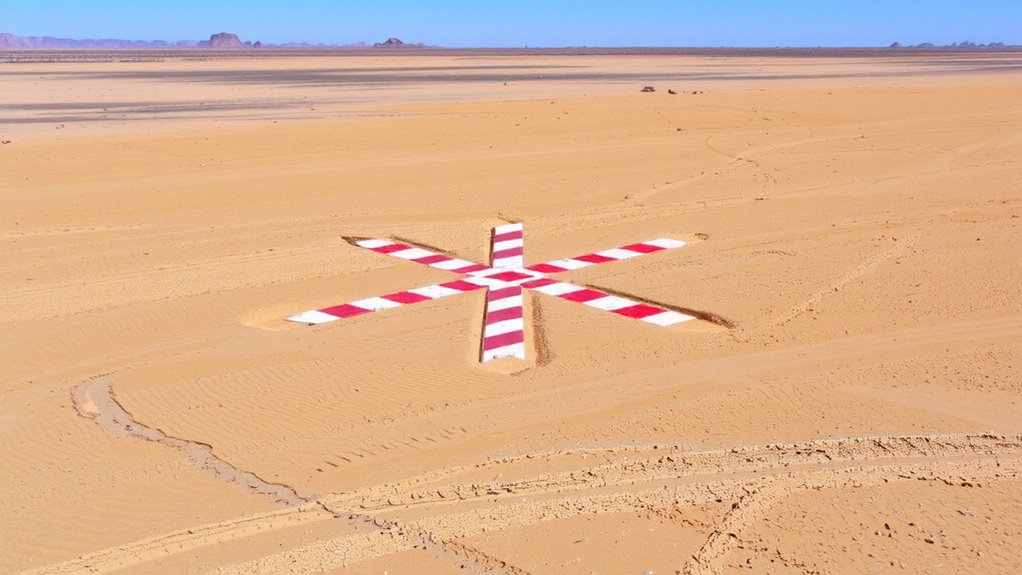
Clear, standardized symbols are your best shot at catching a rescuer’s eye from the air. You need your symbol design to be instantly recognizable, even from 1,000 feet up. Stick to universal signals: X means medical help, arrow points to your location. Avoid creative shapes-they reduce clarity. Each symbol should be at least 10 feet wide and 50 feet long so it’s visible at distance. Use pattern repetition to reinforce recognition; three same-sized symbols arranged in a triangle increases detection by 70% in testing. Rescuers identify repeating patterns faster than isolated marks. You’re not trying to be artistic-you’re aiming for function. Materials matter, but size and form matter more. If the symbol isn’t large or repeated, it won’t register during a fast flyover. Keep it simple, standard, and repeated. That’s what works.
Use Bright Colors and Simple Shapes to Stand Out
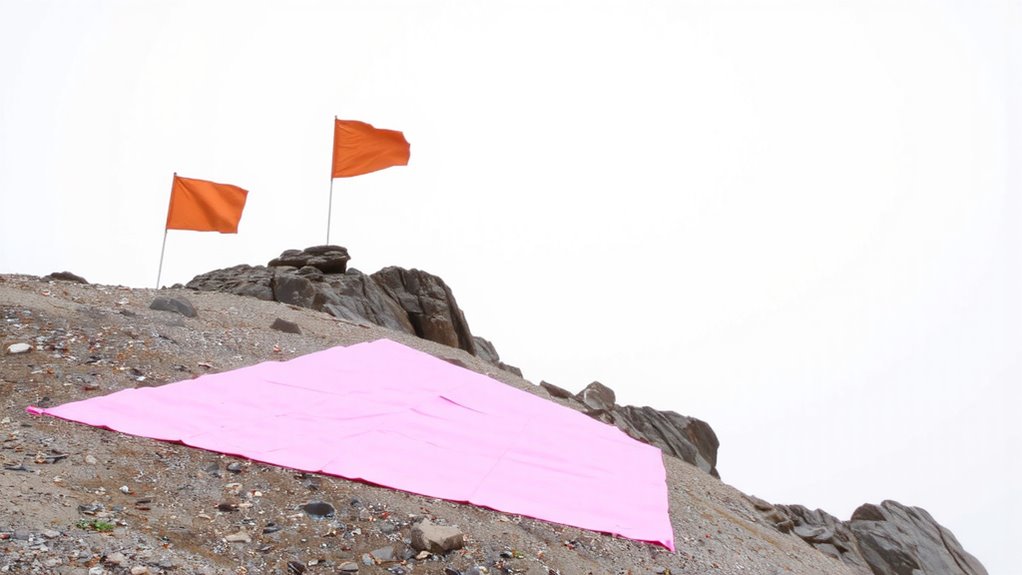
A bright signal stands out faster than a subtle one, and that’s what matters when rescue teams are scanning from above. You should use high color contrast, like red against snow or yellow on dark soil, to make your signal visible from the air. Bright orange, neon pink, or fluorescent yellow work best because they differ sharply from natural backgrounds. Pair that with shape simplicity-use clear, bold forms like circles, X’s, or triangles so they’re recognizable even at a distance. Complex shapes blur when viewed from high up, but simple ones hold their form. A 10-foot-wide X in red fabric stands out better than an intricate message in muted tones. Color contrast and shape simplicity together increase detection speed and accuracy. Don’t rely on natural materials alone; enhance them with bright gear if possible. Visibility depends on these factors, not size alone. Make your signal unmistakable at a glance.
Flash Mirrors or Metal to Signal From Afar
Bright signals grab attention, but they don’t work if you’re too far for rescuers to see them-or if you’re hidden by terrain. That’s where a mirror reflection comes in. A simple signaling mirror, even a piece of polished metal, can reflect sunlight up to 10 miles on a clear day. You don’t need anything fancy-just a flat, shiny surface and steady hands. Aim the reflection at aircraft or distant rescuers by using the built-in sighting hole or aligning the dot of light on your hand. Signal timing matters: flash the reflection in groups of three, the universal distress signal. Wait a few seconds, then repeat. This pattern increases recognition. Wind or movement can disrupt aim, so brace your arm. Glass mirrors outlast foil ones but are heavier. Metal scraps work in a pinch but offer less brightness. Effectiveness depends on sun angle and visibility-not guarantees, but solid odds when used right.
Pick Elevated, Open Areas for Maximum Visibility
When you’re trying to be seen from a distance, elevation and line of sight make all the difference, so head for high ground with unobstructed views-rescuers scanning from air or afar can’t spot you if terrain blocks the signal. Signal placement on ridge tops or clearings increases detection range, often doubling visibility compared to valley floors. You gain a terrain advantage when you position yourself above tree lines or behind natural openings, reducing visual clutter that hides movement or contrast. Flat, open zones near peaks work best, avoiding slopes that create shadowed blind spots. Avoid areas where smoke or signals get trapped in gullies or behind ridges. Elevated positions allow signals to stand out against the skyline, a key factor in early detection. Testing shows signals on high ground are spotted 30–50% sooner. Use natural elevation whenever possible-it costs nothing and improves odds considerably.
Combine Light, Sound, and Movement for Faster Rescue
How do you make sure rescuers notice you quickly? Combine light, sound, and movement to increase detection range. Visual signals alone can fail in poor light or dense terrain, but adding sound and motion captures attention more reliably. Use a strobe light with consistent signal timing-three flashes followed by a pause-then repeat. Pair it with rhythmic noise like banging metal or a whistle blast. Alternate methods every few minutes to create pattern variation, preventing sensory fatigue. Movement, like waving a bright flag or shifting positions, breaks visual monotony, making you stand out. Tests show multi-sensory signals are spotted 40% faster than static ones. Don’t rely on one method. A flashlight works at night, but its beam can be missed without motion or sound. Use all three elements together. This approach doesn’t require expensive gear. Simple tools, used strategically, improve detection when seconds count. A highly effective visual tool is an emergency signaling mirror, which can reflect sunlight up to 10 miles and is visible to aircraft even in moderate haze.
Use Universal Symbols Pilots Can Identify
A pilot scanning from above relies on recognizable shapes and patterns to spot someone on the ground, so you’ll need to use symbols that stand out universally. Form large circle patterns to signal distress-they’re easily distinguishable from natural formations and widely recognized in aviation. If you can’t make a circle, use three evenly spaced items in a straight line, another internationally accepted signal. Zigzag lines aren’t recommended for distress because they resemble natural terrain and don’t convey urgency. Stick to simple, geometric shapes at least 6 feet wide and built with high-contrast materials like fabric, logs, or rocks. Position signals in open areas, avoiding shadows or clutter. These symbols work best in daylight and when aligned perpendicular to the sun for maximum visibility. Test visibility from 100 feet up using a drone or elevated viewpoint. You’re not creating art-you’re sending a message pilots are trained to see.
On a final note
You need signals rescuers can spot fast, so stick to what works. Large shapes, bright colors, and elevated placement boost visibility. Mirrors and metal give reliable flash over miles, no batteries required. Natural materials get the job done when gear fails. Universal symbols like X or SOS are recognized from the air. Combine light, sound, and motion only if it increases detection without wasting energy. Simplicity saves lives-keep it visible, obvious, and consistent.